
Ultimate Soft & Chewy Chocolate Chip Cookies
A bakery-style cookie with crisp edges, a soft center, and rich chocolate in every bite
Chocolate chip cookies are one of the most beloved baked goods in the world, and for good reason. They’re comforting, familiar, and endlessly customizable, yet deceptively simple. At first glance, a chocolate chip cookie looks like an easy recipe—mix, bake, eat—but achieving the perfect balance of texture and flavor takes intention. This recipe is designed to deliver cookies that are soft and chewy in the center, lightly crisp around the edges, deeply flavorful, and loaded with chocolate.
This is not a thin, crunchy cookie, nor a cakey one. Instead, it sits confidently in the middle: rich from butter, complex from brown sugar, tender thanks to an extra egg yolk, and perfectly structured with a careful balance of flour and leavening. Whether you’re baking for a website audience, a bakery-style presentation, or simply your own kitchen, this recipe offers both reliability and room for creativity.
Why This Recipe Works
Before diving into the method, it’s worth understanding what makes this cookie special. Every ingredient here serves a clear purpose, and together they create a dough that bakes up consistently and beautifully.
- Brown sugar and white sugar are used together to balance moisture, sweetness, and structure. Brown sugar brings chewiness and caramel notes, while white sugar contributes crisp edges.
- Butter, used soft but not melted, allows proper creaming. This traps air, giving the cookies lift without making them cakey.
- One whole egg plus one egg yolk increases richness and tenderness. The extra yolk adds fat and emulsifiers without extra water, keeping the cookies soft.
- A mix of baking soda and baking powder gives controlled spread and lift. Baking soda reacts with the acidity of brown sugar, while baking powder provides gentle rise.
- All-purpose flour gives structure without toughness when measured correctly.
- Chocolate in generous quantity ensures every bite is studded with melted pockets of flavor.
This recipe is designed to be dependable, forgiving, and adaptable, making it ideal for home bakers and professional kitchens alike.
Ingredients
- 170 g unsalted butter, softened (soft to the touch but not melted)
- 120 g brown sugar
- 60 g white sugar
- 1 large egg, at room temperature
- 1 egg yolk, at room temperature
- 1 teaspoon vanilla extract
- 260 g all-purpose flour
- ½ teaspoon baking soda
- ½ teaspoon baking powder
- ½ teaspoon salt
- 200–250 g chocolate chips or chunks (a mix of dark and milk chocolate is recommended)
Optional additions:
- 50 g white chocolate chips or chopped nuts (walnuts, pecans, or hazelnuts)
Equipment You’ll Need
- Large mixing bowl
- Electric mixer or sturdy whisk
- Rubber spatula
- Measuring cups or kitchen scale
- Baking sheets
- Parchment paper or silicone baking mats
- Cooling rack
Step-by-Step Instructions
1. Prepare Your Oven and Baking Sheets
Preheat your oven to 175°C (350°F). Line two baking sheets with parchment paper or silicone baking mats. This prevents sticking and encourages even browning.
Make sure your oven is fully preheated before baking. Cookies are sensitive to temperature, and starting in a properly heated oven ensures the right spread and texture.
2. Cream the Butter and Sugars
In a large mixing bowl, add the softened unsalted butter, brown sugar, and white sugar. Using an electric mixer on medium speed (or a whisk with some effort), cream the mixture for 2–3 minutes until it becomes lighter in color and slightly fluffy.
This step is crucial. Creaming incorporates air into the dough, which helps the cookies rise gently and prevents them from becoming dense. Scrape down the sides of the bowl as needed to ensure everything is evenly mixed.
3. Add the Eggs and Vanilla
Add the whole egg and egg yolk to the butter-sugar mixture. Mix until fully incorporated and smooth. Then add the vanilla extract and mix again briefly.
The dough should look glossy and cohesive at this stage. Make sure the eggs are at room temperature; cold eggs can cause the butter to seize, resulting in uneven texture.
4. Combine the Dry Ingredients Separately
In a separate bowl, whisk together the all-purpose flour, baking soda, baking powder, and salt. Whisking ensures the leavening agents and salt are evenly distributed, preventing uneven rise or salty pockets.
5. Incorporate the Dry Ingredients
Gradually add the dry ingredients to the wet mixture. Mix on low speed or fold gently with a spatula until just combined. Do not overmix.
Overworking the dough develops gluten, which can lead to tough cookies. Stop mixing as soon as no dry flour remains visible.
6. Fold in the Chocolate
Add the chocolate chips or chunks and any optional additions such as white chocolate or nuts. Fold gently until evenly distributed throughout the dough.
Using a mix of chocolate types creates depth of flavor. Dark chocolate balances sweetness, while milk chocolate adds creaminess.
7. Optional Dough Resting
For best flavor and texture, cover the dough and refrigerate for 30 minutes to 24 hours. While not mandatory, resting allows the flour to hydrate and the flavors to deepen, resulting in thicker cookies with a more complex taste.
If chilling longer than an hour, let the dough sit at room temperature for 10–15 minutes before scooping.
8. Scoop and Shape
Scoop portions of dough (about 40–50 g each) and place them on the prepared baking sheets, leaving at least 5 cm (2 inches) between each cookie to allow for spreading.
For bakery-style appearance, press a few extra chocolate pieces onto the tops of the dough balls before baking.
9. Bake
Bake in the preheated oven for 10–13 minutes, or until the edges are set and lightly golden while the centers still look slightly soft.
Do not overbake. The cookies will continue to firm up as they cool, and pulling them out at the right moment ensures a soft, chewy center.
10. Cool
Allow the cookies to cool on the baking sheet for 5 minutes before transferring them to a wire rack to cool completely.
This resting time helps them set without breaking and enhances their final texture.
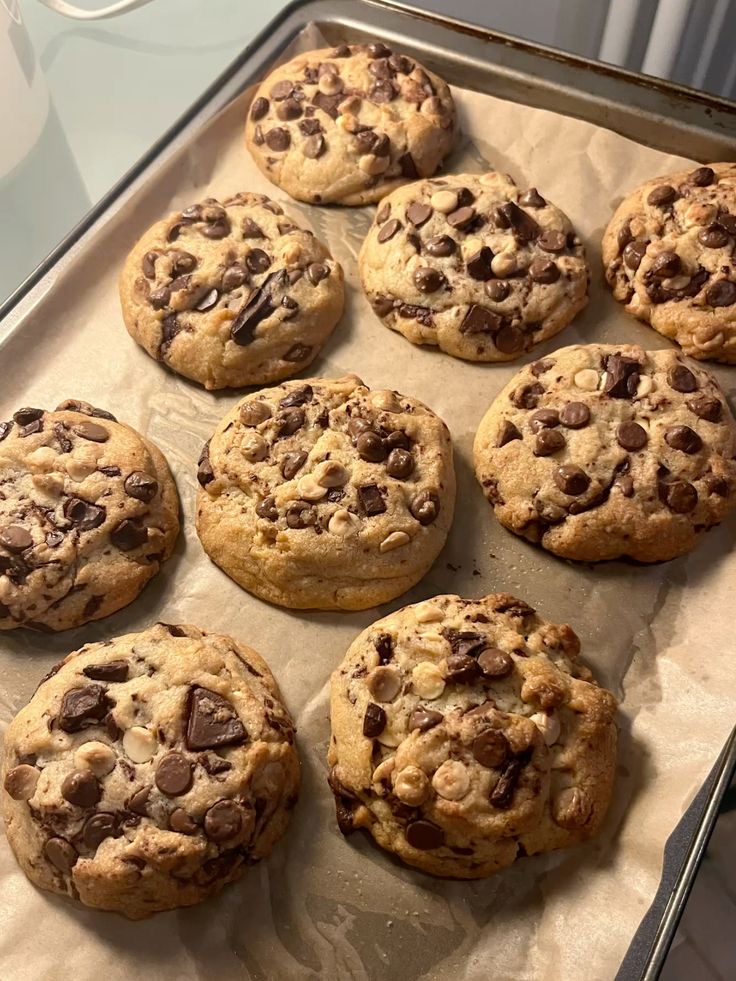
Texture and Flavor Notes
When baked correctly, these cookies should have:
- Lightly crisp, golden edges
- Thick, soft centers
- A rich, buttery aroma
- Balanced sweetness with deep caramel notes
- Generous melted chocolate throughout
They are sturdy enough to hold their shape yet tender enough to feel indulgent.
Variations and Customizations
This dough is an excellent base for customization. Here are several ways to adapt it while maintaining structure:
Chocolate Variations
- Use all dark chocolate for a more intense, less sweet cookie
- Use chopped chocolate bars for irregular pools of melted chocolate
- Add cocoa nibs for bitterness and crunch
Nut Additions
- Walnuts add slight bitterness and softness
- Pecans bring sweetness and buttery richness
- Hazelnuts pair exceptionally well with chocolate
Flavor Enhancements
- Add ½ teaspoon cinnamon for warmth
- Brown the butter for a deeper, nutty flavor (cool completely before using)
- Sprinkle flaky sea salt on top before baking for contrast
Storage and Shelf Life
- Room temperature: Store baked cookies in an airtight container for up to 4 days.
- Refrigerator: Dough can be refrigerated for up to 3 days before baking.
- Freezer: Dough balls freeze well for up to 3 months. Bake directly from frozen, adding 1–2 minutes to the baking time.
To refresh cookies, warm them in a low oven for a few minutes before serving.
Common Questions
Why use both baking soda and baking powder?
Using both gives controlled spread and lift. Baking soda encourages browning and spread, while baking powder provides gentle rise.
Can I reduce the sugar?
Reducing sugar will affect texture and spread. For best results, stick to the given amounts.
Why are my cookies flat?
Possible reasons include butter that was too warm, skipping the chilling step, or inaccurate flour measurement.
Can I make smaller cookies?
Yes. Reduce baking time by 2–3 minutes and watch closely.
Final Thoughts
This chocolate chip cookie recipe is designed to be dependable, flavorful, and adaptable. It respects the classic while improving on it through careful ratios and technique. Whether you’re publishing it on a food blog, baking for others, or refining your own signature cookie, this recipe delivers consistent, bakery-quality results.