
Red Velvet Cheesecake Bites
Red Velvet Cheesecake Bites are the perfect marriage of two beloved desserts: classic red velvet cake and rich, creamy cheesecake. These bite-sized treats deliver an indulgent contrast of textures and flavors in every mouthful. Soft, cocoa-kissed red velvet cake surrounds a smooth cheesecake center, creating a dessert that feels luxurious yet playful.
These bites are ideal for holidays, parties, dessert tables, or anytime you want something that looks impressive but is surprisingly manageable to make. They require no fancy equipment, and the process is broken into simple, approachable steps. Best of all, they can be prepared ahead of time, making them perfect for entertaining.
Whether you are a seasoned baker or just starting out, Red Velvet Cheesecake Bites are a rewarding project that delivers bakery-quality results at home.
Why Red Velvet and Cheesecake Work So Well Together
Red velvet cake has a subtle cocoa flavor, mild sweetness, and soft crumb that pairs beautifully with creamy fillings. Cheesecake, on the other hand, is rich, tangy, and smooth. When combined, the two create balance. The cake keeps the dessert from feeling too heavy, while the cheesecake adds depth and indulgence.
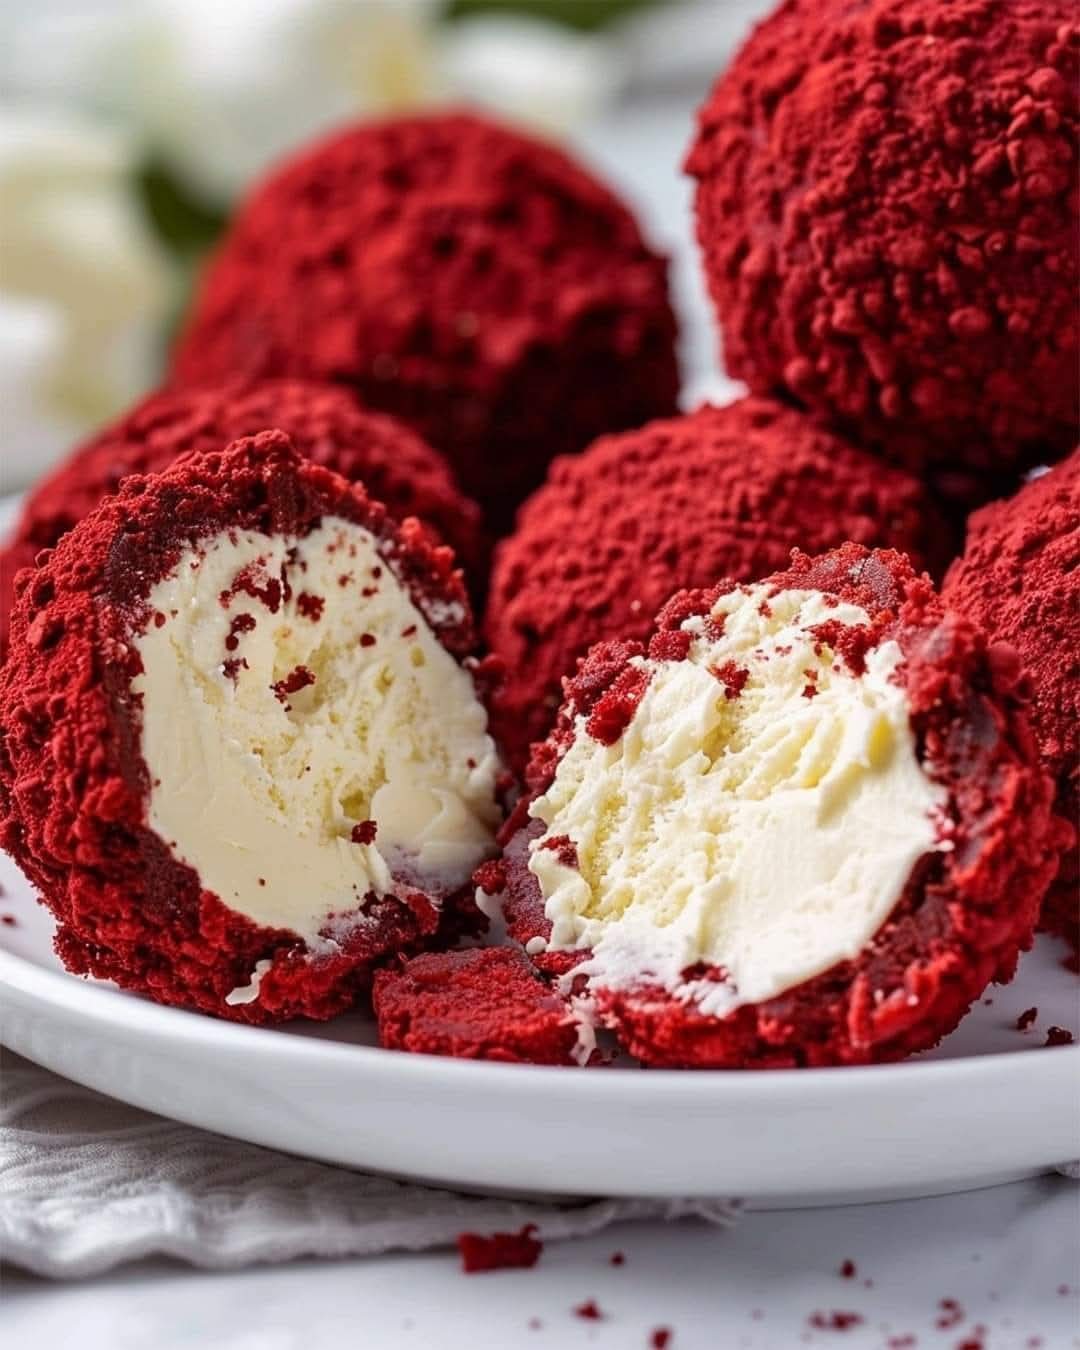
The contrast is not just in flavor, but in texture as well. The outer cake layer is tender and slightly crumbly, while the center remains silky and dense. When chilled, these bites hold their shape beautifully while still melting in your mouth.
Another reason this pairing works so well is visual appeal. The deep red exterior instantly draws attention, making these bites perfect for celebrations such as Valentine’s Day, Christmas, birthdays, and weddings.
Texture, Flavor, and Appearance
Red Velvet Cheesecake Bites are rich without being overwhelming. The cocoa flavor is gentle and balanced, allowing the vanilla-scented cheesecake to shine. The sweetness is controlled, making them enjoyable even for those who prefer desserts that are not overly sugary.
Visually, they are striking. The red velvet crumbs give them a bold, velvety appearance, while optional white chocolate coating adds elegance and contrast. When sliced or bitten into, the creamy center creates a beautiful surprise.
Ingredient Breakdown and Purpose
Understanding the role of each ingredient helps ensure consistent results and allows for confident adjustments if needed.
All-Purpose Flour
Provides structure to the cake while keeping it soft and tender.
Cocoa Powder
Adds the signature hint of chocolate flavor without overpowering the cake.
Baking Soda
Helps the cake rise and remain light.
Butter
Adds richness and moisture to the red velvet cake.
Sugar
Sweetens the cake and contributes to a soft crumb.
Egg
Binds ingredients together and provides structure.
Buttermilk
Adds tang, moisture, and tenderness. It is essential for classic red velvet flavor.
Red Food Coloring
Gives red velvet its iconic color. Gel or liquid food coloring may be used.
Cream Cheese
Forms the base of the cheesecake filling, providing richness and tang.
Powdered Sugar
Sweetens the cheesecake filling while keeping it smooth.
Vanilla Extract
Enhances both the cake and cheesecake flavors.
White Chocolate (Optional)
Adds sweetness, texture, and a professional finish.
Ingredients List
For the Red Velvet Cake
1 1/4 cups all-purpose flour
1/4 cup unsweetened cocoa powder
1/2 teaspoon baking soda
1/4 teaspoon salt
1/2 cup unsalted butter, softened
3/4 cup granulated sugar
1 large egg
1 teaspoon vanilla extract
1/2 cup buttermilk
1 teaspoon red food coloring
For the Cheesecake Filling
8 ounces (225 g) cream cheese, softened
1/4 cup powdered sugar
1/2 teaspoon vanilla extract
For Assembly
1 cup white chocolate or candy melts (optional)
Reserved red velvet cake crumbs
Equipment Needed
- Mixing bowls
- Hand mixer or stand mixer
- Whisk
- Rubber spatula
- Baking pan
- Parchment paper
- Spoon or cookie scoop
- Baking sheet
- Refrigerator
Step-by-Step Instructions
Step 1: Prepare the Red Velvet Cake
Preheat your oven to 350°F (175°C). Grease and line a square or round baking pan with parchment paper, allowing overhang for easy removal.
In a medium bowl, whisk together the flour, cocoa powder, baking soda, and salt. Set aside.
In a separate large bowl, cream the softened butter and granulated sugar until light and fluffy. This step is important for creating a soft cake texture.
Add the egg and vanilla extract, mixing until fully incorporated.
Stir in the red food coloring, adjusting the amount if necessary to achieve the desired color.
Add the dry ingredients and buttermilk alternately, beginning and ending with the dry ingredients. Mix gently until just combined, being careful not to overmix.
Pour the batter into the prepared pan and spread evenly.
Bake for 20 to 25 minutes, or until a toothpick inserted into the center comes out clean. Remove from the oven and allow the cake to cool completely.
Step 2: Prepare the Cheesecake Filling
In a bowl, beat the softened cream cheese until smooth and creamy.
Add the powdered sugar and vanilla extract. Beat until fully combined and smooth.
Transfer the filling to the refrigerator and chill for about 15 minutes. Chilling firms the mixture slightly, making it easier to shape.
Step 3: Crumble the Cake
Once the red velvet cake has cooled completely, crumble it into fine crumbs using your hands or a fork.
Set aside about 1/4 cup of crumbs for rolling the finished bites.
Place the remaining crumbs in a large bowl.
Step 4: Form the Cake Mixture
Add 2 to 3 tablespoons of the cheesecake filling to the cake crumbs. Mix gently until the crumbs hold together when pressed.
Add more filling if needed, but be careful not to add too much. The mixture should be moist enough to shape but not sticky.
Step 5: Assemble the Cheesecake Bites
Scoop about one tablespoon of the cake mixture and flatten it in your palm.
Roll a small amount of the chilled cheesecake filling into a ball and place it in the center.
Gently wrap the cake mixture around the filling, sealing it completely and rolling it into a smooth ball.
Repeat with the remaining mixture.
Step 6: Coat the Bites
Roll each ball in the reserved red velvet crumbs to coat.
For an extra layer of flavor and a professional finish, dip the balls into melted white chocolate, allow excess to drip off, then roll again in crumbs.
Place the finished bites on a parchment-lined baking sheet.
Step 7: Chill and Set
Refrigerate the bites for at least 30 minutes before serving. This allows them to firm up and enhances flavor and texture.
Tips for Perfect Red Velvet Cheesecake Bites
- Use room-temperature cream cheese for the smoothest filling
- Let the cake cool completely before crumbling
- Chill the filling before assembling
- Work gently to maintain a smooth exterior
- Chill thoroughly before serving
Variations and Customizations
These bites are easy to adapt:
- Add chocolate chips to the cheesecake filling
- Use dark or milk chocolate instead of white
- Flavor the cheesecake with lemon or almond extract
- Coat with powdered sugar for a truffle-style finish
- Make them smaller for party platters
Storage and Make-Ahead Instructions
Store Red Velvet Cheesecake Bites in an airtight container in the refrigerator for up to five days.
They can also be frozen for up to one month. Freeze in a single layer, then transfer to a container. Thaw in the refrigerator before serving.
Serving Suggestions
Serve these bites chilled on a dessert platter or cupcake stand. They pair beautifully with coffee, tea, or milk.
They are excellent for parties, gift boxes, and holiday trays due to their size and visual appeal.
Why This Recipe Is Always a Crowd Favorite
Red Velvet Cheesecake Bites consistently impress because they combine familiar flavors with an elegant presentation. They feel indulgent, special, and celebratory, yet they are easy to eat and share.
Their make-ahead convenience and versatility make them a go-to dessert for both casual and formal occasions.
Final Thoughts
Red Velvet Cheesecake Bites are a perfect example of how simple techniques and classic flavors can create something truly special. With their soft cake exterior, creamy center, and striking appearance, they deliver satisfaction in every bite.
Whether you are making them for a holiday, a party, or simply because you love red velvet, this recipe offers reliable results and unforgettable flavor.