
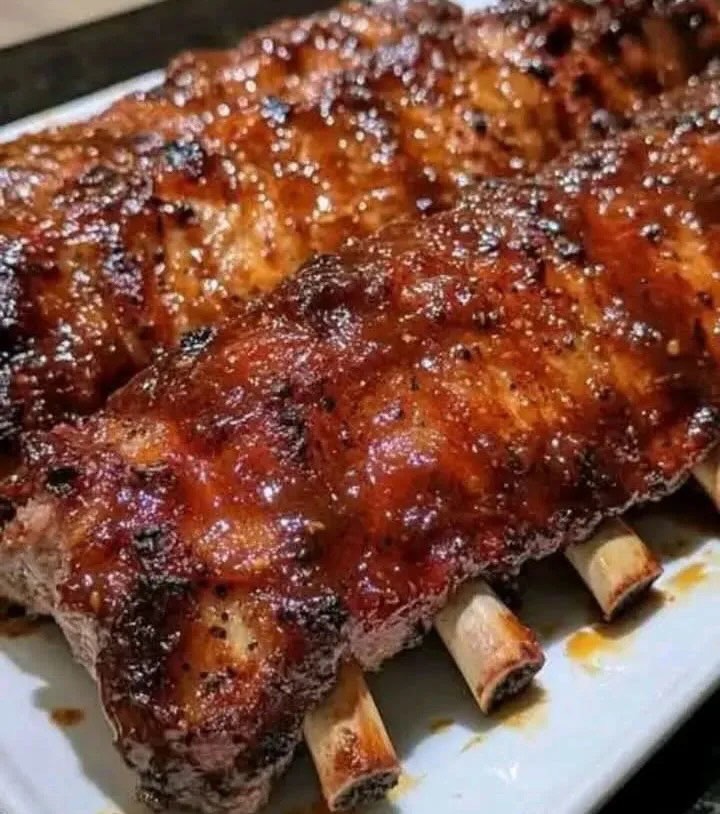
Oven-Baked BBQ Ribs (Fall-Off-the-Bone Tender)
There are few comfort foods as universally loved as a rack of tender, smoky, fall-off-the-bone BBQ ribs. While ribs are often associated with outdoor grilling and long smoking sessions, you do not need a smoker, grill, or special equipment to achieve restaurant-quality ribs at home. With the right technique, low oven temperature, and a well-balanced spice rub, oven-baked ribs can be just as flavorful, juicy, and satisfying as their smoked counterparts.
This oven-baked BBQ ribs recipe is designed for home cooks of all skill levels. It relies on slow cooking, simple pantry spices, and a foolproof foil-wrapped method that locks in moisture and tenderness. The result is ribs so soft they practically melt when you touch them with a fork, finished with a sticky layer of barbecue sauce that caramelizes beautifully in the oven.
Whether you are cooking for a family dinner, a weekend gathering, or simply craving hearty comfort food, these ribs are guaranteed to impress. This guide walks you through every step in detail, from choosing the right ribs to seasoning, baking, saucing, and serving, along with expert tips to help you get perfect results every time.
Why Oven-Baked Ribs Work
Many people assume ribs must be smoked for hours to achieve tenderness and flavor. While smoking adds a distinct aroma, the key to tender ribs is actually low and slow cooking combined with proper seasoning and moisture retention. The oven provides a controlled environment where temperature remains consistent, making it easier to avoid overcooking or drying out the meat.
Wrapping the ribs tightly in aluminum foil creates a sealed environment that allows the ribs to gently steam in their own juices. This process breaks down connective tissue and collagen, which is what makes the ribs tender enough to pull cleanly from the bone. Finishing the ribs uncovered with barbecue sauce adds texture, caramelization, and that signature sticky glaze everyone loves.
Ingredients
This recipe keeps things simple while delivering bold flavor.
For the Ribs
- 2 racks of pork ribs (baby back ribs or spare ribs)
- Aluminum foil
Dry Rub
- 1/4 cup brown sugar
- 1 tablespoon paprika
- 1 tablespoon garlic powder
- 1 tablespoon onion powder
- 1 teaspoon salt
- 1 teaspoon black pepper
For Finishing
- BBQ sauce, your favorite variety
Choosing the Right Ribs
Before you begin, it’s important to understand the difference between common types of pork ribs.
Baby Back Ribs
Baby back ribs come from the upper part of the rib cage near the spine. They are shorter, leaner, and more tender than spare ribs. They cook slightly faster and are ideal if you prefer meat that is soft but not overly fatty.
Spare Ribs
Spare ribs come from the lower belly area of the pig. They are larger, meatier, and contain more fat, which makes them incredibly flavorful when cooked properly. They take a bit longer to cook but reward you with rich, juicy meat.
Either option works beautifully for this recipe. Choose based on personal preference and availability.
Preparing the Ribs
Removing the Membrane
Most racks of ribs have a thin membrane on the bone side. Removing it is an important step for tenderness and seasoning penetration.
- Place the ribs bone-side up.
- Slide a butter knife under the membrane at one end.
- Grip the loosened membrane with a paper towel.
- Pull firmly until it comes off in one piece.
This step ensures the ribs cook evenly and absorb more flavor from the spice rub.
Making the Dry Rub
The dry rub is the foundation of flavor in this recipe. It balances sweetness, savory notes, and mild heat.
In a medium bowl, combine:
- Brown sugar for sweetness and caramelization
- Paprika for color and mild smokiness
- Garlic powder and onion powder for savory depth
- Salt to enhance all flavors
- Black pepper for subtle heat
Mix thoroughly until evenly combined.
Seasoning the Ribs
Place the ribs on a clean surface or large baking sheet. Pat them dry with paper towels to remove excess moisture. This helps the rub adhere better.
Generously rub the spice mixture onto both sides of each rack. Massage it into the meat, ensuring even coverage along the edges and between the bones. Use all of the rub for maximum flavor.
Once seasoned, let the ribs rest for 15–30 minutes at room temperature. This allows the spices to begin penetrating the meat. If you have extra time, you can refrigerate the ribs for up to 12 hours for deeper flavor.
Slow Baking for Tenderness
Preheating the Oven
Preheat your oven to 275°F (135°C). This low temperature is essential for breaking down tough connective tissue without drying out the meat.
Wrapping the Ribs
Place each rack of ribs on a large sheet of aluminum foil. Wrap them tightly, sealing the edges well to trap steam. Place the wrapped ribs seam-side up on a baking sheet to catch any juices that may escape.
Baking Time
Bake the ribs for 2 1/2 to 3 hours, depending on thickness and rib type.
- Baby back ribs: 2 1/2 hours
- Spare ribs: up to 3 hours
You’ll know the ribs are ready when the meat has shrunk back from the bones and a fork slides in easily.
Saucing and Caramelizing
Once the ribs are tender, remove them from the oven and carefully unwrap the foil. Be cautious, as hot juices will have accumulated inside.
Increase the oven temperature to 400°F (205°C).
Brush a generous layer of BBQ sauce over both sides of the ribs. Place them back on the baking sheet, uncovered.
Return the ribs to the oven for 15–20 minutes, brushing with additional sauce halfway through. This step allows the sauce to thicken, caramelize, and cling to the ribs.
For a deeper caramelized finish, you can switch the oven to broil for the final 3–5 minutes. Watch closely to prevent burning.
Resting and Serving
Remove the ribs from the oven and let them rest for 10 minutes before cutting. Resting allows juices to redistribute, ensuring moist and flavorful meat.
Slice between the bones and serve warm with extra BBQ sauce on the side.
Tips for Perfect Oven-Baked Ribs
- Low and slow is essential. High heat will dry out the ribs before they become tender.
- Seal the foil tightly. Steam is key to fall-off-the-bone texture.
- Use a wire rack for saucing. This allows excess sauce to drip away and promotes even caramelization.
- Do not skip resting. Cutting too soon causes juices to escape.
Flavor Variations
This base recipe is incredibly versatile.
Spicy Ribs
Add cayenne pepper or chili powder to the dry rub.
Smoky Ribs
Use smoked paprika or add a drop of liquid smoke to the BBQ sauce.
Honey BBQ Ribs
Mix honey into the BBQ sauce for extra sweetness and shine.
Dry-Style Ribs
Skip the sauce and finish the ribs with an additional sprinkle of dry rub.
Side Dishes That Pair Well
- Creamy coleslaw
- Baked beans
- Cornbread
- Roasted potatoes
- Mac and cheese
- Grilled vegetables
- Pickles or pickled onions
Storage and Reheating
Storing Leftovers
Store cooked ribs in an airtight container in the refrigerator for up to 4 days.
Freezing
Wrap ribs tightly in foil and place in freezer-safe bags. Freeze for up to 3 months.
Reheating
Reheat in a 300°F oven, covered with foil, until warmed through. Add extra sauce if needed.
Frequently Asked Questions
Can I make these ribs ahead of time?
Yes. Bake the ribs fully, then refrigerate. Reheat and sauce just before serving.
Do I need to add liquid to the foil?
No. The ribs release enough natural juices during cooking.
Can I use beef ribs?
Yes, but increase cooking time and ensure they are well wrapped.
Final Thoughts
These oven-baked BBQ ribs prove that you don’t need a grill or smoker to achieve deeply flavorful, fall-off-the-bone ribs at home. With a simple spice rub, careful foil wrapping, and slow oven baking, you can create ribs that rival any barbecue restaurant.
This recipe is reliable, approachable, and endlessly customizable, making it perfect for weeknight dinners, special occasions, or anytime comfort food cravings strike. Once you try this method, it’s likely to become your go-to way of making ribs year-round.