
Classic Marble Cake Recipe
A timeless vanilla and chocolate swirl cake with a soft, tender crumb
Introduction
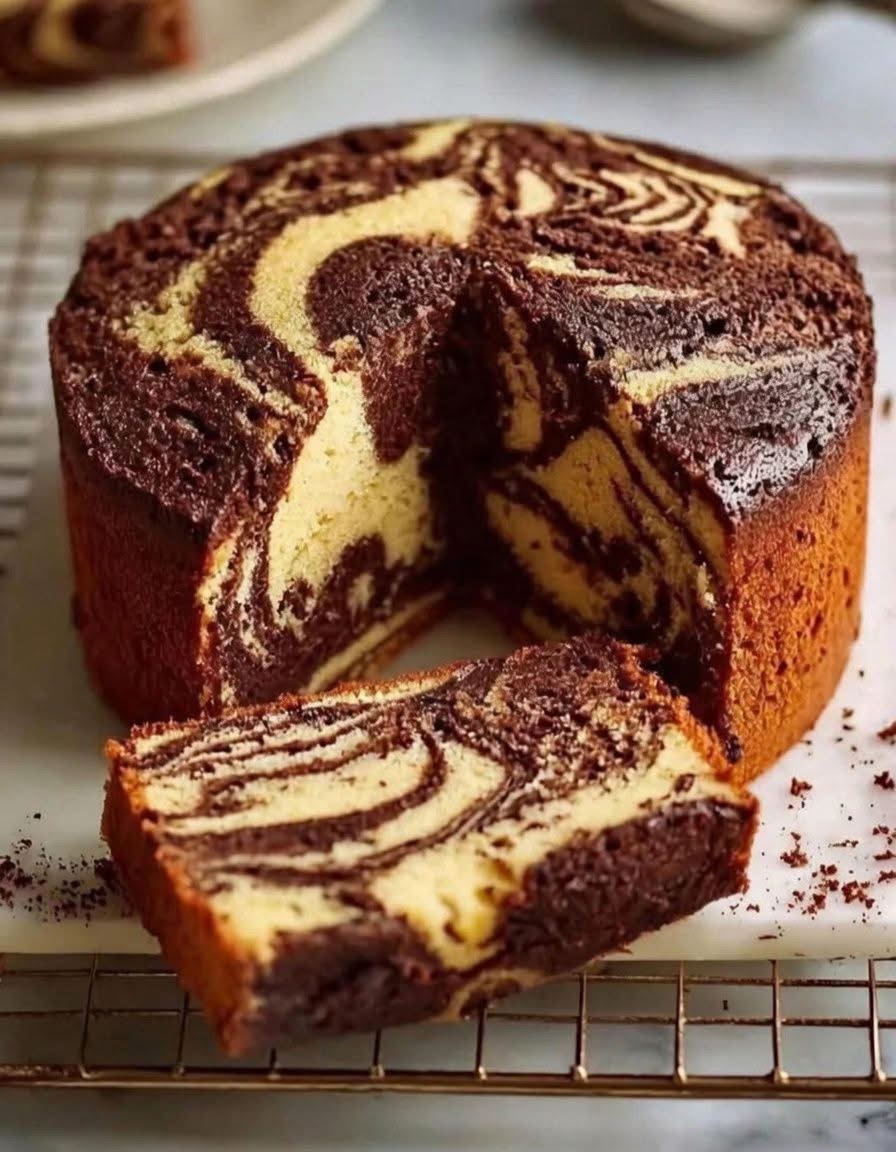
Few cakes are as universally loved and instantly recognizable as the classic marble cake. With its beautiful swirls of vanilla and chocolate batter woven together in a single loaf or pan, marble cake is a perfect balance of flavor, texture, and visual appeal. It offers the best of both worlds: the light, fragrant sweetness of vanilla cake combined with the deep, comforting richness of chocolate. This combination makes marble cake a favorite for family gatherings, celebrations, afternoon tea, and everyday desserts.
What sets marble cake apart is not just its flavor but its versatility. It can be baked as a loaf, a round layer cake, a bundt cake, or even cupcakes. It can be served plain, dusted with powdered sugar, glazed with chocolate, or frosted with buttercream. Whether you are an experienced baker or someone just starting out, marble cake is approachable, forgiving, and endlessly rewarding.
This recipe focuses on a moist, tender crumb achieved through the use of vegetable oil and milk, rather than butter. The result is a cake that stays soft for days, slices cleanly, and tastes just as good on the third day as it does fresh out of the oven. The chocolate swirl is created using cocoa powder rather than melted chocolate, allowing the chocolate flavor to shine without weighing down the batter.
In this guide, you will find not only the recipe itself but also detailed explanations of each step, tips for success, variations, storage advice, and troubleshooting tips. This comprehensive approach ensures consistent results and gives you the confidence to make this cake your own.
Why This Marble Cake Recipe Works
This marble cake recipe is carefully balanced to produce a cake that is moist, tender, and flavorful without being overly sweet or dense. Here are a few reasons why it works so well:
- Oil-Based Batter
Vegetable oil keeps the cake moist for longer than butter-based cakes. Oil coats the flour proteins more evenly, resulting in a softer crumb. - Room Temperature Eggs
Eggs at room temperature blend more smoothly into the batter, creating a more uniform texture and better rise. - Milk for Tenderness
Milk adds moisture, softness, and richness while helping dissolve the sugar properly. - Simple Cocoa Swirl
Using cocoa powder mixed with hot liquid intensifies the chocolate flavor without altering the cake’s structure. - Balanced Leavening
Baking powder provides a steady rise, giving the cake its light, fluffy texture.
Ingredients Overview
For the Vanilla Cake Batter
- 2 cups all-purpose flour
Provides structure to the cake. Spoon and level the flour to avoid adding too much. - 1 cup granulated sugar
Sweetens the cake and helps create a tender crumb. - 2 teaspoons baking powder
The main leavening agent, responsible for the cake’s rise. - ¼ teaspoon salt
Enhances flavor and balances sweetness. - 3 large eggs (room temperature)
Bind the ingredients together and add richness. - ¾ cup vegetable oil
Keeps the cake moist and soft for days. - 1 cup milk
Adds moisture and improves texture. - 2 teaspoons vanilla extract
Provides classic vanilla flavor that complements the chocolate swirl.
For the Chocolate Swirl
- 2 tablespoons cocoa powder
Use unsweetened cocoa powder for a rich chocolate flavor. - 2 tablespoons hot milk or hot water
Blooms the cocoa powder, intensifying the chocolate taste. - 1 tablespoon sugar (optional)
Adds sweetness to the chocolate portion if desired.
Equipment Needed
- Mixing bowls (large and medium)
- Whisk
- Spatula
- Measuring cups and spoons
- Electric hand mixer or stand mixer (optional)
- Loaf pan, round cake pan, or bundt pan
- Parchment paper (optional)
- Toothpick or skewer
- Wire cooling rack
Step-by-Step Instructions
Step 1: Prepare the Pan and Oven
Preheat your oven to 350°F (175°C). Grease your chosen cake pan thoroughly with oil or non-stick spray. If desired, line the bottom with parchment paper to ensure easy removal.
Proper pan preparation is essential. Even a well-made cake can stick if the pan is not greased adequately. Pay special attention to corners and edges.
Step 2: Combine Dry Ingredients
In a large mixing bowl, whisk together the all-purpose flour, sugar, baking powder, and salt. Whisking evenly distributes the leavening agent and salt throughout the flour, preventing uneven rise or flavor.
This step also aerates the flour slightly, contributing to a lighter texture.
Step 3: Add Wet Ingredients
Add the eggs to the dry mixture, followed by the vegetable oil, milk, and vanilla extract. Using a whisk or electric mixer on low speed, mix until the batter is smooth and lump-free.
Avoid overmixing. Once the ingredients are fully combined and the batter looks smooth, stop mixing. Overmixing can develop gluten, leading to a dense or tough cake.
Step 4: Prepare the Chocolate Batter
In a small bowl, combine the cocoa powder with the hot milk or hot water. Stir until smooth and fully dissolved. The heat helps bloom the cocoa, enhancing its flavor.
If you prefer a slightly sweeter chocolate swirl, add one tablespoon of sugar and mix well.
Step 5: Divide the Batter
Pour about one-third of the vanilla batter into the bowl with the chocolate mixture. Stir gently until fully combined. This creates the chocolate batter while maintaining a similar consistency to the vanilla batter.
Step 6: Create the Marble Effect
Pour half of the vanilla batter into the prepared pan. Spoon dollops of the chocolate batter over the vanilla layer. Add the remaining vanilla batter on top, followed by more dollops of chocolate batter.
Using a knife or skewer, gently swirl the batters together. Use slow, deliberate motions and avoid over-swirling. The goal is a marbled pattern, not a fully blended batter.
Step 7: Bake the Cake
Place the pan in the preheated oven and bake for 45–55 minutes, depending on the size and type of pan used. Begin checking for doneness at the 45-minute mark.
Insert a toothpick into the center of the cake. If it comes out clean or with a few moist crumbs, the cake is done.
Step 8: Cool the Cake
Remove the cake from the oven and allow it to cool in the pan for 10–15 minutes. Then carefully turn it out onto a wire rack to cool completely.
Cooling is important for proper texture and slicing. Cutting the cake while it is still warm may cause it to crumble.
Tips for Perfect Marble Cake
- Always use room temperature eggs for better mixing and rise.
- Measure flour accurately to avoid a dry cake.
- Do not overmix the batter after adding wet ingredients.
- Swirl gently for a defined marble pattern.
- Rotate the pan halfway through baking if your oven heats unevenly.
Variations and Add-Ins
Butter-Based Version
Replace vegetable oil with ¾ cup melted unsalted butter for a richer flavor.
Chocolate Chip Marble Cake
Fold ½ cup chocolate chips into the chocolate batter for extra texture.
Citrus Marble Cake
Add orange or lemon zest to the vanilla batter for a fresh, aromatic twist.
Marble Bundt Cake
Bake in a greased bundt pan for 50–60 minutes and drizzle with glaze.
Serving Suggestions
- Serve plain with tea or coffee
- Dust with powdered sugar
- Drizzle with chocolate or vanilla glaze
- Frost with whipped cream or buttercream
- Serve with fresh berries or ice cream
Storage and Shelf Life
- Room Temperature: Store in an airtight container for up to 3 days.
- Refrigerator: Keeps for up to 5 days; bring to room temperature before serving.
- Freezer: Wrap tightly and freeze for up to 3 months. Thaw overnight in the refrigerator.
Troubleshooting Common Issues
Cake Is Dry
Possible causes include overbaking or too much flour. Check oven temperature and measure ingredients carefully.
Cake Sank in the Middle
This can happen if the cake is underbaked or if the oven door was opened too early.
Dense Texture
Often caused by overmixing or expired baking powder.
Swirl Disappeared
Over-swirling can blend the batters too much. Use fewer, gentler strokes.
Frequently Asked Questions
Can I use butter instead of oil?
Yes, but the texture will be slightly firmer and less moist.
Can I make this cake dairy-free?
Use plant-based milk such as almond or soy milk.
Can I reduce the sugar?
You can reduce the sugar slightly, but it may affect texture and moisture.
Final Thoughts
Classic marble cake is a timeless recipe that never goes out of style. Its simple ingredients, stunning appearance, and balanced flavors make it a staple in home baking. Whether served plain or dressed up for a special occasion, this cake delivers comfort, nostalgia, and satisfaction in every slice.
With this detailed guide, you now have everything you need to bake a flawless marble cake with confidence. Take your time, enjoy the process, and make it your own. Happy baking.