
The Softest No-Knead Sandwich Bread (No Eggs, No Butter)
There is something deeply satisfying about baking your own sandwich bread. The gentle rise, the quiet magic of yeast, the smell that fills the kitchen as the loaf bakes — it’s comfort, tradition, and practicality all wrapped into one. This recipe is for anyone who loves homemade bread but doesn’t love complicated techniques, heavy kneading, or enriched doughs loaded with eggs and butter.
This no-knead sandwich bread is unbelievably soft, tender, and versatile, made with simple pantry ingredients and minimal hands-on time. It’s the kind of bread that coworkers ask about, family members request again and again, and you find yourself baking weekly without even planning to.
If you’ve ever thought homemade bread had to be dense, dry, or overly chewy without butter or eggs, this loaf will change your mind completely.
Why This Bread Works
This recipe relies on hydration, time, and gentle handling rather than kneading or enrichment. The result is a loaf with:
- A soft, fluffy crumb
- A thin, tender crust perfect for sandwiches
- Excellent structure for slicing
- Neutral flavor that works for sweet or savory uses
Instead of kneading to develop gluten, this dough uses a high hydration ratio and a longer rest, allowing the gluten to form naturally. This method creates elasticity and strength while keeping the crumb light and airy.
No butter means the bread stays soft without becoming greasy. No eggs mean the texture is clean and balanced, not cakey. It’s simple, honest bread — and that’s exactly why it’s so good.
Ingredients
This recipe uses everyday pantry staples. If you bake even occasionally, you likely already have everything you need.
Basic Ingredients
- 3 ½ cups (440g) all-purpose flour
- 1 ½ cups (360ml) warm water (about 100–110°F / 38–43°C)
- 2 teaspoons sugar
- 2 teaspoons instant yeast (or active dry yeast)
- 1 ½ teaspoons salt
- 2 tablespoons neutral oil (vegetable, canola, or olive oil)
Optional (But Helpful)
- Extra oil for greasing the pan
- Flour for dusting
- Milk or water for brushing the top (optional)
Equipment Needed
- Large mixing bowl
- Wooden spoon or silicone spatula
- Measuring cups and spoons
- Standard 9×5-inch loaf pan
- Clean kitchen towel or plastic wrap
- Oven
No stand mixer. No dough hook. No bench scraper. This recipe is intentionally low-effort.
Step-by-Step Instructions
Step 1: Activate the Yeast
In a large mixing bowl, combine the warm water and sugar. Sprinkle the yeast over the surface and stir gently. Let the mixture sit for 5–10 minutes until it becomes foamy.
If using instant yeast, this step is still recommended. It ensures the yeast is alive and gives the dough a better start.
Step 2: Mix the Dough
Add the flour and salt to the bowl. Pour in the oil. Using a spoon or spatula, mix until all the flour is fully hydrated and no dry patches remain.
The dough will be sticky, loose, and shaggy — this is exactly what you want. Do not add extra flour.
Once mixed, scrape down the sides of the bowl and shape the dough roughly into a ball using the spoon.
Step 3: First Rise
Cover the bowl with a clean towel or plastic wrap. Place it in a warm, draft-free spot and let it rise until doubled in size, about 1 to 1½ hours.
The dough should look bubbly and airy, with a slightly domed surface.
Step 4: Shape the Dough (No Kneading)
Lightly flour your work surface and hands. Gently turn the dough out onto the surface. Do not punch it down aggressively — handle it with care.
Flatten it slightly into a rectangle, then fold it like a letter: fold the top third down, the bottom third up, then roll gently into a log shape.
Pinch the seam closed and tuck the ends under.
Step 5: Second Rise
Grease your loaf pan lightly. Place the shaped dough seam-side down into the pan.
Cover loosely and let rise again for 30–45 minutes, or until the dough rises just above the rim of the pan.
Step 6: Bake
Preheat the oven to 375°F (190°C).
Bake the bread for 30–35 minutes, until golden brown and hollow-sounding when tapped on top. The internal temperature should reach about 190–195°F (88–90°C).
If the top browns too quickly, tent loosely with foil during the last 10 minutes.
Step 7: Cool Completely
Remove the loaf from the pan and let it cool on a wire rack for at least 1 hour before slicing.
This step is essential. Cutting too early will compress the crumb and make the bread gummy.
Texture and Flavor
This bread has a pillowy interior with a fine, even crumb. It’s soft enough for classic sandwiches but sturdy enough to toast beautifully. The flavor is mild and slightly sweet, making it ideal for:
- Peanut butter and jelly
- Turkey and cheese
- Grilled sandwiches
- French toast
- Morning toast with jam or honey
Why No Kneading Works Here
Traditional bread recipes rely on kneading to align gluten strands. In this recipe, gluten develops through:
- High hydration
- Time
- Gentle folding during shaping
The long rise allows enzymes in the flour to do much of the work naturally. This creates strength without toughness and softness without richness.
Common Mistakes and How to Avoid Them
Adding Too Much Flour
Sticky dough is normal. Adding extra flour will make the loaf dense and dry.
Under-Proofing
If the bread doesn’t rise enough, it will be tight and heavy. Be patient and watch the dough, not the clock.
Over-Baking
Too long in the oven dries the bread. Check early if your oven runs hot.
Cutting Too Soon
Cooling is part of the baking process. Let the crumb set fully.
Storage and Shelf Life
- Room temperature: Store in a bread bag or wrapped in a towel for up to 3 days.
- Refrigerator: Not recommended; it dries out the bread.
- Freezer: Slice, wrap well, and freeze for up to 3 months.
To refresh, toast or warm briefly in the oven.
Variations
Whole Wheat Version
Replace up to 50% of the flour with whole wheat flour. Increase water by 2–3 tablespoons.
Honey Bread
Replace sugar with honey for a deeper flavor.
Seeded Sandwich Bread
Add 2–3 tablespoons of seeds (sunflower, sesame, flax) to the dough.
Dairy-Free Milk Bread
Replace water with warm plant-based milk for extra softness.
Scaling the Recipe
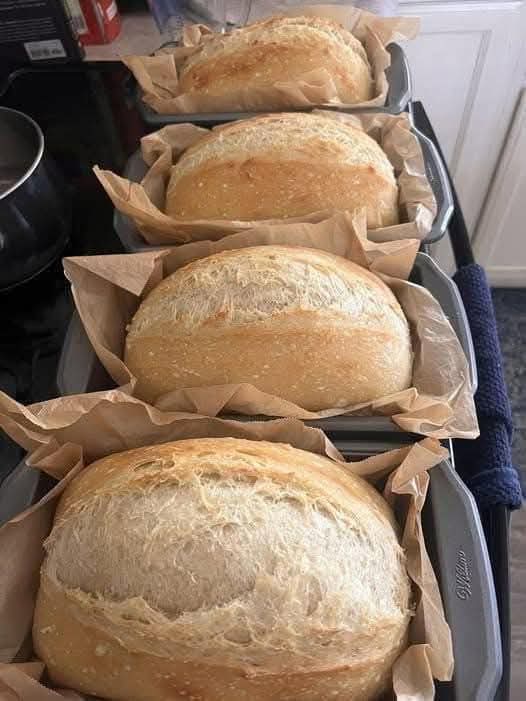
This dough doubles beautifully. For two loaves, simply double all ingredients and divide after the first rise.
Why People Keep Asking for This Bread
This is the kind of recipe that spreads quietly — shared at work, scribbled on scraps of paper, passed between neighbors. It’s reliable, forgiving, and deeply comforting.
You don’t need special tools. You don’t need advanced skills. You just need a bowl, a spoon, and a little patience.
And once you bake it, you’ll understand why it becomes a habit.
Final Thoughts
Homemade bread doesn’t have to be complicated or intimidating. This no-knead sandwich bread proves that simplicity often produces the best results.
Soft, fluffy, dependable, and endlessly versatile — this is the kind of loaf that earns a permanent place in your kitchen.
Bake it once, and it won’t be the last time.