
A No-Bake, Elegant Chocolate Dessert with Creamy Layers and a Crisp Chocolate Shell
Introduction
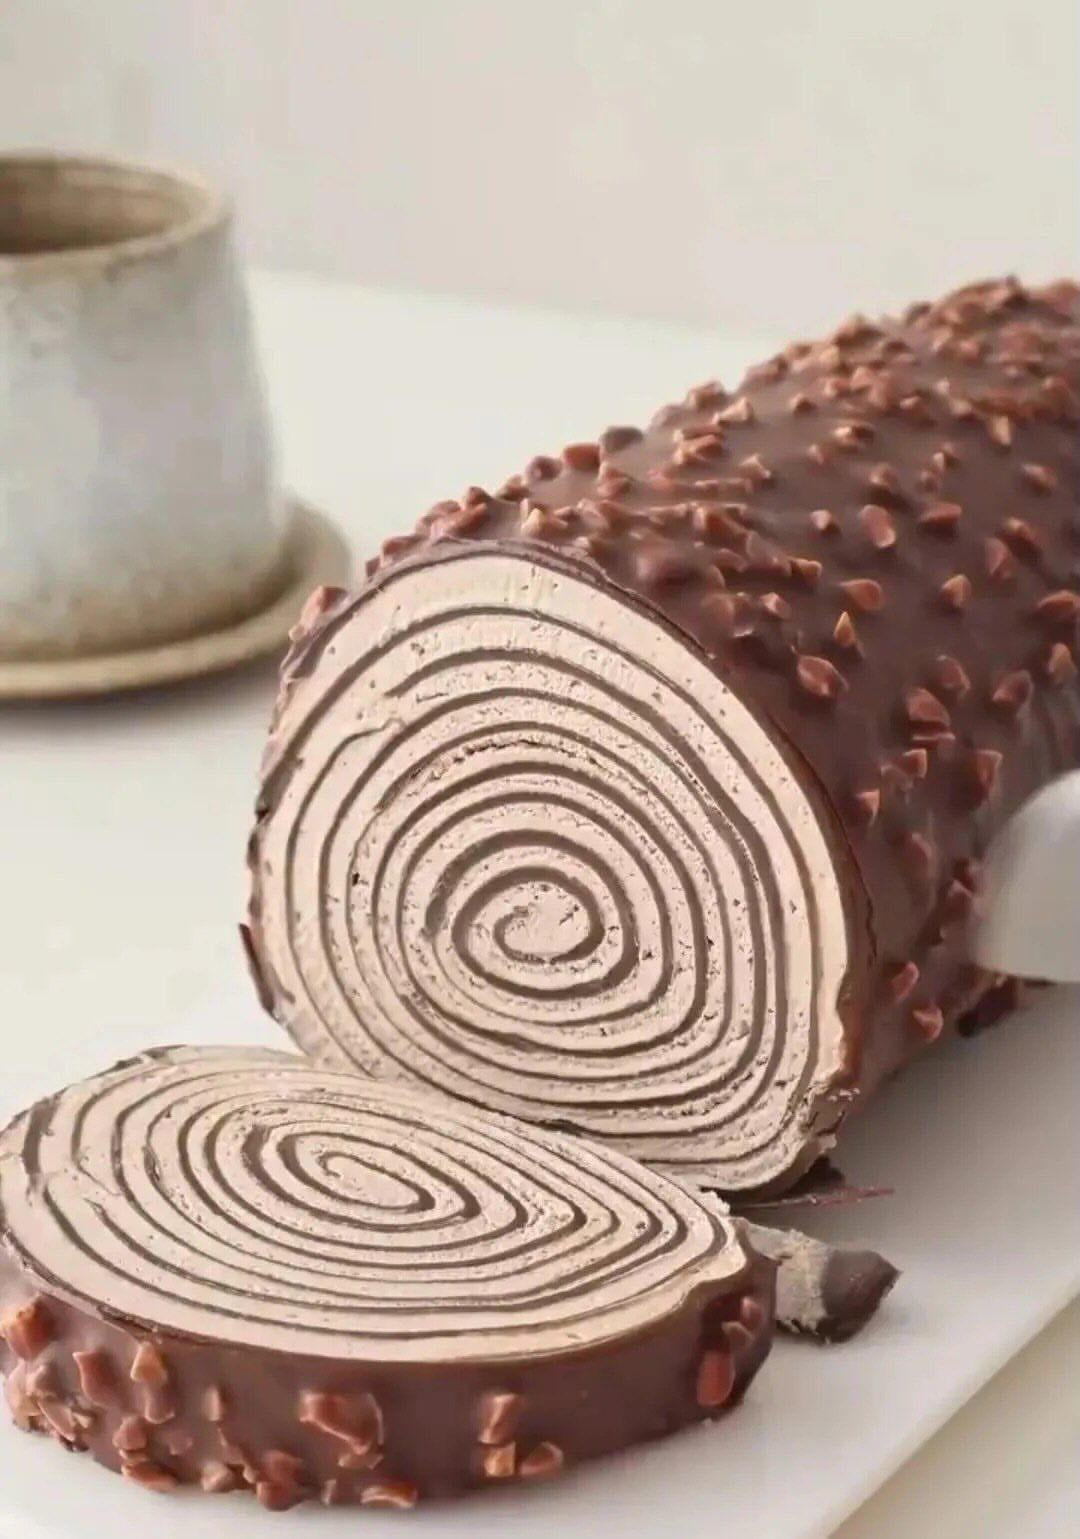
This Chocolate Swirl Mousse Roll is the kind of dessert that looks like it came from a high-end pastry shop, yet is surprisingly approachable to make at home. With its hypnotic spiral pattern, smooth mousse interior, and glossy chocolate coating, it instantly becomes the centerpiece of any dessert table. Slice into it, and you reveal perfect concentric rings of light chocolate mousse wrapped in a delicate chocolate shell, often finished with crunchy bits for contrast.
What makes this dessert especially appealing is that it requires no baking, making it ideal for warm weather, special occasions, or anytime you want an impressive dessert without turning on the oven. The texture is luxurious but light, rich without being heavy, and balanced with just the right amount of sweetness. It is the kind of dessert that invites slow enjoyment, one elegant slice at a time.
This recipe is written in a professional, website-ready format, with clear sections, detailed explanations, and helpful tips to ensure success even if you are making a rolled dessert for the first time.
Why This Chocolate Mousse Roll Works
The beauty of this dessert lies in contrast and structure. The mousse is stabilized just enough to hold its shape while remaining airy and creamy. The rolling technique creates the dramatic swirl effect without complicated tools. The outer chocolate coating adds snap and richness, while optional chopped nuts or crisp bits provide texture.
Unlike sponge cake rolls, this version relies entirely on mousse, making it naturally gluten-free when prepared with appropriate chocolate and cream.
Ingredients Overview
This recipe is composed of three main elements:
- The chocolate mousse base
- The swirl and rolling structure
- The chocolate coating and finishing touches
Using high-quality chocolate and real cream makes a noticeable difference in both flavor and texture.
Ingredients
For the Chocolate Mousse
- 400 ml heavy whipping cream, very cold
- 200 g dark or milk chocolate, finely chopped
- 2 tablespoons powdered sugar
- 1 teaspoon vanilla extract
- 1 teaspoon unflavored gelatin (optional, for extra stability)
- 2 tablespoons cold water (if using gelatin)
For the Chocolate Coating
- 250 g milk or dark chocolate
- 1 tablespoon neutral oil or cocoa butter (for shine and smoothness)
Optional Toppings
- Chopped hazelnuts, almonds, or peanuts
- Chocolate crisp pearls or crushed wafer cookies
- Cocoa powder for dusting
Equipment Needed
- Mixing bowls
- Electric mixer or whisk
- Small saucepan or microwave-safe bowl
- Offset spatula
- Parchment paper or acetate sheet
- Plastic wrap
- Sharp knife for slicing
Step-by-Step Instructions
Step 1: Prepare the Chocolate Base
Place the chopped chocolate in a heatproof bowl. Gently melt it using a double boiler or microwave in short intervals, stirring frequently until smooth. Set aside and allow it to cool slightly. The chocolate should be fluid but not hot, as heat can deflate the mousse.
Step 2: Bloom the Gelatin (Optional)
If using gelatin for added structure, sprinkle the gelatin over the cold water and let it bloom for 5 minutes. Gently warm until dissolved, then set aside to cool slightly.
Step 3: Whip the Cream
In a large bowl, whip the cold heavy cream with powdered sugar and vanilla extract until soft peaks form. The cream should be light and airy but not stiff. Overwhipping will make the mousse grainy.
Step 4: Combine Chocolate and Cream
Gently fold the melted chocolate into the whipped cream in batches, using a spatula and light folding motions. If using gelatin, fold it in at this stage. The mixture should be smooth, uniform, and fluffy.
Creating the Swirl Pattern
Step 5: Prepare the Rolling Surface
Lay a large sheet of parchment paper or acetate on a flat surface. Spread the mousse evenly into a rectangular shape, approximately 1 cm thick. Use an offset spatula to smooth the surface evenly.
For a more defined swirl, you can create subtle lines across the mousse using the spatula or piping bag before rolling.
Step 6: Chill Slightly
Refrigerate the mousse layer for 15–20 minutes. It should be firm enough to hold shape but still pliable for rolling.
Step 7: Roll the Mousse
Using the parchment paper as support, gently roll the mousse into a tight log, starting from the shorter edge. Roll slowly and evenly to maintain a clean spiral. Wrap tightly in parchment and plastic wrap, twisting the ends to secure.
Refrigerate for at least 2 hours, or until fully set.
Chocolate Coating and Finishing
Step 8: Prepare the Chocolate Coating
Melt the chocolate with the oil or cocoa butter until smooth and glossy. Let it cool slightly so it thickens just enough to coat without running off.
Step 9: Coat the Roll
Unwrap the chilled mousse roll and place it on a wire rack or parchment-lined tray. Pour the chocolate coating evenly over the roll, allowing excess to drip off. Use a spatula if needed to smooth the surface.
Immediately sprinkle with chopped nuts or crisp toppings before the chocolate sets.
Step 10: Final Chill
Return the coated roll to the refrigerator for 20–30 minutes, until the chocolate shell is fully set.
Slicing and Serving
For clean slices, use a sharp knife warmed under hot water and wiped dry between cuts. Each slice will reveal a perfect spiral pattern with smooth, creamy layers and a crisp chocolate exterior.
Serve chilled, either plain or with a dollop of whipped cream, fresh berries, or a drizzle of chocolate sauce.
Storage Instructions
- Store in the refrigerator for up to 4 days
- Keep tightly wrapped to prevent drying
- This dessert can be frozen for up to 1 month
- Thaw overnight in the refrigerator before serving
Tips for Professional Results
- Always let melted chocolate cool slightly before folding
- Use cold cream for best whipping results
- Do not rush the chilling steps
- Acetate sheets give the cleanest swirl and finish
- Quality chocolate makes a significant flavor difference
Variations
White Chocolate Swirl Roll
Replace dark chocolate with white chocolate and add vanilla bean or citrus zest for brightness.
Coffee Chocolate Roll
Add 1 teaspoon instant espresso powder to the melted chocolate for a mocha flavor.
Nutella Mousse Roll
Substitute part of the chocolate with Nutella for a hazelnut twist.
Why This Dessert Is Perfect for Entertaining
This Chocolate Swirl Mousse Roll is elegant, sliceable, and easy to make ahead. It requires no last-minute assembly, travels well, and delivers a dramatic presentation with minimal effort. Whether served at holidays, dinner parties, or special celebrations, it consistently impresses guests while remaining stress-free for the host.
Final Thoughts
This no-bake Chocolate Swirl Mousse Roll is proof that sophisticated desserts do not need complicated techniques or baking skills. With careful folding, proper chilling, and quality ingredients, you can create a dessert that is visually stunning, irresistibly creamy, and unforgettable in flavor.