
Crusty Mini Baguettes: A Taste of France in Your Kitchen
There is something timeless and deeply comforting about pulling a tray of golden, crusty baguettes from your own oven. The crackle of the crust as it cools, the soft and airy crumb inside, and the unmistakable aroma of freshly baked bread instantly transport you to a quiet bakery on a cobblestone street in Paris. With this detailed guide to making crusty mini baguettes at home, you can bring that authentic French bakery experience straight into your kitchen.
Mini baguettes are not only charming and elegant, but they are also incredibly practical. Their smaller size makes them perfect for sandwiches, appetizers, dinner rolls, or serving alongside soups and salads. Whether you are hosting a dinner party or simply baking for your family, these crusty mini baguettes deliver both beauty and flavor.
This comprehensive recipe guide will walk you through every step of the process—from understanding your ingredients to mastering shaping and baking techniques—so you can achieve bakery-quality results with confidence.
The Beauty of French Bread
Traditional French bread, particularly the classic baguette, is known for its simple ingredients and precise technique. In France, bread-making is often guided by strict standards, especially in artisan bakeries. The magic of a baguette lies not in complex ingredients, but in the careful balance of flour, water, yeast, and salt.
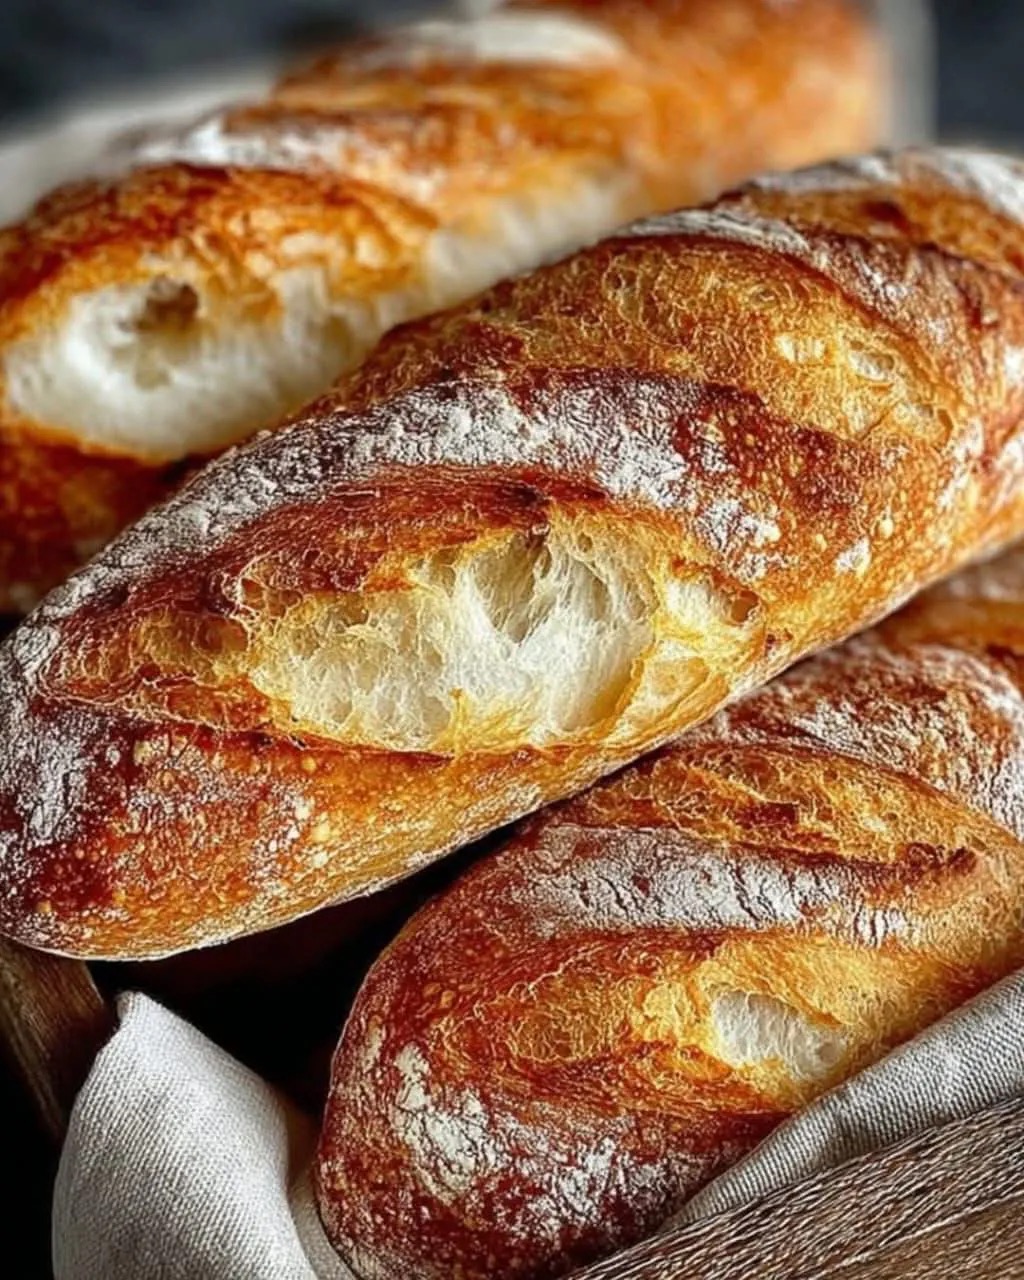
Mini baguettes follow the same philosophy. They are scaled-down versions of the classic loaf but retain all the defining characteristics:
- A thin, crisp, golden crust
- A light and airy interior
- A slightly chewy texture
- A mild, slightly nutty flavor
By making them at home, you gain full control over the process and the quality of ingredients, ensuring freshness that no store-bought loaf can match.
Ingredients
This recipe keeps things simple and traditional.
Ingredients:
- 2 1/4 cups all-purpose flour
- 1 teaspoon salt
- 1 teaspoon sugar
- 1 packet active dry yeast (2 1/4 teaspoons)
- 3/4 cup warm water
- 1 tablespoon olive oil
- 1 egg (optional, for egg wash)
Understanding the Ingredients
Before diving into the method, it helps to understand what each ingredient contributes to the final loaf.
Flour
All-purpose flour works beautifully for mini baguettes. It provides enough protein to develop gluten, which gives structure and chew. If you prefer a slightly chewier texture, you can substitute a portion with bread flour, but all-purpose flour alone produces excellent results.
Salt
Salt enhances flavor and strengthens gluten. It also regulates yeast activity, ensuring your dough rises steadily rather than too quickly.
Sugar
While traditional baguettes often contain no sugar, a small amount helps activate the yeast and contributes to browning during baking.
Yeast
Active dry yeast is responsible for fermentation. It creates carbon dioxide, which forms air pockets in the dough, resulting in a light and airy crumb.
Water
Warm water activates the yeast and hydrates the flour. The ideal temperature is around 100–110°F (38–43°C). Water that is too hot can kill the yeast, while water that is too cool may slow fermentation.
Olive Oil
Although traditional French baguettes do not always include oil, adding a small amount improves tenderness and adds subtle flavor. It also makes the dough easier to handle.
Egg Wash (Optional)
Brushing the shaped baguettes with egg wash creates a glossy, deeply golden crust. While optional, it enhances visual appeal.
Step-by-Step Preparation
Step 1: Activate the Yeast
In a small bowl, combine the warm water, sugar, and active dry yeast. Stir gently and let it sit for 5–10 minutes.
You will know the yeast is ready when it becomes frothy and bubbly on the surface. This indicates that fermentation has begun. If nothing happens, your yeast may be expired or the water temperature may have been incorrect.
Step 2: Mix the Dough
In a large mixing bowl, combine the flour and salt. Stir to distribute the salt evenly.
Create a well in the center and pour in the activated yeast mixture and olive oil. Using a wooden spoon or your hands, mix until the dough begins to come together.
The dough should feel slightly sticky but manageable. If it is too dry, add a teaspoon of water at a time. If too wet, sprinkle in a small amount of flour.
Step 3: Kneading for Structure
Transfer the dough onto a lightly floured surface. Knead for about 8–10 minutes.
Proper kneading develops gluten, which creates elasticity and structure. As you knead, the dough will become smoother and less sticky.
To knead:
- Push the dough away with the heel of your hand.
- Fold it back toward you.
- Rotate slightly.
- Repeat.
The dough is ready when it is smooth and elastic. You can test it using the “windowpane test”: stretch a small piece gently. If it forms a thin, translucent sheet without tearing, the gluten is well developed.
Step 4: First Rise
Place the kneaded dough into a lightly oiled bowl. Turn it once to coat the surface.
Cover with a clean kitchen towel or plastic wrap and let it rise in a warm, draft-free place for 1–1.5 hours, or until doubled in size.
During this stage, yeast ferments sugars and produces gases that expand the dough, building flavor and structure.
Step 5: Shaping the Mini Baguettes
Once doubled, gently punch down the dough to release excess gas.
Turn it out onto a lightly floured surface and divide into 4–6 equal portions, depending on your desired size.
To shape each mini baguette:
- Flatten each portion into a small rectangle.
- Fold the top third toward the center.
- Fold the bottom third over that.
- Roll gently to form a slender log.
- Taper the ends slightly for a traditional look.
Place the shaped loaves seam-side down on a parchment-lined baking sheet.
Step 6: Second Rise
Cover loosely and let the shaped baguettes rise again for 30–45 minutes.
This second rise ensures lightness and improves texture.
Step 7: Scoring the Dough
Preheat your oven to 425°F (220°C).
Using a sharp knife or bread lame, make 2–3 diagonal slashes across the top of each baguette. These cuts allow controlled expansion during baking and give the bread its signature appearance.
Step 8: Optional Egg Wash
For a glossy finish, whisk the egg and brush lightly over each loaf.
Step 9: Creating Steam for a Crisp Crust
To achieve a crusty exterior similar to those found in artisan bakeries, steam is essential.
Place a shallow pan on the lower rack of the oven. Just before baking, pour a cup of hot water into the pan to create steam.
Steam keeps the crust flexible during the first minutes of baking, allowing maximum expansion before it hardens.
Step 10: Baking
Bake the mini baguettes for 15–20 minutes, or until golden brown.
They should sound hollow when tapped on the bottom.
Allow them to cool on a wire rack before slicing. Cooling helps set the crumb structure.
Tips for Perfect Mini Baguettes
- Do not rush the rising time. Slow fermentation enhances flavor.
- Use a kitchen scale for precise measurements if possible.
- Avoid adding too much flour during kneading.
- Always preheat the oven thoroughly.
- Steam is key to a crisp crust.
Serving Ideas
Mini baguettes are incredibly versatile. Here are a few serving suggestions:
- Slice and serve with butter and jam for breakfast.
- Use for small sandwiches filled with ham and cheese.
- Pair with soups, especially French onion or tomato basil.
- Serve with olive oil and balsamic vinegar.
- Turn into garlic bread by adding butter and herbs.
They are perfect for entertaining and elevate even simple meals.
Storage and Reheating
Fresh baguettes are best enjoyed the day they are baked. However, you can store them in a paper bag at room temperature for up to two days.
To refresh:
- Sprinkle lightly with water.
- Bake at 350°F (175°C) for 5–7 minutes.
For longer storage, freeze them tightly wrapped for up to three months.
Why Homemade Is Worth It
Baking bread at home connects you to centuries of tradition. In cities like Lyon and Marseille, bakeries fill the streets with the scent of fresh bread every morning. By learning this simple technique, you recreate that tradition in your own space.
Homemade mini baguettes are:
- Fresher than store-bought
- Free from preservatives
- Customizable
- Budget-friendly
- Deeply satisfying to make
Final Thoughts
Crusty mini baguettes are more than just bread—they are an experience. From mixing the dough to hearing the crust crackle as it cools, each step brings a sense of accomplishment and joy.
With just a few basic ingredients and careful technique, you can create golden, crisp, bakery-style baguettes right at home. Whether served at a family dinner, offered to guests, or enjoyed quietly with butter and tea, these mini baguettes deliver authentic flavor and timeless comfort.
Once you master this recipe, you may never look at store-bought bread the same way again.