
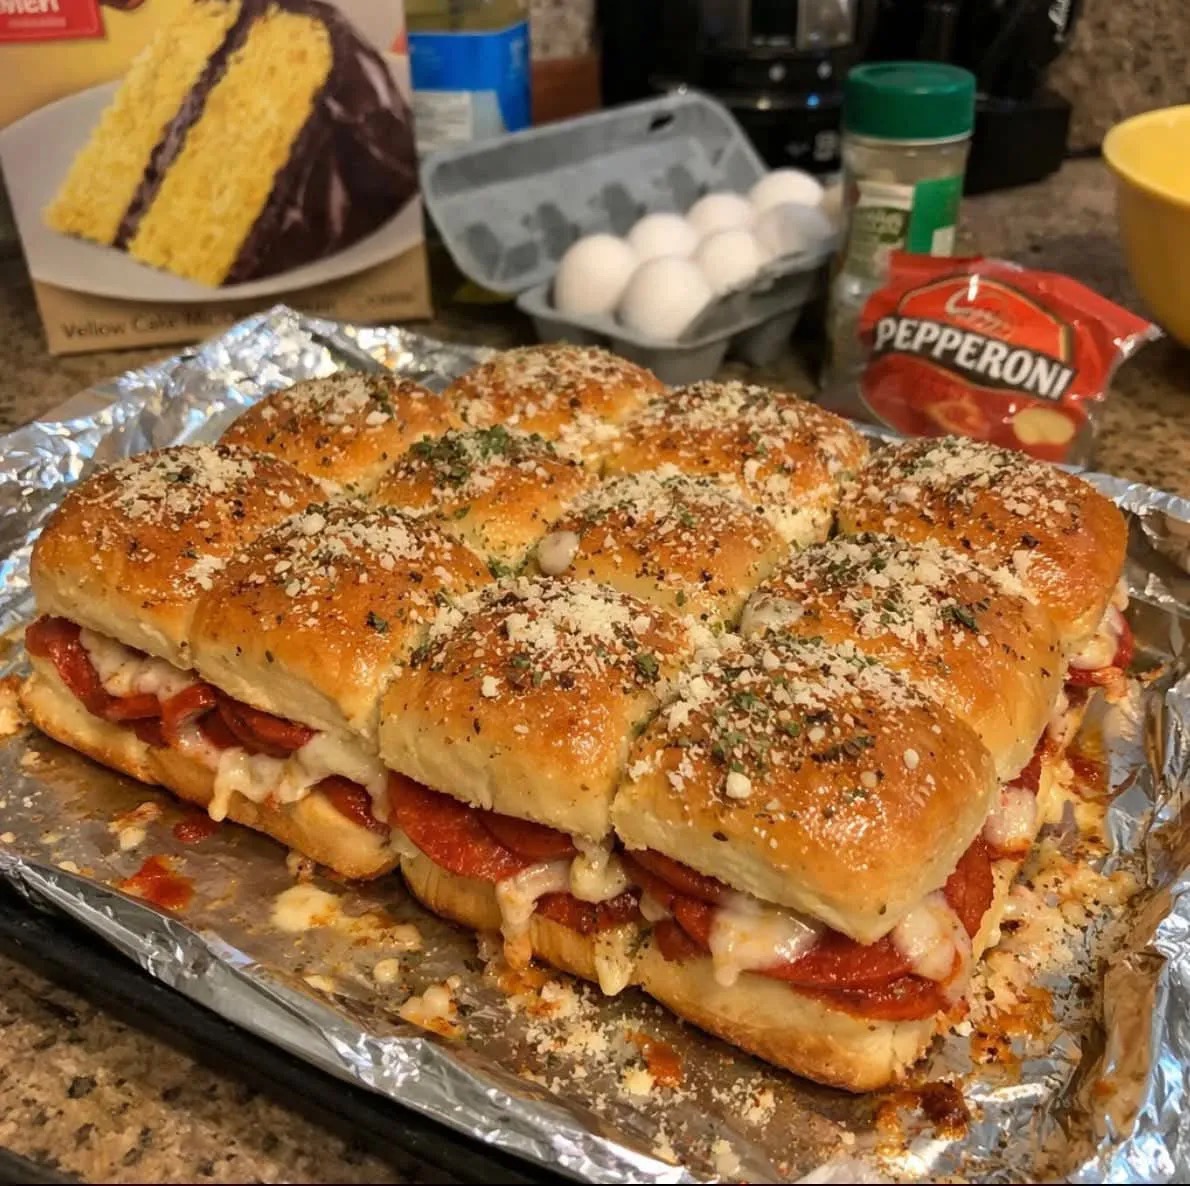
Pizza Sliders
Pizza Sliders are the perfect combination of two comfort food favorites: classic pizza and soft, pull-apart slider sandwiches. They are easy to prepare, family-friendly, and ideal for gatherings, game days, weeknight dinners, or party appetizers. With layers of savory pizza sauce, melted mozzarella, colorful vegetables, and a buttery garlic topping baked to golden perfection, these sliders deliver bold pizza flavor in a fun, handheld form.
This detailed recipe will guide you through every step of preparing delicious Pizza Sliders, including tips, variations, storage instructions, and serving ideas to help you achieve the best results every time.
Why You’ll Love This Recipe
Pizza Sliders are incredibly versatile and customizable. Whether you prefer a classic vegetarian version or want to add meats like pepperoni or sausage, the base recipe adapts beautifully. They come together quickly using simple pantry ingredients, making them an excellent option when you need something satisfying without spending hours in the kitchen.
The soft slider buns absorb the rich pizza sauce while remaining fluffy inside, and the buttery garlic topping adds an irresistible golden finish. Best of all, they can be prepared in advance and baked just before serving, making them perfect for entertaining.
Ingredients
For the Sliders:
- 12 small slider buns
- 1/2 cup pizza sauce
- 1 cup shredded mozzarella cheese
- 1/2 cup sliced bell peppers
- 1/4 cup black olives, sliced
- 1 teaspoon dried oregano
For the Garlic Butter Topping:
- 2 tablespoons melted butter
- 1/2 teaspoon garlic powder
- 1 tablespoon grated Parmesan cheese
Ingredient Breakdown and Tips
Slider Buns
Soft slider buns are essential for achieving the perfect texture. Hawaiian rolls are a popular option because of their slight sweetness, which complements the savory toppings. However, any soft dinner roll or slider bun will work well.
Pizza Sauce
Use a high-quality pizza sauce for the best flavor. You can choose store-bought or make your own using crushed tomatoes, garlic, olive oil, oregano, and basil. Avoid using overly watery sauce, as it can make the sliders soggy.
Mozzarella Cheese
Shredded mozzarella melts beautifully and gives the sliders that classic pizza stretch. For richer flavor, consider combining mozzarella with a small amount of provolone or fontina.
Vegetables
Bell peppers add color and crunch, while black olives provide a briny contrast. You can use red, green, or yellow peppers depending on preference. Slice them thinly to ensure even baking.
Garlic Butter Topping
The butter mixture brushed over the tops creates a golden crust and adds a delicious garlic aroma. The Parmesan cheese enhances flavor and adds a subtle crispness.
Equipment Needed
- 9×13-inch baking dish
- Sharp knife
- Small mixing bowl
- Pastry brush
- Aluminum foil
Step-by-Step Instructions
Step 1: Preheat the Oven
Preheat your oven to 350°F (175°C). Lightly grease a 9×13-inch baking dish or line it with parchment paper for easier cleanup.
Step 2: Prepare the Buns
Without separating the individual buns, slice the entire pack horizontally using a serrated knife. You should have one large bottom layer and one large top layer. This method makes assembly easier and ensures even filling distribution.
Place the bottom half into the prepared baking dish.
Step 3: Spread the Pizza Sauce
Evenly spread the pizza sauce over the bottom layer of buns. Use the back of a spoon to create a smooth layer, ensuring coverage all the way to the edges.
Step 4: Add the Cheese
Sprinkle half of the shredded mozzarella evenly over the sauce. This first layer helps create a barrier between the sauce and vegetables, reducing sogginess.
Step 5: Add Vegetables
Distribute the sliced bell peppers and black olives evenly across the cheese layer. Sprinkle dried oregano over the vegetables to enhance the pizza flavor.
Step 6: Add Remaining Cheese
Top with the remaining mozzarella cheese, ensuring even coverage so each slider gets a generous portion.
Step 7: Add the Top Layer
Place the top half of the buns over the layered fillings.
Step 8: Prepare the Garlic Butter
In a small bowl, combine melted butter and garlic powder. Brush the mixture generously over the tops of the buns. Sprinkle grated Parmesan cheese evenly over the buttered tops.
Step 9: Bake
Cover the baking dish loosely with aluminum foil. Bake for 15 minutes to allow the cheese to melt thoroughly.
Remove the foil and bake for an additional 5–10 minutes, or until the tops are golden brown and slightly crisp.
Step 10: Cool and Serve
Allow the sliders to cool for 5 minutes before slicing along the bun seams. Serve warm.
Flavor Variations
One of the greatest advantages of Pizza Sliders is how easily they can be customized.
Pepperoni Pizza Sliders
Add a layer of sliced pepperoni between the cheese layers for a classic flavor.
Sausage and Mushroom
Cook and crumble Italian sausage before layering. Add sautéed mushrooms for a hearty variation.
Margherita Style
Use fresh mozzarella slices, fresh basil leaves, and a drizzle of olive oil for a simple yet elegant version.
Supreme Sliders
Incorporate onions, mushrooms, pepperoni, and sausage for a fully loaded option.
Spicy Version
Add red pepper flakes, sliced jalapeños, or a drizzle of hot honey after baking.
Make-Ahead Instructions
Pizza Sliders can be assembled up to 24 hours in advance. Prepare them fully but do not bake. Cover tightly with plastic wrap and refrigerate. When ready to serve, brush with the garlic butter topping and bake as directed, adding 5 extra minutes to the covered baking time if baking straight from the refrigerator.
Storage and Reheating
Refrigeration
Store leftovers in an airtight container in the refrigerator for up to 3 days.
Freezing
Wrap individual sliders in plastic wrap and store in a freezer-safe container for up to 2 months.
Reheating
Reheat in a 325°F oven for 10–15 minutes or until warmed through. Avoid microwaving for extended periods, as this may make the bread chewy.
Serving Suggestions
Pizza Sliders pair well with a variety of side dishes:
- Fresh green salad
- Caesar salad
- Tomato soup
- Marinara sauce for dipping
- Garlic knots
- Pasta salad
For parties, serve alongside other finger foods such as chicken wings, mozzarella sticks, or stuffed mushrooms.
Tips for Perfect Pizza Sliders
- Do not overload with sauce to prevent sogginess.
- Slice vegetables thinly for even cooking.
- Cover with foil during the first part of baking to prevent over-browning.
- Let the sliders rest briefly before cutting for cleaner slices.
- Use freshly shredded cheese for superior melting.
Nutritional Considerations
These sliders can be adapted for different dietary needs. For a lighter version, use reduced-fat cheese and whole wheat slider buns. To make them gluten-free, substitute gluten-free rolls. For a dairy-free option, use plant-based cheese alternatives and vegan butter.
Frequently Asked Questions
Can I use different cheeses?
Yes. Provolone, cheddar, Monterey Jack, or a pizza blend all work well.
How do I keep the bottoms from getting soggy?
Layer cheese directly over the sauce before adding vegetables and avoid overly watery ingredients.
Can I cook these in an air fryer?
Yes, in smaller batches. Cook at 325°F for approximately 8–10 minutes, checking frequently.
Are they suitable for kids?
Absolutely. They are easy to hold and can be customized with child-friendly toppings.
Conclusion
Pizza Sliders are a simple yet impressive dish that combines the best elements of pizza and sandwiches into one satisfying bite. Their versatility makes them perfect for family dinners, potlucks, and celebrations. With soft, buttery tops and gooey melted cheese layered with flavorful toppings, they are guaranteed to become a regular favorite in your kitchen.
By following this detailed guide, you can confidently prepare delicious Pizza Sliders tailored to your taste preferences. Experiment with flavors, make them ahead for convenience, and enjoy a crowd-pleasing recipe that never disappoints.