
Ultimate Fudgy Chocolate Lava Brownies
A Deep, Gooey, Crackly-Top Brownie Recipe for True Chocolate Lovers
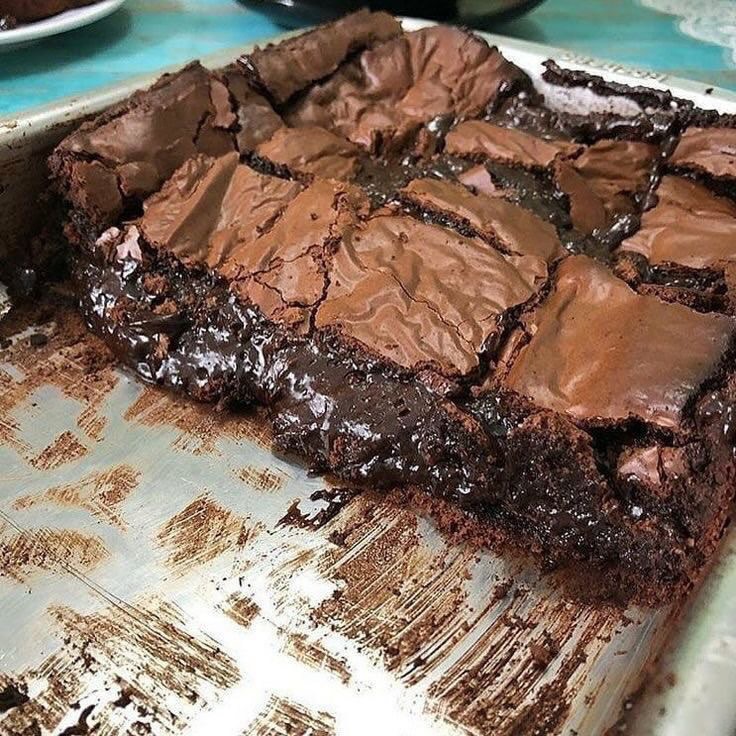
If you are searching for the ultimate chocolate dessert — the kind with a delicate, paper-thin crackly top and an irresistibly gooey, molten center — these Fudgy Chocolate Lava Brownies are exactly what you need. With a rich, intensely chocolate flavor and a soft, almost underbaked center that melts into a glossy pool of decadence, this recipe is designed for serious brownie lovers.
These brownies combine the best qualities of classic brownies and molten lava cake. The top bakes into a shiny, crinkled crust, while the interior remains dense, moist, and luxuriously fudgy. Every bite is packed with deep cocoa flavor and a silky texture that feels indulgent without being overly sweet.
This guide will walk you through every detail: choosing the right ingredients, mastering the technique, baking tips, storage advice, variations, and serving suggestions. Whether you are baking for family, entertaining guests, or creating content for your website, this long-form recipe has everything you need.
Why You Will Love These Brownies
- Ultra-fudgy center with molten chocolate pockets
- Crisp, shiny crackled top
- Deep, intense chocolate flavor
- Simple pantry ingredients
- Easy method with professional results
- Perfect for gatherings, holidays, or late-night cravings
Understanding the Texture: What Makes Lava Brownies Special?
Brownies generally fall into three categories: cakey, chewy, and fudgy. These lava brownies firmly belong in the fudgy category, with an added molten center.
The secret lies in:
- A high fat-to-flour ratio
- Minimal flour
- Proper sugar dissolution
- Slightly underbaking the center
- Using real chocolate instead of only cocoa powder
The glossy top forms when sugar dissolves properly into the egg mixture, creating that iconic crinkled crust. Meanwhile, the molten center happens when the interior is just slightly underbaked, allowing the chocolate to stay soft and fluid.
Ingredients
For the Brownies
- 1 cup (225 g) unsalted butter
- 8 oz (225 g) high-quality semi-sweet chocolate, chopped
- 1 1/4 cups (250 g) granulated sugar
- 1/2 cup (100 g) light brown sugar
- 4 large eggs, room temperature
- 1 tablespoon pure vanilla extract
- 3/4 cup (95 g) all-purpose flour
- 1/4 cup (25 g) unsweetened cocoa powder
- 1 teaspoon salt
- 1 cup (170 g) dark chocolate chunks or chips
Optional Lava Boost
- 1/2 cup chocolate hazelnut spread or ganache (for extra molten center pockets)
Ingredient Breakdown and Why Each Matters
Butter
Butter provides richness and moisture. Melting it with chocolate creates a smooth base that forms the foundation of the fudgy texture.
Chocolate
Use high-quality chocolate. The better the chocolate, the deeper and smoother the flavor. Avoid chocolate chips for melting; they often contain stabilizers.
Sugar
The combination of granulated and brown sugar balances sweetness and moisture. Brown sugar adds a subtle caramel depth.
Eggs
Eggs create structure and that shiny crust. Room-temperature eggs incorporate more smoothly.
Cocoa Powder
Enhances chocolate flavor without making the batter heavy.
Flour
Minimal flour keeps the brownies dense and gooey rather than cakey.
Salt
Essential for balancing sweetness and enhancing chocolate flavor.
Equipment You Will Need
- 9×9 inch (23×23 cm) square baking pan
- Parchment paper
- Mixing bowls
- Heatproof bowl
- Whisk
- Rubber spatula
- Fine mesh sieve
- Offset spatula or spoon
Step-by-Step Instructions
Step 1: Prepare the Pan
Preheat your oven to 350°F (175°C). Line your 9×9 inch baking pan with parchment paper, leaving an overhang on two sides for easy removal.
Lightly grease the parchment to prevent sticking.
Step 2: Melt the Butter and Chocolate
In a heatproof bowl set over a pot of simmering water (double boiler method), melt the butter and chopped chocolate together. Stir gently until smooth and glossy.
Alternatively, microwave in 20-second intervals, stirring between each interval.
Allow the mixture to cool slightly before proceeding.
Step 3: Mix Sugars and Eggs
In a large mixing bowl, whisk together granulated sugar, brown sugar, and eggs. Whisk vigorously for about 2–3 minutes until the mixture becomes lighter in color and slightly thickened.
This step helps create the crackly top.
Add vanilla extract and mix again.
Step 4: Combine Chocolate Mixture with Egg Mixture
Slowly pour the slightly cooled chocolate mixture into the egg mixture while whisking continuously.
Mix until smooth and fully incorporated.
Step 5: Add Dry Ingredients
Sift together flour, cocoa powder, and salt.
Gently fold the dry ingredients into the wet mixture using a spatula. Do not overmix. Stop as soon as no streaks remain.
Fold in the chocolate chunks.
Step 6: Optional Lava Center
For extra molten centers:
- Pour half the batter into the pan.
- Spoon dollops of chocolate hazelnut spread or ganache across the surface.
- Cover with remaining batter.
- Gently swirl if desired.
Step 7: Bake
Bake for 28–35 minutes.
The edges should look set and slightly firm. The center should still look slightly underdone and soft.
A toothpick inserted near the edge should come out with moist crumbs. The center may appear gooey — this is correct.
Do not overbake.
Step 8: Cool Properly
Allow brownies to cool in the pan for at least 45 minutes before slicing.
For clean slices, refrigerate for 1 hour after cooling, then cut with a sharp knife wiped clean between cuts.
How to Tell When They Are Done
- Edges firm
- Top crackly and shiny
- Center slightly wobbly but not liquid
- Internal temperature around 180–190°F (82–88°C)
Remember: brownies continue cooking as they cool.
Tips for Perfect Lava Brownies
- Use room-temperature eggs.
- Do not overmix after adding flour.
- Slightly underbake for gooey centers.
- Use good chocolate.
- Let them rest before slicing.
Common Mistakes to Avoid
Overbaking
This is the most common error. Even five extra minutes can turn fudgy brownies into dry ones.
Using Low-Quality Chocolate
It affects both flavor and texture.
Skipping the Whisking Step
Whisking eggs and sugar properly creates that glossy crust.
Serving Suggestions
These brownies are rich and versatile. Serve them:
- Warm with vanilla ice cream
- With whipped cream
- Drizzled with caramel sauce
- With fresh berries
- With espresso or strong coffee
For a restaurant-style dessert, heat a slice for 10–15 seconds in the microwave and serve immediately.
Storage Instructions
Room Temperature
Store in an airtight container for up to 3 days.
Refrigerator
Store up to 1 week. Bring to room temperature before serving.
Freezer
Wrap tightly and freeze up to 3 months. Thaw overnight in the refrigerator.
Delicious Variations
Salted Caramel Lava Brownies
Add swirls of caramel and sprinkle flaky sea salt on top before baking.
Nutty Lava Brownies
Fold in toasted walnuts or pecans.
Espresso Chocolate Brownies
Add 1 teaspoon instant espresso powder to intensify chocolate flavor.
Peanut Butter Swirl
Swirl peanut butter into the top before baking.
Double Dark Chocolate
Use dark chocolate with 70% cocoa for deeper flavor.
Make-Ahead Tips
You can prepare the batter up to 24 hours in advance. Cover and refrigerate. Bring to room temperature before baking.
You may also bake the brownies a day ahead; the flavor deepens overnight.
Frequently Asked Questions
Can I make this in a 9×13 pan?
Yes, but the brownies will be thinner. Reduce baking time by 5–8 minutes.
Can I use cocoa powder only?
You can, but melted chocolate gives superior texture and richness.
Why did my brownies turn cakey?
Too much flour or overbaking.
Why did they sink in the middle?
They were underbaked too much. A slight dip is normal for lava-style brownies.
The Science Behind Crackly Tops
The shiny crust forms when dissolved sugar rises to the surface during baking and forms a delicate meringue-like layer. Proper whisking and sugar ratio are key.
Pairing Ideas
- Dark roast coffee
- Cold milk
- Dessert wine
- Vanilla bean ice cream
- Fresh raspberries
Final Thoughts
These Fudgy Chocolate Lava Brownies are the ultimate chocolate indulgence. With their glossy, crackled top and irresistibly molten center, they strike the perfect balance between structure and decadence.
They are easy enough for beginners yet impressive enough for special occasions. Whether served warm with ice cream or enjoyed straight from the pan, this recipe guarantees rich chocolate satisfaction every time.
Bake them once, and they may become your signature dessert.