
Mini Cheesecakes with Cherry Topping
A Classic Bite-Sized Dessert Perfect for Any Occasion
Introduction
Mini cheesecakes are one of those desserts that manage to feel both elegant and comforting at the same time. They deliver all the rich, creamy indulgence of a traditional cheesecake but in a convenient, individual-sized portion that is easy to serve, store, and enjoy. Whether you are preparing dessert for a party, a holiday gathering, or simply satisfying a sweet craving at home, mini cheesecakes are a reliable and crowd-pleasing choice.
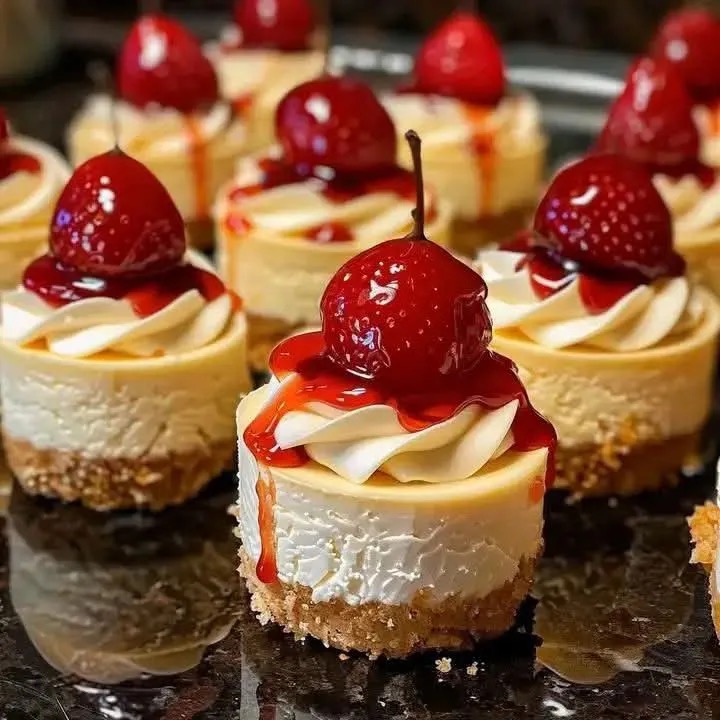
This recipe features a buttery vanilla wafer crust, a smooth and creamy cheesecake filling, and a vibrant cherry topping that adds both sweetness and visual appeal. The contrast between the slightly crisp base, the velvety filling, and the fruity topping creates a balanced dessert that feels indulgent without being overwhelming.
What makes this recipe particularly appealing is its simplicity. With just a handful of ingredients and straightforward steps, you can create a dessert that looks and tastes like it came from a professional bakery. Additionally, the small size of each cheesecake allows for easy portion control and makes them ideal for sharing.
In this guide, you will learn everything you need to know to make perfect mini cheesecakes, from preparing the crust to achieving a smooth filling and finishing with a beautiful cherry topping. Along the way, you will also find tips, variations, and serving ideas to help you customize the recipe to your taste.
⸻
Ingredients
For the Crust
• 1 (12-ounce) package vanilla wafers, crushed
For the Cheesecake Filling
• 2 (8-ounce) packages cream cheese, softened
• 3/4 cup white sugar
• 2 large eggs
• 1 teaspoon vanilla extract
For the Topping
• 1 (21-ounce) can cherry pie filling
⸻
Why This Recipe Works
The success of these mini cheesecakes lies in the balance of textures and flavors:
• The vanilla wafer crust provides a slightly sweet, crisp foundation that complements the creamy filling.
• The cream cheese filling is rich and smooth, with just enough sweetness to highlight the natural tang of the cheese.
• The cherry topping adds brightness, color, and a fruity contrast that enhances the overall dessert.
Because each component is simple and well-balanced, the final result is both satisfying and refined.
⸻
Preparation Time
• Prep Time: 20 minutes
• Bake Time: 15–18 minutes
• Cooling Time: 1–2 hours
• Total Time: Approximately 2 hours
⸻
Step-by-Step Instructions
Step 1: Prepare the Oven and Muffin Tins
Preheat your oven to 350 degrees Fahrenheit (175 degrees Celsius). Line two 24-cup miniature muffin tins with paper liners. This step ensures easy removal and a neat presentation.
⸻
Step 2: Make the Crust
Crush the vanilla wafers into fine crumbs. You can do this using a food processor for a uniform texture or place the wafers in a sealed plastic bag and crush them with a rolling pin.
Spoon about 1/2 teaspoon of the crushed wafers into each paper liner. Press the crumbs down firmly using the back of a spoon or your fingers to create a compact base. This will form the crust for each mini cheesecake.
⸻
Step 3: Prepare the Cheesecake Filling
In a large mixing bowl, beat the softened cream cheese until smooth and creamy. This step is essential to avoid lumps in the filling.
Add the sugar and continue mixing until fully incorporated. The mixture should be light and smooth.
Next, add the eggs one at a time, mixing well after each addition. Be careful not to overmix, as this can introduce too much air into the batter.
Stir in the vanilla extract and mix until just combined. The final batter should be smooth, creamy, and slightly thick.
⸻
Step 4: Fill the Muffin Cups
Spoon the cheesecake batter evenly into each prepared muffin cup, filling them nearly to the top. The filling will rise slightly during baking but will settle as it cools.
⸻
Step 5: Bake the Mini Cheesecakes
Place the muffin tins in the preheated oven and bake for 15 to 18 minutes. The centers should be set but still slightly soft when gently touched.
Avoid overbaking, as this can cause the cheesecakes to become dry or crack.
⸻
Step 6: Cool the Cheesecakes
Remove the muffin tins from the oven and allow the cheesecakes to cool at room temperature for about 30 minutes.
Once cooled, transfer them to the refrigerator and chill for at least 1 hour. Chilling helps the cheesecakes firm up and enhances their flavor and texture.
⸻
Step 7: Add the Cherry Topping
Once the cheesecakes are fully chilled, spoon a small amount of cherry pie filling onto each one. Be sure to include both the cherries and some of the syrup for a glossy finish.
⸻
Step 8: Serve and Enjoy
Carefully remove the mini cheesecakes from the muffin tins and arrange them on a serving platter. Serve chilled for the best taste and texture.
⸻
Tips for Perfect Mini Cheesecakes
1. Use softened cream cheese to ensure a smooth filling. Cold cream cheese can result in lumps.
2. Do not overmix the batter. Overmixing can incorporate too much air, leading to cracks during baking.
3. Press the crust firmly to create a stable base that holds together well.
4. Bake just until set. Overbaking can dry out the cheesecakes and affect their texture.
5. Chill thoroughly before serving. This step is essential for achieving the perfect consistency.
⸻
Variations
Chocolate Mini Cheesecakes
Add melted chocolate to the filling for a rich, chocolate version.
Strawberry Cheesecakes
Replace the cherry topping with strawberry pie filling for a different fruity flavor.
Lemon Cheesecakes
Add lemon zest and a bit of lemon juice to the filling for a bright, citrusy twist.
Caramel Cheesecakes
Top with caramel sauce and a sprinkle of sea salt for a sweet and salty variation.
⸻
Serving Suggestions
Mini cheesecakes are versatile and can be served in various ways:
• Arrange them on a dessert platter for parties
• Serve alongside coffee or tea for a simple treat
• Pair with fresh fruit for a balanced dessert
Their small size makes them ideal for gatherings, as guests can easily enjoy them without the need for slicing.
⸻
Storage and Reheating
Storage
Store the mini cheesecakes in an airtight container in the refrigerator for up to 4 days.
Freezing
You can freeze them without the topping for up to 2 months. Thaw in the refrigerator before adding the cherry topping and serving.
⸻
Nutritional Overview
These mini cheesecakes provide:
• Richness from cream cheese
• Sweetness from sugar and topping
• A small portion size that helps with moderation
They are an indulgent treat best enjoyed occasionally.
⸻
Frequently Asked Questions
Can I use a different crust?
Yes, graham cracker crumbs or crushed cookies can be used as alternatives to vanilla wafers.
Can I make them ahead of time?
Yes, these cheesecakes are perfect for making in advance. Prepare them a day ahead and store them in the refrigerator until ready to serve.
Why did my cheesecakes crack?
Cracking can occur due to overmixing or overbaking. Be sure to follow the instructions carefully for best results.
⸻
Conclusion
Mini Cheesecakes with Cherry Topping are a timeless dessert that combines simplicity with elegance. Their creamy texture, buttery crust, and vibrant topping make them a favorite for both casual and special occasions.
With this detailed guide, you have everything you need to create perfect mini cheesecakes in your own kitchen. From preparation to presentation, each step is designed to help you achieve a dessert that is as beautiful as it is delicious.
Once you try this recipe, it is likely to become a go-to option whenever you need a reliable and impressive dessert that everyone will enjoy.