
Lotus Biscoff Cheesecake
A Complete Guide to a Creamy, Caramelized, No-Bake Dessert with Irresistible Flavor
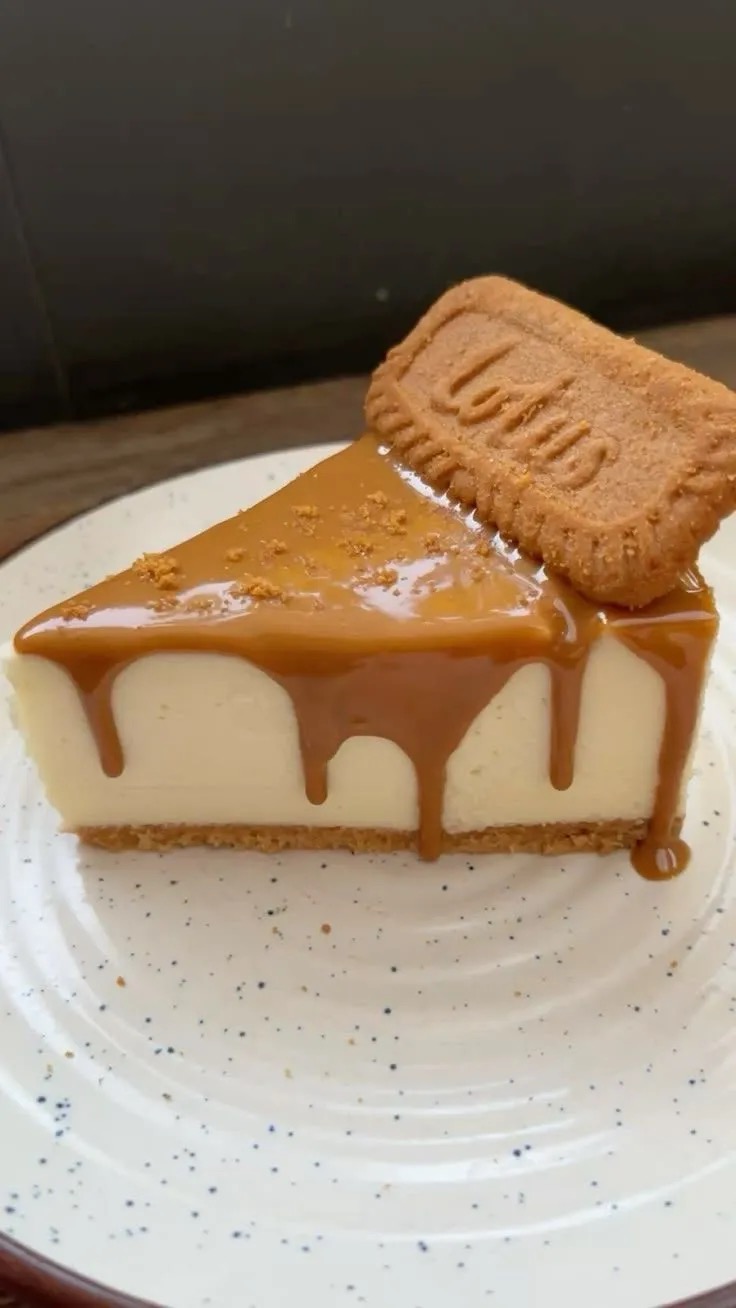
Lotus Biscoff cheesecake is one of those desserts that instantly captures attention. With its rich caramel flavor, velvety smooth texture, and signature spiced biscuit base, it delivers a luxurious experience in every bite. The combination of creamy cheesecake filling and the deep, slightly spiced sweetness of Biscoff creates a dessert that feels indulgent yet perfectly balanced.
This guide will walk you through everything you need to create a flawless Lotus Biscoff cheesecake at home. From building a firm, buttery crust to achieving a silky cream layer and finishing with a glossy topping, each step is designed to help you produce a dessert that looks as impressive as it tastes.
What Makes Lotus Biscoff Cheesecake Special
The defining feature of this cheesecake is the use of Lotus Biscoff biscuits and spread. These biscuits have a unique caramelized flavor with subtle hints of spice, making them ideal for desserts.
When crushed and combined with butter, they form a base that is both flavorful and sturdy. The Biscoff spread, when blended into the cream layer, adds richness and depth, creating a dessert that is both creamy and complex.
Unlike traditional baked cheesecakes, this version is typically no-bake, making it simpler while still delivering a luxurious result.
Ingredients
Base (Crust)
- 250 g Lotus Biscoff biscuits
- 100 g melted butter
Cream Layer
- 400 g cream cheese (room temperature)
- 200 ml heavy cream (cold)
- 150 g Lotus Biscoff spread
- 80 g powdered sugar
- 1 teaspoon vanilla extract
Topping
- 150 g Lotus Biscoff spread (melted slightly for pouring)
- Crushed Biscoff biscuits for garnish
Equipment Needed
- 20 cm (8-inch) springform pan
- Food processor or rolling pin
- Mixing bowls
- Hand or stand mixer
- Spatula
Using the right tools helps ensure a smooth process and professional-looking results.
Step 1: Preparing the Biscuit Base
Start by crushing the Lotus Biscoff biscuits into fine crumbs. You can use a food processor or place them in a sealed bag and crush them with a rolling pin.
Transfer the crumbs to a bowl and pour in the melted butter. Mix until the texture resembles wet sand.
Press the mixture firmly into the bottom of your springform pan, creating an even layer. Use the back of a spoon or a flat-bottomed glass to compact it tightly.
Place the base in the refrigerator for at least 30 minutes to set. This step ensures the crust holds together when sliced.
Step 2: Preparing the Cream Cheese Mixture
In a large mixing bowl, add the room temperature cream cheese.
Beat it until smooth and creamy, making sure there are no lumps. This step is crucial for achieving a silky texture.
Add the powdered sugar and vanilla extract, then mix until fully combined.
Step 3: Incorporating the Biscoff Spread
Add the Lotus Biscoff spread to the cream cheese mixture.
Mix until smooth and evenly blended. The mixture should be thick, creamy, and rich in color.
This step infuses the cheesecake with its signature caramelized flavor.
Step 4: Whipping the Cream
In a separate bowl, pour the cold heavy cream.
Whip it until soft peaks form. The cream should be thick enough to hold its shape but still smooth and not overwhipped.
Properly whipped cream is essential for creating a light and airy texture in the cheesecake.
Step 5: Folding the Mixture
Gently fold the whipped cream into the cream cheese mixture.
Use a spatula and fold carefully to maintain the airiness of the whipped cream.
The result should be a smooth, fluffy filling that is easy to spread.
Step 6: Assembling the Cheesecake
Remove the chilled crust from the refrigerator.
Pour the cream filling over the base and spread it evenly.
Smooth the top using a spatula to create a clean, even surface.
Return the cheesecake to the refrigerator and chill for at least 6 hours, preferably overnight.
Step 7: Preparing the Topping
Melt the Lotus Biscoff spread gently until it becomes pourable.
Allow it to cool slightly before pouring it over the chilled cheesecake.
Spread the topping evenly across the surface.
Step 8: Garnishing
Sprinkle crushed Biscoff biscuits over the top for added texture and visual appeal.
You can also drizzle extra spread or pipe whipped cream for decoration.
Step 9: Final Chilling
Place the cheesecake back in the refrigerator for an additional 30 to 60 minutes to allow the topping to set.
Step 10: Serving
Carefully remove the cheesecake from the springform pan.
Slice using a sharp knife, wiping the blade between cuts for clean edges.
Serve chilled for the best texture and flavor.
Tips for the Perfect Cheesecake
Use room temperature cream cheese to avoid lumps
Do not overwhip the cream
Fold gently to maintain a light texture
Chill thoroughly for proper setting
Use high-quality ingredients for the best flavor
Flavor Variations
This cheesecake can be customized in several ways.
Chocolate Biscoff Cheesecake
Add melted chocolate to the filling for a richer dessert.
Nutty Version
Incorporate crushed nuts into the base for added texture.
Mini Cheesecakes
Prepare the recipe in individual molds for portioned servings.
Common Mistakes to Avoid
Not chilling the base long enough
Using cold cream cheese
Overmixing the filling
Skipping the final chill
Cutting before the cheesecake is fully set
Avoiding these mistakes ensures a smooth and stable dessert.
Storage and Shelf Life
Store the cheesecake in the refrigerator, covered, for up to 4 days.
For longer storage, it can be frozen and thawed in the refrigerator before serving.
Why This Recipe Works
This recipe achieves a perfect balance of textures and flavors.
The buttery biscuit base provides structure, the creamy filling offers richness, and the Biscoff topping adds a smooth, caramelized finish.
Each layer complements the others, resulting in a dessert that is cohesive and indulgent.
Serving Suggestions
Serve the cheesecake as a standalone dessert or pair it with coffee or tea.
It also works well as a centerpiece for celebrations or gatherings.
Making It Ahead
This cheesecake is ideal for preparing in advance.
In fact, making it a day ahead improves the flavor and texture, as it allows the layers to fully set and develop.
Final Thoughts
Lotus Biscoff cheesecake is a dessert that combines simplicity with elegance. Its rich, creamy texture and distinctive caramelized flavor make it a favorite among dessert lovers.
By following this detailed guide, you can create a cheesecake that is smooth, flavorful, and visually stunning.
Whether you are making it for a special occasion or simply treating yourself, this recipe delivers a truly indulgent experience.
Take your time, enjoy the process, and savor every bite of this irresistible dessert.