
Cherry Pie Bars Recipe
A Sweet, Buttery Dessert with Classic Cherry Pie Flavor in Every Bite
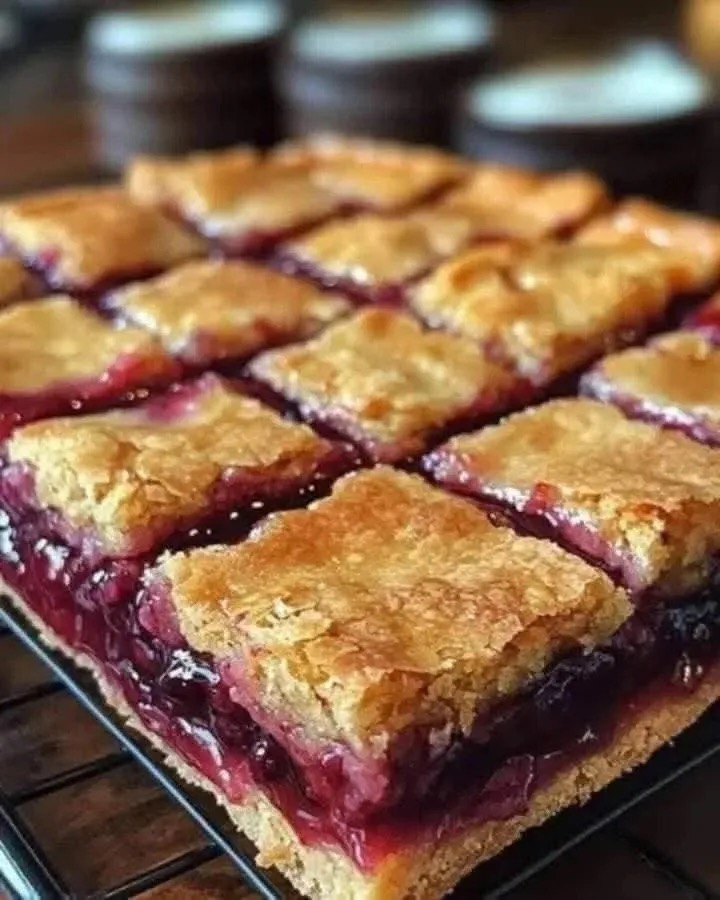
Cherry Pie Bars are the perfect dessert for anyone who loves the taste of traditional cherry pie but prefers something simpler, faster, and easier to serve. With a buttery crust that doubles as a crumbly topping and a rich, vibrant cherry filling in between, these bars deliver everything you love about pie—without the hassle of rolling out dough or worrying about perfect crust edges.
This recipe is especially popular for gatherings, holidays, and casual family desserts because it can be made in a single pan and sliced into neat, portable portions. Whether you’re serving them at a party, packing them for a picnic, or enjoying them with a cup of coffee, Cherry Pie Bars are a reliable crowd-pleaser.
What sets this dessert apart is its balance of textures and flavors. The base is soft yet sturdy, the cherry filling is sweet with just a hint of tartness, and the topping adds a lightly crisp finish. Together, they create a dessert that feels both comforting and indulgent.
Why You’ll Love Cherry Pie Bars
There are many reasons why this recipe deserves a place in your baking collection.
First, it simplifies a classic dessert. Traditional cherry pie can be time-consuming, especially when it comes to preparing and handling pie crust. These bars eliminate that step entirely while still delivering the same flavor profile.
Second, they are versatile. You can easily customize the filling, adjust the sweetness, or add a glaze to suit your taste.
Third, they are perfect for sharing. Unlike pie, which requires slicing and serving carefully, these bars can be cut into squares and served effortlessly.
Finally, they store well. You can make them ahead of time and enjoy them over several days without sacrificing flavor or texture.
Ingredients
For the Crust and Topping:
- 1 cup unsalted butter, softened
- 2 cups granulated sugar
- 1 teaspoon vanilla extract
- 1/4 teaspoon almond extract
- 4 large eggs
- 3 cups all-purpose flour
- 1 teaspoon salt
For the Filling:
- 2 cans (21 ounces each) cherry pie filling
Understanding the Ingredients
Before starting, it helps to understand the role each ingredient plays in the recipe.
Butter provides richness and helps create a soft, tender base.
Sugar adds sweetness and contributes to the golden color when baked.
Eggs bind the ingredients together and add structure.
Vanilla and almond extracts enhance the flavor, with almond especially complementing cherry beautifully.
Flour forms the structure of the bars, giving them their shape and texture.
Salt balances the sweetness and enhances overall flavor.
Cherry pie filling is the star of the recipe, delivering that classic fruity taste with minimal effort.
Step-by-Step Instructions
Step 1: Preheat and Prepare the Pan
Preheat your oven to 350°F (175°C). Grease a 9×13-inch baking pan thoroughly, or line it with parchment paper for easier removal.
This step ensures your bars won’t stick and makes cleanup much easier.
Step 2: Cream the Butter and Sugar
In a large mixing bowl, combine the softened butter and sugar. Beat them together until the mixture becomes light and fluffy.
This process is essential because it incorporates air into the batter, helping create a soft and tender texture.
Step 3: Add the Eggs and Extracts
Add the eggs one at a time, mixing well after each addition. Then stir in the vanilla extract and almond extract.
At this stage, the batter should be smooth and slightly glossy.
Step 4: Incorporate the Dry Ingredients
Gradually add the flour and salt to the wet mixture. Mix until just combined.
Avoid overmixing, as this can make the bars dense rather than soft.
Step 5: Assemble the Base Layer
Spread about two-thirds of the batter evenly into the prepared baking pan. The batter will be thick, so you may need to use a spatula to spread it evenly.
This layer forms the base of your bars.
Step 6: Add the Cherry Filling
Spoon the cherry pie filling over the base layer. Spread it evenly, making sure it reaches all corners of the pan.
The filling should form a generous, even layer.
Step 7: Add the Topping
Drop the remaining batter in small spoonfuls over the cherry filling. It doesn’t need to completely cover the surface—some of the filling should remain visible.
As the bars bake, this topping will spread slightly and create a beautiful, rustic finish.
Step 8: Bake
Place the pan in the preheated oven and bake for 35 to 45 minutes, or until the top is lightly golden and set.
The edges should be slightly crisp, while the center remains soft.
Step 9: Cool Completely
Allow the bars to cool completely in the pan before slicing. This step is important because it helps the layers set properly, making the bars easier to cut.
Step 10: Slice and Serve
Once cooled, cut into squares or rectangles. Serve as is, or enhance with a light glaze or dusting of powdered sugar.
Optional Glaze
For an extra touch of sweetness, you can add a simple glaze.
Ingredients:
- 1 cup powdered sugar
- 2–3 tablespoons milk
- 1/2 teaspoon vanilla extract
Mix until smooth and drizzle over the cooled bars.
Tips for Perfect Cherry Pie Bars
Use Quality Filling
Choose a good-quality cherry pie filling for the best flavor. Some varieties include whole cherries, which add texture.
Don’t Skip the Almond Extract
Even a small amount enhances the cherry flavor significantly.
Line the Pan
Using parchment paper makes it much easier to remove and slice the bars cleanly.
Let Them Cool Fully
Cutting too early can cause the bars to fall apart.
Variations to Try
Homemade Cherry Filling
If you prefer, you can make your own filling using fresh or frozen cherries, sugar, and cornstarch.
Different Fruit Fillings
Try blueberry, raspberry, or apple pie filling for a new twist.
Add a Crumble Topping
Mix a bit of extra flour, sugar, and butter to create a crumb topping for added texture.
Make It Citrus-Flavored
Add lemon zest to the batter for a bright, fresh flavor.
Storage and Shelf Life
Cherry Pie Bars are easy to store and maintain their quality well.
- Room temperature: Store in an airtight container for up to 2 days
- Refrigerator: Keeps fresh for up to 5 days
- Freezer: Freeze for up to 3 months
To serve after freezing, thaw at room temperature or warm slightly in the oven.
Serving Suggestions
These bars are delicious on their own, but you can elevate them even further:
- Serve with whipped cream
- Add a scoop of vanilla ice cream
- Pair with coffee or tea
- Dust with powdered sugar for a simple presentation
Common Mistakes to Avoid
Overbaking
This can make the bars dry. Keep an eye on the baking time and remove them once the top is lightly golden.
Uneven Spreading
Take your time to spread both the batter and filling evenly for consistent layers.
Skipping Cooling Time
Allowing the bars to cool fully ensures clean slices and better texture.
Why These Bars Are So Popular
Cherry Pie Bars have gained popularity because they combine the best parts of pie and cake into one easy dessert. They’re nostalgic, comforting, and adaptable to many occasions.
They also strike the perfect balance between effort and reward. With minimal preparation, you get a dessert that looks impressive and tastes like it took much more work.
Final Thoughts
Cherry Pie Bars are a perfect example of how simple ingredients can create something truly special. They bring together the rich, buttery flavor of a homemade crust with the sweet and slightly tart taste of cherries in a way that is both satisfying and easy to make.
Whether you’re baking for a celebration or just want a comforting dessert at home, this recipe delivers every time. It’s reliable, delicious, and guaranteed to become a favorite in your kitchen.
And just like many classic desserts, don’t expect leftovers—these bars tend to disappear quickly once served.