
Artisan Bread with Herbs
A Complete Guide to Baking Flavorful, Rustic Sourdough at Home
Introduction
There is something deeply satisfying about baking your own artisan bread. The process is slow, deliberate, and almost meditative, transforming simple ingredients into a beautifully crusty loaf with a soft, airy interior. When you add fresh herbs like sage and rosemary, along with delicate notes of pink peppercorn and smoked sea salt, the result becomes more than just bread—it becomes an aromatic, flavorful centerpiece worthy of any table.
This herb-infused artisan bread uses natural fermentation through levain, giving it a complex flavor profile, improved digestibility, and a rustic texture that is difficult to replicate with commercial yeast. While sourdough baking may seem intimidating at first, understanding the process step by step will help you gain confidence and achieve excellent results.
In this comprehensive guide, you will learn not only how to make this artisan herb bread but also why each step matters. From selecting ingredients to mastering fermentation and baking techniques, this recipe is designed to help you succeed whether you are a beginner or an experienced baker.
Ingredients
For the Dough
- 400 g bread flour
- 320 g water (room temperature)
- 100 g active levain
- 8 g salt
For the Toppings
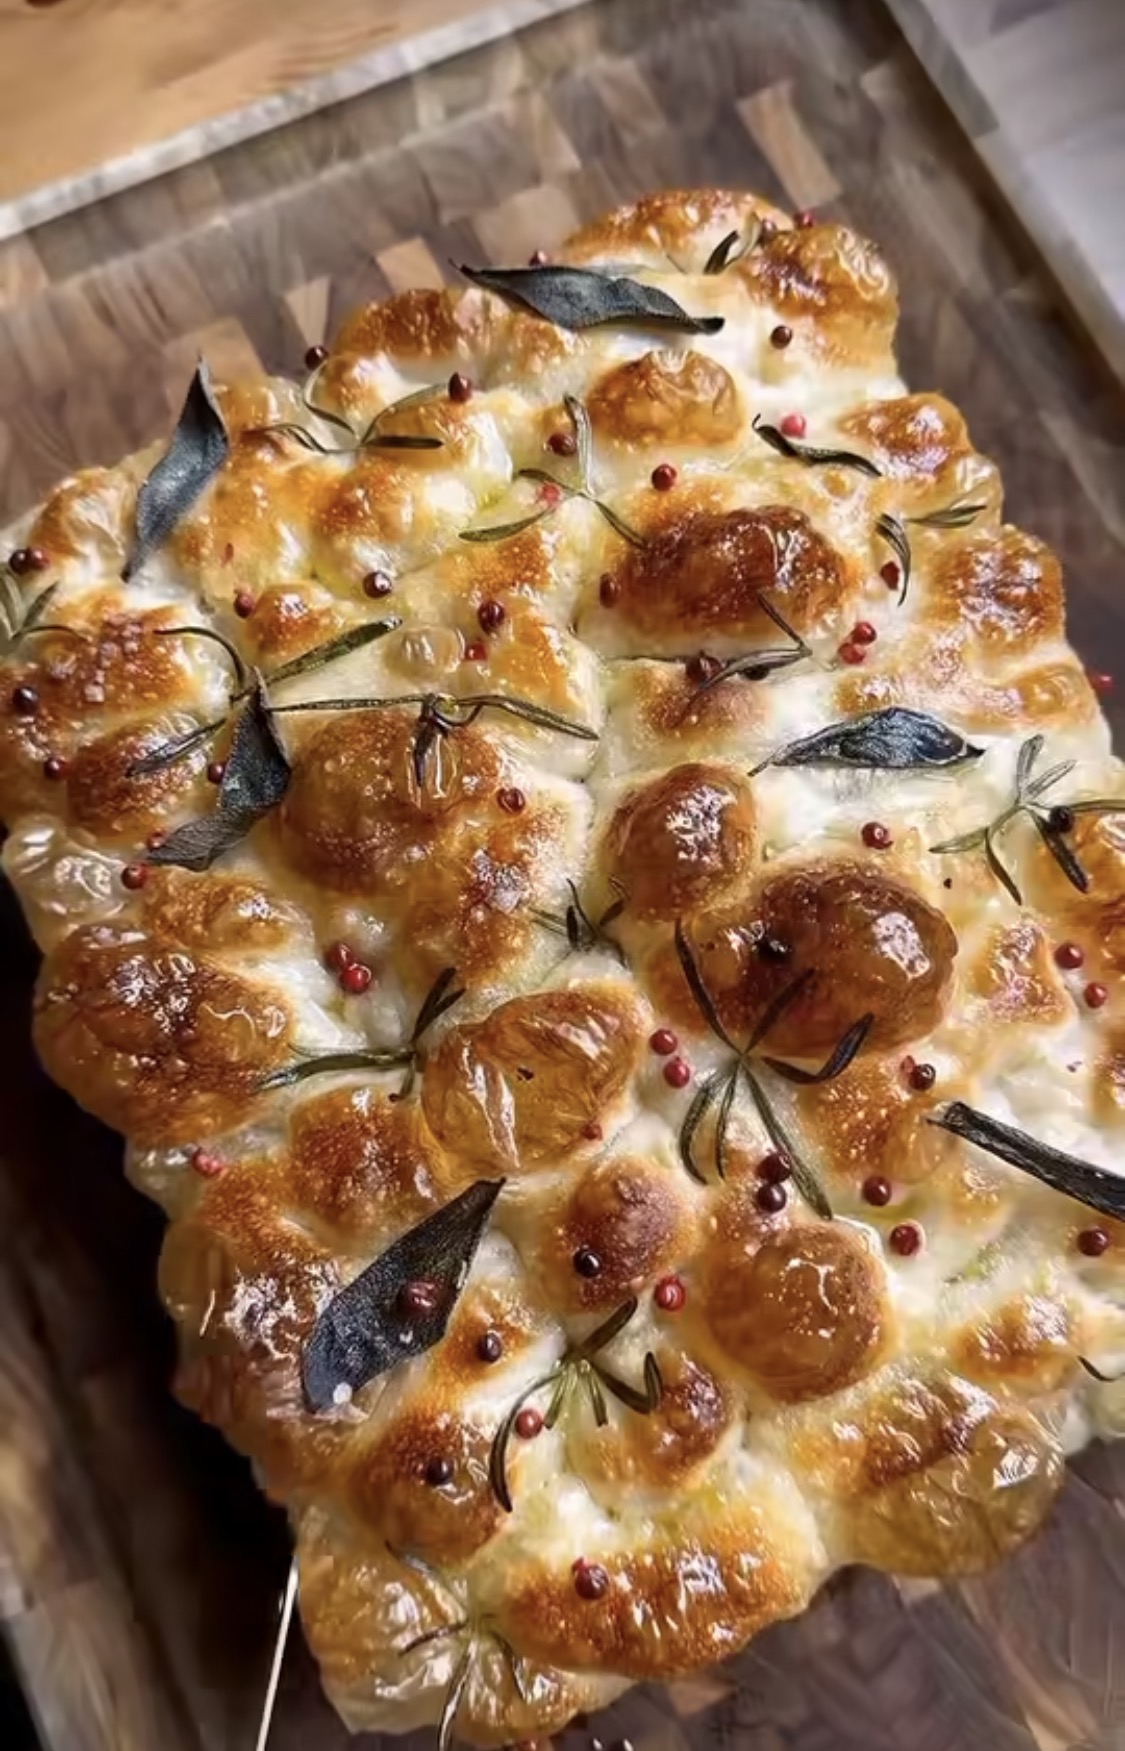
- Fresh sage leaves
- Fresh rosemary
- Pink peppercorns
- Smoked sea salt
Understanding the Ingredients
Bread Flour
Bread flour has a higher protein content than all-purpose flour, which allows for stronger gluten development. This is essential for achieving the chewy texture and open crumb typical of artisan bread.
Water
Water hydrates the flour and activates gluten formation. The hydration level in this recipe is relatively high, resulting in a moist, airy crumb.
Levain
Levain is a naturally fermented mixture of flour and water containing wild yeast and bacteria. It acts as the leavening agent, replacing commercial yeast and providing depth of flavor.
Salt
Salt strengthens gluten, enhances flavor, and regulates fermentation. It is a crucial ingredient that should never be omitted.
Herbs and Toppings
Fresh sage and rosemary bring earthy, aromatic notes, while pink peppercorns add a subtle sweetness and mild spice. Smoked sea salt enhances the overall flavor with a hint of smokiness.
Equipment You Will Need
- Large mixing bowl
- Dough scraper
- Kitchen scale
- Clean towel or plastic wrap
- Proofing basket (optional but recommended)
- Dutch oven or baking stone
- Sharp blade or bread lame
- Parchment paper
Step 1: Preparing the Levain
Before starting the dough, ensure your levain is active and ready. Feed your sourdough starter about 4–6 hours before mixing, depending on room temperature. The levain should be bubbly, doubled in size, and pass the float test.
Step 2: Mixing the Dough
In a large bowl, combine the bread flour and water. Mix until no dry flour remains. This mixture will be sticky and shaggy. Cover and let it rest for 30 minutes. This step is called autolyse, and it allows the flour to fully hydrate, improving gluten development.
After the rest period, add the levain and mix thoroughly. Once incorporated, add the salt and continue mixing until the dough becomes cohesive.
Step 3: Bulk Fermentation
Bulk fermentation is the stage where the dough rises and develops flavor. Cover the bowl and let the dough rest at room temperature for 3 to 5 hours.
During this time, perform stretch and folds every 30–45 minutes during the first 2 hours. To do this, gently pull one side of the dough upward and fold it over itself. Rotate the bowl and repeat on all sides.
This process strengthens the dough without kneading and helps build structure.
Step 4: Incorporating the Herbs
After the first hour of bulk fermentation, gently incorporate the herbs. Flatten the dough slightly and sprinkle chopped rosemary, whole sage leaves, and lightly crushed pink peppercorns over the surface. Fold the dough to distribute them evenly.
Be careful not to overwork the dough, as you want to preserve its structure and trapped air.
Step 5: Shaping the Dough
Once bulk fermentation is complete, turn the dough onto a lightly floured surface. Shape it into a round by folding the edges toward the center.
Let it rest for 20 minutes, then perform a final shaping to create surface tension. This helps the loaf hold its shape during baking.
Place the shaped dough seam-side up in a floured proofing basket or bowl lined with a towel.
Step 6: Final Proof
Cover the dough and let it proof for 2–3 hours at room temperature, or overnight in the refrigerator for a slower fermentation and enhanced flavor.
The dough is ready when it has risen slightly and springs back slowly when pressed.
Step 7: Preparing for Baking
Preheat your oven to 250°C (480°F) with a Dutch oven inside for at least 30–45 minutes. This ensures even heat distribution and helps create steam, which is essential for a crisp crust.
Step 8: Scoring and Baking
Turn the dough onto parchment paper. Score the top using a sharp blade. This allows the bread to expand properly during baking.
Sprinkle smoked sea salt and additional herbs on top if desired.
Carefully transfer the dough into the hot Dutch oven. Cover with the lid and bake for 20 minutes. Then remove the lid and bake for another 20–25 minutes until the crust is deep golden brown.
Step 9: Cooling
Remove the bread from the oven and let it cool completely on a wire rack. This step is crucial, as the interior continues to set during cooling.
Cutting the bread too early may result in a gummy texture.
Tips for Success
Maintain Proper Hydration
If your dough feels too sticky, resist the urge to add more flour immediately. High hydration is key to achieving an open crumb.
Control Temperature
Fermentation speed depends on temperature. Warmer environments accelerate the process, while cooler conditions slow it down.
Use Fresh Herbs
Fresh herbs provide better flavor and aroma than dried ones in this recipe.
Practice Patience
Artisan bread requires time and attention. Rushing any step can affect the final result.
Flavor Variations
This recipe is highly adaptable. You can experiment with different flavor combinations:
- Garlic and thyme for a savory twist
- Olives and oregano for a Mediterranean feel
- Sun-dried tomatoes and basil for a rich, tangy flavor
Serving Suggestions
This artisan herb bread pairs beautifully with a variety of dishes:
- Serve alongside soups and stews
- Use it as a base for sandwiches
- Enjoy with olive oil and balsamic vinegar
- Pair with cheese boards
Storage and Shelf Life
Store the bread at room temperature in a paper bag or wrapped in a clean towel. Avoid plastic, as it can soften the crust.
The bread will stay fresh for 2–3 days. For longer storage, slice and freeze it, then toast slices as needed.
Troubleshooting
Dense Bread
This may be caused by under-fermentation or weak levain.
Flat Loaf
Over-proofing can lead to a lack of structure.
Thick Crust
Baking too long or at too high a temperature can result in an overly thick crust.
Conclusion
Baking artisan bread with herbs is a rewarding experience that combines technique, patience, and creativity. With practice, you will develop an intuitive understanding of the dough and fermentation process, allowing you to create consistently beautiful loaves.
This recipe offers a perfect balance of rustic texture and aromatic flavor, making it an excellent addition to your baking repertoire. Whether you are baking for yourself or sharing with others, this herb-infused artisan bread is sure to impress and satisfy.
Take your time, enjoy the process, and embrace the art of bread making.