
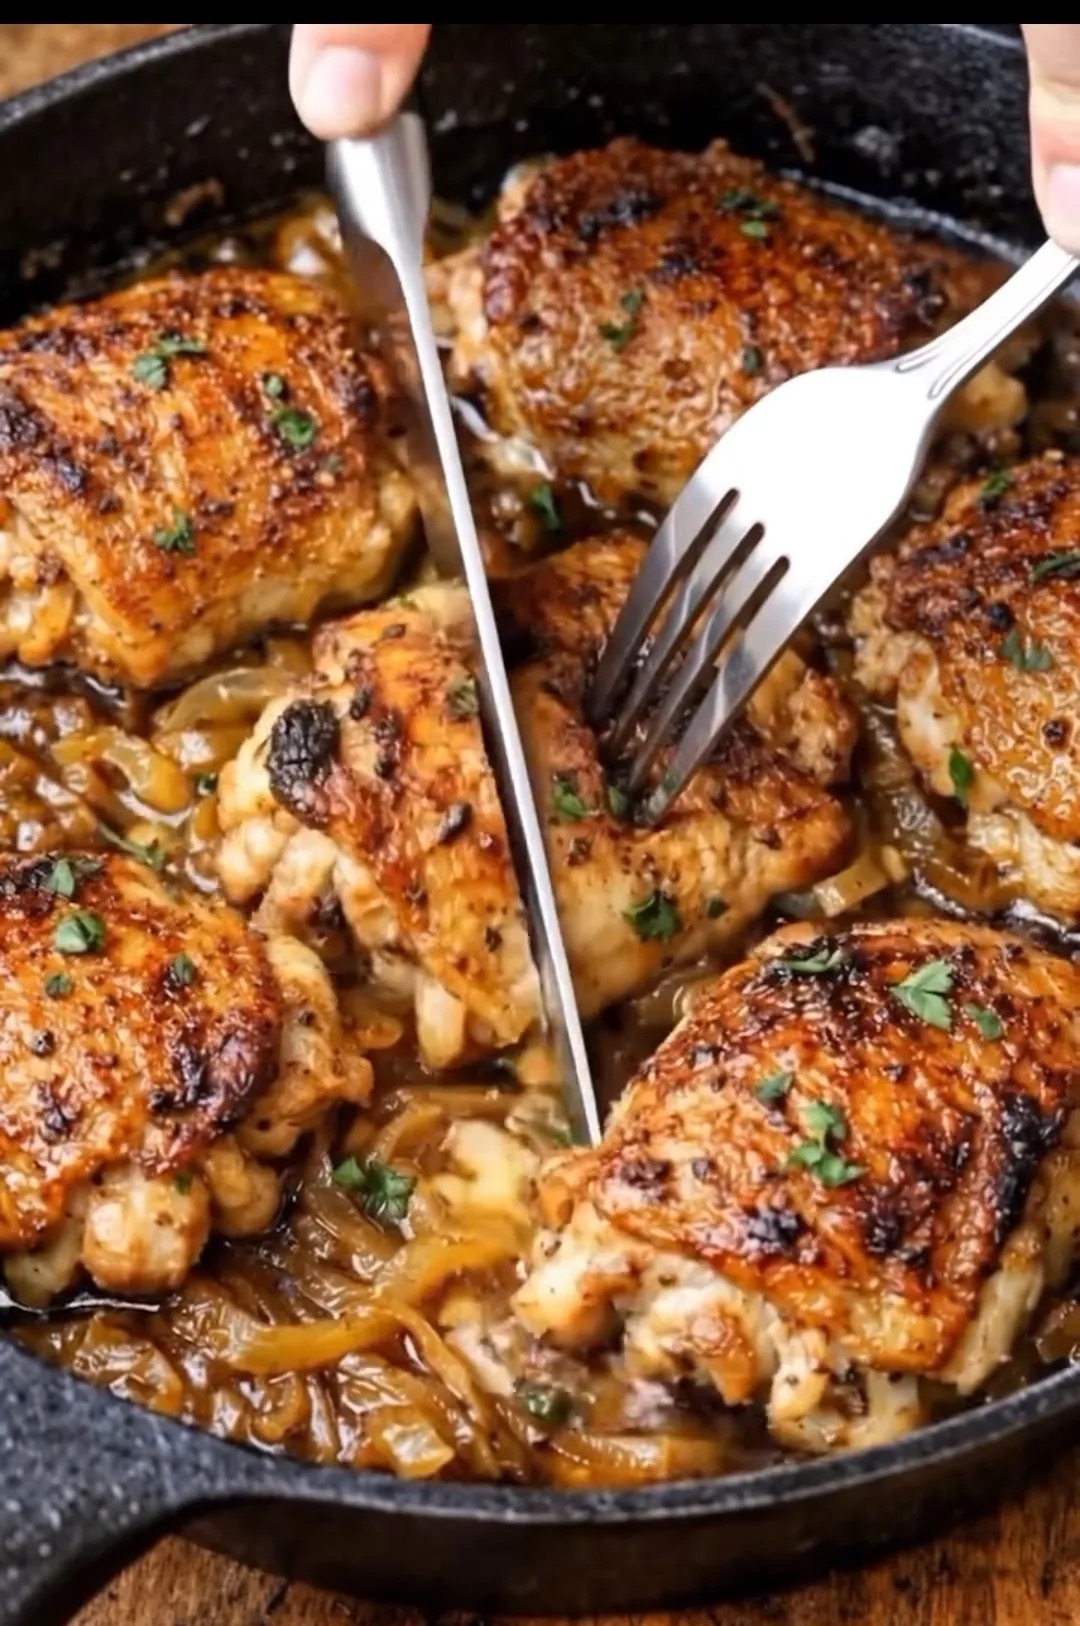
Pan-Seared Chicken Thighs with Caramelized Onions
A Complete, In-Depth Recipe Guide for a Perfectly Rich and Comforting Dish
Introduction
Pan-seared chicken thighs with caramelized onions is one of those timeless dishes that brings together simplicity and deep, satisfying flavor. It is a recipe rooted in technique rather than complexity, where each step builds layers of taste—from the crispy, golden-brown skin of the chicken to the slow-cooked sweetness of the onions.
This dish is ideal for both beginner cooks looking to master foundational skills and experienced home chefs who appreciate the beauty of classic cooking methods. With just a handful of ingredients and the right approach, you can create a meal that feels elegant, comforting, and deeply rewarding.
In this comprehensive guide, you will learn not only how to prepare this dish but also why each step matters. Understanding the science and technique behind cooking will elevate your results and give you confidence in the kitchen.
Why Chicken Thighs Are the Best Choice
When it comes to flavor and texture, chicken thighs outperform chicken breasts in many ways. They are naturally richer due to their higher fat content, which keeps them juicy during cooking and prevents them from drying out.
Bone-in, skin-on chicken thighs are especially ideal for this recipe. The skin crisps beautifully when seared, while the bone helps retain moisture and adds depth of flavor. As the chicken cooks, it releases flavorful juices that enhance the onions and create a natural sauce.
The Magic of Caramelized Onions
Caramelized onions are the heart of this dish. Unlike simply sautéed onions, caramelized onions are cooked slowly over moderate heat, allowing their natural sugars to break down and develop a deep golden-brown color.
This process transforms sharp, pungent onions into something soft, sweet, and complex. Their flavor balances the savory richness of the chicken and creates a luxurious base that ties the entire dish together.
Patience is key here. Proper caramelization takes time, but the result is worth every minute.
Ingredients
Main Ingredients
- 6 bone-in, skin-on chicken thighs
- 3 large yellow onions, thinly sliced
- 3 tablespoons olive oil
- 2 tablespoons unsalted butter
- 3 cloves garlic, minced
- 1 teaspoon salt (adjust to taste)
- 1/2 teaspoon black pepper
- 1 teaspoon paprika
- 1/2 teaspoon dried thyme (or 1 teaspoon fresh thyme)
- 1/2 teaspoon dried rosemary (optional)
Optional Additions for Extra Flavor
- 1/2 cup chicken broth
- 1 tablespoon balsamic vinegar or white wine vinegar
- 1 teaspoon sugar (to help onions caramelize, if needed)
- Fresh parsley for garnish
Equipment Needed
- Large heavy-bottom skillet or cast iron pan
- Tongs
- Wooden spoon
- Knife and cutting board
A cast iron skillet is highly recommended because it retains heat evenly and helps achieve a perfect sear on the chicken.
Preparation Steps
1. Preparing the Chicken
Start by patting the chicken thighs dry with paper towels. This is a crucial step because moisture prevents proper browning. Dry skin ensures a crisp, golden crust when seared.
Season both sides of the chicken generously with salt, pepper, paprika, thyme, and rosemary. Allow the chicken to sit at room temperature for about 15–20 minutes before cooking. This helps it cook more evenly.
2. Slicing the Onions
Slice the onions thinly and evenly. Uniform slices ensure consistent cooking and prevent some pieces from burning while others remain undercooked.
Cooking Process
Step 1: Searing the Chicken
Heat 2 tablespoons of olive oil in a large skillet over medium-high heat. Once the oil is hot but not smoking, place the chicken thighs skin-side down in the pan.
Do not overcrowd the pan. If necessary, cook in batches.
Let the chicken cook undisturbed for about 7–10 minutes. This allows the skin to render its fat and become crispy. Avoid moving the chicken too early, as this will prevent proper browning.
Flip the chicken and cook for another 5–7 minutes on the other side. Once done, remove the chicken from the pan and set aside. It does not need to be fully cooked at this stage, as it will finish cooking later.
Step 2: Building the Onion Base
Reduce the heat to medium and add butter to the same pan. Once melted, add the sliced onions.
Stir to coat the onions in the remaining chicken fat and butter. Add a pinch of salt to help draw out moisture.
Cook the onions slowly, stirring occasionally. After about 10 minutes, they will begin to soften. Continue cooking for another 20–30 minutes, stirring frequently.
As the onions cook, they will gradually turn golden brown and develop a sweet aroma. If they start to stick or burn, add a small splash of water or broth to deglaze the pan.
If desired, add a small amount of sugar to enhance caramelization, though this is optional.
Step 3: Adding Garlic and Deglazing
Once the onions are deeply caramelized, add the minced garlic and cook for about 1 minute until fragrant.
At this stage, you can deglaze the pan with chicken broth, balsamic vinegar, or a splash of white wine. Scrape up the browned bits from the bottom of the pan, as they are packed with flavor.
Step 4: Returning the Chicken to the Pan
Place the chicken thighs back into the skillet, nestling them into the onions.
Reduce the heat to low, cover the pan, and let the chicken cook for another 20–25 minutes. This allows the flavors to meld together and ensures the chicken is fully cooked.
The internal temperature of the chicken should reach 75°C (165°F).
Final Touches
Once the chicken is cooked through, taste the onions and adjust seasoning as needed.
For a fresh finish, sprinkle chopped parsley over the dish. This adds a pop of color and a light herbal note that balances the richness.
Serving Suggestions
This dish pairs beautifully with a variety of sides. Here are some ideas:
- Creamy mashed potatoes
- Steamed rice or pilaf
- Crusty bread to soak up the sauce
- Roasted vegetables such as carrots or green beans
The caramelized onions create a natural sauce that complements starchy sides perfectly.
Tips for Success
1. Do Not Rush the Onions
Caramelization is a slow process. Cooking onions too quickly will result in burning rather than proper browning.
2. Use Moderate Heat
High heat can ruin both the chicken and the onions. Maintain a steady, moderate temperature throughout.
3. Let the Chicken Rest
Allow the chicken to rest for a few minutes before serving. This helps retain its juices.
4. Avoid Overcrowding
Cooking too many pieces at once lowers the pan temperature and prevents proper searing.
Variations
1. Creamy Version
Add a splash of heavy cream at the end for a richer sauce.
2. Spicy Twist
Include chili flakes or cayenne pepper for a bit of heat.
3. Herb-Forward Flavor
Use fresh herbs such as thyme, rosemary, and sage for a more aromatic profile.
4. Mediterranean Style
Add olives, lemon zest, and a touch of oregano for a Mediterranean-inspired variation.
Storage and Reheating
Storage
Store leftovers in an airtight container in the refrigerator for up to 3 days.
Reheating
Reheat gently on the stovetop over low heat. Add a splash of water or broth to prevent drying out.
Avoid microwaving if possible, as it can make the chicken rubbery.
Nutritional Overview
Chicken thighs provide a good source of protein, iron, and essential vitamins. While they contain more fat than chicken breasts, this fat contributes to flavor and satiety.
Caramelized onions add natural sweetness without the need for added sugars, making this dish both satisfying and balanced.
Common Mistakes to Avoid
- Not drying the chicken before searing
- Cooking onions too quickly
- Skipping the deglazing step
- Overcooking the chicken
Each of these can impact the final flavor and texture of the dish.
Conclusion
Pan-seared chicken thighs with caramelized onions is a dish that showcases how simple ingredients can be transformed through proper technique. From the crispy skin of the chicken to the deep sweetness of the onions, every element works in harmony to create a comforting and flavorful meal.
By taking the time to understand each step and focusing on quality execution, you can consistently achieve restaurant-level results at home. Whether you are cooking for family, guests, or simply for yourself, this dish is sure to impress and satisfy.
Once mastered, it can easily become a staple in your cooking repertoire—a reliable and delicious recipe you return to again and again.