
Bakery-Style Giant Chocolate Chip Cookies (Quick Version)
Few desserts are as universally loved as a classic chocolate chip cookie. Soft in the center, slightly crisp at the edges, and loaded with rich chocolate chips, these bakery-style giant cookies take everything you love about the traditional version and elevate it to a whole new level. This recipe is designed to help you recreate thick, indulgent, bakery-quality cookies right in your own kitchen using simple ingredients and straightforward techniques.
In this comprehensive guide, you will learn not only how to make these cookies, but also the science behind each step. Understanding the “why” behind the method will allow you to consistently produce perfect results and even customize the recipe to suit your preferences.
What Makes Bakery-Style Cookies Different
Bakery-style cookies are distinct from regular homemade cookies in several ways:
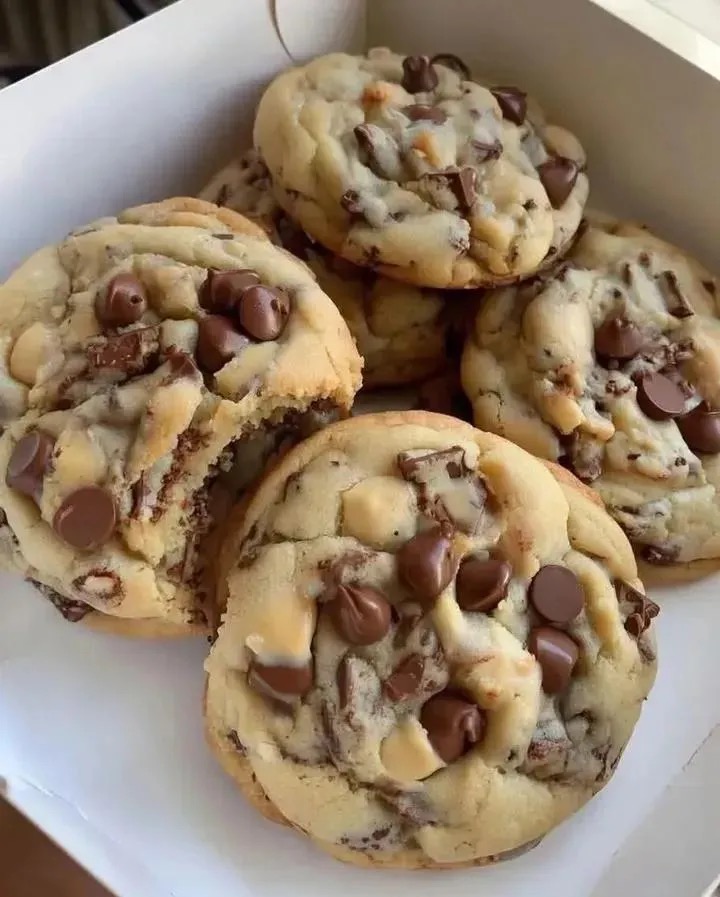
- Larger size – These cookies are significantly bigger, often two to three times the size of standard cookies.
- Thicker texture – They are tall and dense rather than thin and flat.
- Soft centers – The inside remains soft and slightly underbaked for a gooey texture.
- Crisp edges – The outside develops a golden crust for contrast.
Achieving this balance requires careful attention to ingredients, mixing techniques, and baking methods.
Ingredients Overview
Dry Ingredients
- 2 1/4 cups all-purpose flour
- 1 1/2 teaspoons cornstarch
- 1 teaspoon baking soda
- 1/2 teaspoon salt
Wet Ingredients
- 3/4 cup butter
- 3/4 cup brown sugar
- 1/2 cup granulated sugar
- 2 eggs
- 1 teaspoon vanilla extract
- 1 1/2 cups chocolate chips
Understanding the Role of Each Ingredient
Flour
Flour provides structure. The amount used in this recipe ensures the cookies are thick and hold their shape during baking. Too little flour results in flat cookies, while too much creates a dry texture.
Cornstarch
Cornstarch is a key ingredient for achieving a soft, tender texture. It helps break down gluten formation, resulting in cookies that are soft in the center and slightly chewy.
Baking Soda
Baking soda acts as a leavening agent. It helps the cookies rise slightly and contributes to their golden-brown color.
Salt
Salt enhances the flavor of the cookies and balances the sweetness. Even a small amount makes a noticeable difference.
Butter
Butter adds richness and flavor. Using softened butter allows it to cream properly with the sugars, creating a smooth and airy base.
Brown Sugar and Granulated Sugar
The combination of sugars is essential:
- Brown sugar adds moisture and a slight caramel flavor.
- Granulated sugar contributes to crisp edges.
Eggs
Eggs provide structure and moisture. They also help bind the ingredients together.
Vanilla Extract
Vanilla enhances the overall flavor and adds warmth to the cookies.
Chocolate Chips
Chocolate chips are the highlight of the recipe. Use high-quality chocolate for the best results. You can also mix different types, such as milk, dark, or semi-sweet chocolate.
Step-by-Step Instructions
Step 1: Prepare Your Ingredients
Before you begin, ensure all ingredients are at room temperature. This is especially important for butter and eggs, as it allows for smoother mixing and better texture.
Preheat your oven to 180°C (350°F) and line a baking sheet with parchment paper.
Step 2: Mix the Dry Ingredients
In a medium bowl, whisk together:
- Flour
- Cornstarch
- Baking soda
- Salt
Whisking ensures the ingredients are evenly distributed, preventing uneven baking.
Step 3: Cream the Butter and Sugars
In a large mixing bowl, combine softened butter, brown sugar, and granulated sugar.
Using a hand mixer or stand mixer, beat the mixture for 2–3 minutes until it becomes light and fluffy. This step is crucial, as it incorporates air into the dough, contributing to the cookies’ texture.
Step 4: Add Eggs and Vanilla
Add the eggs one at a time, mixing well after each addition. Then add the vanilla extract.
Mix until the ingredients are fully incorporated and the mixture is smooth.
Step 5: Combine Wet and Dry Ingredients
Gradually add the dry ingredients to the wet mixture. Mix on low speed or by hand until just combined.
Avoid overmixing, as this can develop too much gluten and result in tough cookies.
Step 6: Fold in Chocolate Chips
Gently fold in the chocolate chips using a spatula. Ensure they are evenly distributed throughout the dough.
For an extra bakery-style appearance, reserve a few chocolate chips to press onto the tops of the cookies before baking.
Step 7: Shape the Dough
Divide the dough into large portions, about 1/3 to 1/2 cup each. Roll them into balls and place them on the prepared baking sheet.
Leave enough space between each cookie, as they will spread slightly during baking.
For thicker cookies, keep the dough balls tall rather than flattening them.
Step 8: Chill the Dough (Optional but Recommended)
For best results, chill the dough for at least 30–60 minutes. Chilling helps:
- Enhance flavor
- Prevent excessive spreading
- Create thicker cookies
If you are short on time, you can skip this step, but the texture may be slightly different.
Step 9: Bake the Cookies
Bake in the preheated oven for 12–15 minutes, or until:
- The edges are golden brown
- The centers look slightly underbaked
Do not overbake. The cookies will continue to cook on the baking sheet after being removed from the oven.
Step 10: Cool and Serve
Allow the cookies to cool on the baking sheet for 5–10 minutes before transferring them to a wire rack.
This resting period helps them set and develop their final texture.
Serve warm for the best experience, when the chocolate chips are still melted and gooey.
Tips for Perfect Bakery-Style Cookies
Use High-Quality Ingredients
The simplicity of this recipe means that each ingredient plays an important role. High-quality butter and chocolate can significantly improve the final result.
Measure Accurately
Baking is precise. Use proper measuring cups and level off dry ingredients to avoid inconsistencies.
Do Not Overmix
Overmixing the dough can lead to dense, tough cookies. Mix just until the ingredients are combined.
Chill the Dough
Although optional, chilling the dough is one of the most effective ways to improve texture and flavor.
Bake One Tray at a Time
For even baking, place one tray in the center of the oven rather than baking multiple trays at once.
Variations and Customizations
Double Chocolate Cookies
Add cocoa powder to the dough and use chocolate chunks instead of chips for a richer flavor.
Nutty Chocolate Chip Cookies
Incorporate chopped walnuts or pecans for added crunch.
Stuffed Cookies
Place a piece of chocolate, caramel, or spread inside each dough ball for a surprise filling.
Sea Salt Topping
Sprinkle a small amount of flaky sea salt on top of the cookies before baking to enhance flavor.
Storage and Shelf Life
Room Temperature
Store cookies in an airtight container at room temperature for up to 4 days.
Refrigeration
Refrigeration is not necessary but can extend freshness slightly.
Freezing Dough
You can freeze the dough balls for up to 3 months. Bake directly from frozen, adding a few extra minutes to the baking time.
Freezing Baked Cookies
Baked cookies can also be frozen and reheated in the oven for a fresh-baked taste.
Troubleshooting Common Issues
Cookies Spread Too Much
- Butter may be too soft
- Dough was not chilled
- Too little flour was used
Cookies Are Too Dry
- Overbaking
- Too much flour
Cookies Are Too Dense
- Overmixing the dough
- Not enough leavening
Serving Ideas
These giant cookies are perfect for:
- Dessert platters
- Celebrations and gatherings
- Gift boxes
- Afternoon snacks with coffee or milk
You can also crumble them over ice cream or use them to make ice cream sandwiches.
Final Thoughts
Bakery-style giant chocolate chip cookies are a timeless treat that never fails to impress. With their thick, soft centers and rich chocolate flavor, they offer a comforting and indulgent experience that is hard to resist.
This quick version simplifies the process without compromising quality, making it accessible for both beginners and experienced bakers. By following the steps and tips outlined in this guide, you can consistently create cookies that look and taste like they came straight from a professional bakery.
Once you master the basic recipe, feel free to experiment with flavors, textures, and add-ins to make it uniquely your own. Whether enjoyed fresh out of the oven or shared with others, these cookies are sure to become a favorite in your recipe collection.