
Cheeseburger Stuffed Buns
Soft, Buttery Bread Filled With Juicy Cheeseburger Flavor
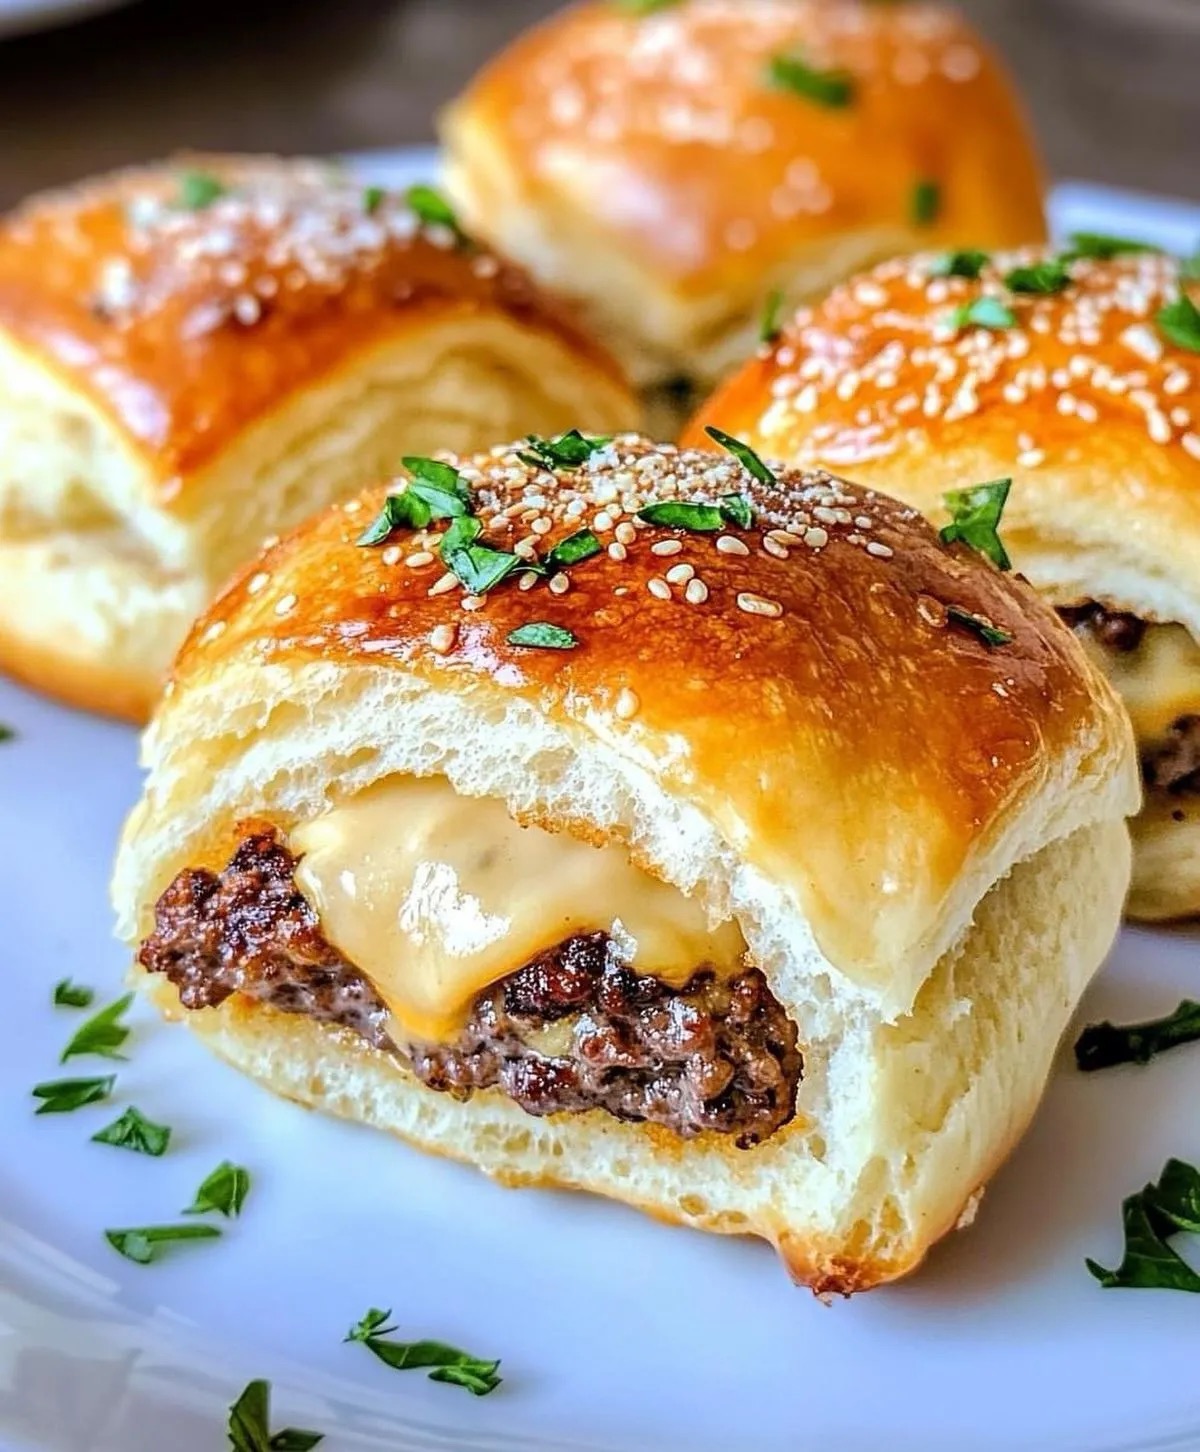
There are few foods more comforting than a classic cheeseburger, and few things more satisfying than freshly baked bread. Cheeseburger stuffed buns bring these two favorites together in one irresistible bite. Soft, fluffy dough wrapped around a savory beef filling, melted cheese, and classic burger seasonings creates a handheld meal that feels both nostalgic and exciting. These buns are perfect for family dinners, weekend baking projects, game-day snacks, lunchboxes, or party appetizers.
What makes cheeseburger stuffed buns so appealing is their versatility. They can be served warm straight from the oven, packed for lunch, or reheated later without losing their flavor or texture. Unlike traditional burgers, these buns are neat, portable, and easy to serve. They also freeze beautifully, making them a great make-ahead option.
This recipe walks you through every step in detail, from preparing a soft yeast dough to cooking a flavorful cheeseburger filling and shaping the buns so they bake evenly and look beautiful. Even if you are new to baking with yeast, the instructions are written to guide you confidently through the process.
Ingredients
For the Dough
- 3 cups all-purpose flour
- 2¼ teaspoons instant yeast (1 packet)
- 2 tablespoons sugar
- 1 teaspoon salt
- 1 cup warm milk (about 105–110°F / 40–43°C)
- 2 tablespoons butter, melted
- 1 large egg
This dough is soft, slightly enriched, and easy to work with. The milk, butter, and egg create a tender crumb, while the sugar helps activate the yeast and adds a subtle sweetness that balances the savory filling.
For the Cheeseburger Filling
- 1 pound (450 g) ground beef
- 1 small onion, finely diced
- 2 cloves garlic, minced
- 1 teaspoon salt
- ½ teaspoon black pepper
- 1 teaspoon paprika
- 1 teaspoon mustard (yellow or Dijon)
- 2 tablespoons ketchup
- 1 tablespoon Worcestershire sauce
- 1½ cups shredded cheddar cheese (or American cheese, mozzarella, or a blend)
This filling captures the classic cheeseburger flavor profile. The onion and garlic add depth, while ketchup, mustard, and Worcestershire sauce give the beef that familiar burger taste.
For Topping (Optional)
- 1 egg, beaten (for egg wash)
- 1 tablespoon sesame seeds
The egg wash gives the buns a glossy, golden finish, while sesame seeds add visual appeal and a subtle nutty flavor reminiscent of burger buns.
Step-by-Step Instructions
Step 1: Prepare the Dough
In a large mixing bowl, combine the flour, instant yeast, sugar, and salt. Stir well to distribute the yeast evenly throughout the flour. This step is important to ensure even rising and consistent texture.
In a separate bowl, mix the warm milk, melted butter, and egg. Make sure the milk is warm but not hot, as excessive heat can kill the yeast. The ideal temperature feels warm to the touch but comfortable, similar to warm bath water.
Gradually add the wet ingredients to the dry ingredients, mixing with a spoon or spatula until a shaggy dough forms. Once the dough comes together, transfer it to a lightly floured surface.
Knead the dough for about 8 to 10 minutes by hand, or 5 to 6 minutes using a stand mixer with a dough hook. The dough should become smooth, elastic, and slightly tacky but not sticky. If the dough feels too wet, add a tablespoon of flour at a time. If it feels too dry, add a teaspoon of milk as needed.
Form the dough into a ball and place it in a lightly greased bowl, turning once to coat all sides. Cover with plastic wrap or a clean kitchen towel.
Let the dough rise in a warm, draft-free place for about 1 to 1½ hours, or until doubled in size.
Step 2: Make the Cheeseburger Filling
While the dough is rising, prepare the filling. Heat a large skillet over medium heat and add the ground beef. Cook the beef, breaking it up with a spoon, until it is browned and no longer pink.
Add the diced onion and cook for 3 to 4 minutes, until softened. Stir in the garlic and cook for another 30 seconds, just until fragrant.
Season the beef mixture with salt, pepper, paprika, mustard, ketchup, and Worcestershire sauce. Stir well to combine all the flavors. Continue cooking for 2 to 3 minutes to allow the sauce to thicken slightly and coat the meat evenly.
Remove the skillet from the heat and allow the filling to cool completely. This step is crucial. Adding hot filling to the dough can cause the dough to become sticky and difficult to shape, and it may interfere with proper rising.
Once cooled, stir in the shredded cheese. Set the filling aside.
Step 3: Divide and Shape the Dough
After the dough has doubled in size, gently punch it down to release excess air. Transfer it to a lightly floured surface and divide it into equal portions. Depending on your preference, you can make 10 to 12 medium-sized buns or 14 to 16 smaller buns.
Roll each portion into a smooth ball, then flatten it into a circle about 4 to 5 inches in diameter. Keep the edges slightly thinner than the center, which helps with sealing.
Step 4: Fill the Buns
Place a generous spoonful of the cheeseburger filling in the center of each dough circle. Be careful not to overfill, as this can make sealing difficult.
Bring the edges of the dough up around the filling, pinching them together firmly to seal. Make sure there are no gaps or holes where filling could leak out during baking.
Place each bun seam-side down on a baking sheet lined with parchment paper, leaving enough space between buns for expansion.
Step 5: Second Rise
Cover the shaped buns loosely with a clean kitchen towel and let them rise for 30 to 40 minutes, until slightly puffed. This second rise helps create a light, fluffy texture in the finished buns.
Step 6: Bake the Buns
Preheat your oven to 375°F (190°C).
If using egg wash, brush the tops of the buns gently with beaten egg. Sprinkle with sesame seeds if desired.
Bake the buns for 18 to 22 minutes, or until they are golden brown and sound hollow when lightly tapped. Baking time may vary slightly depending on the size of your buns and your oven.
Remove the buns from the oven and allow them to cool slightly on a wire rack before serving.
Serving Suggestions
Cheeseburger stuffed buns are incredibly versatile and can be served in many ways:
- As a main dish with a simple green salad or roasted vegetables
- As a snack or appetizer for parties and gatherings
- Packed in lunchboxes for school or work
- Served with dipping sauces such as ketchup, mustard, burger sauce, or ranch
They are best enjoyed warm, when the cheese is still soft and melty, but they are equally delicious at room temperature.
Tips for Perfect Cheeseburger Stuffed Buns
- Cool the filling completely before assembling the buns to prevent soggy dough.
- Seal the dough tightly to keep the filling inside during baking.
- Do not overfill; less is better for neat, evenly baked buns.
- Weigh the dough portions if you want perfectly uniform buns.
- Use parchment paper to prevent sticking and make cleanup easier.
Variations and Customizations
One of the best things about this recipe is how easy it is to customize.
Cheese Options
Cheddar is classic, but you can use mozzarella, Colby Jack, Monterey Jack, American cheese, or a blend for different flavors.
Meat Alternatives
Ground turkey or chicken can be used instead of beef. Adjust seasoning as needed since lean meats benefit from extra moisture and flavor.
Vegetarian Version
Replace the beef with seasoned mushrooms, lentils, or a plant-based meat substitute. Add extra cheese for richness.
Bacon Cheeseburger Buns
Add cooked, crumbled bacon to the filling for a smoky twist.
Spicy Version
Mix in chopped jalapeños, hot sauce, or pepper jack cheese for heat.
Make-Ahead and Storage Instructions
Refrigeration
Store leftover buns in an airtight container in the refrigerator for up to 3 days. Reheat in the oven at 350°F (175°C) for 8 to 10 minutes, or until warmed through.
Freezing
Cheeseburger stuffed buns freeze exceptionally well. Allow them to cool completely, then wrap each bun tightly in plastic wrap and place in a freezer-safe bag. Freeze for up to 2 months.
To reheat from frozen, thaw overnight in the refrigerator or reheat directly in the oven at 350°F (175°C) for 15 to 20 minutes.
Frequently Asked Questions
Can I use active dry yeast instead of instant yeast?
Yes. Dissolve the active dry yeast in the warm milk with the sugar and let it sit for 5 to 10 minutes until foamy before proceeding with the recipe.
Why did my buns leak filling?
This usually happens if the dough is not sealed properly or if the buns are overfilled. Make sure the seams are pinched tightly and placed seam-side down.
Can I make the dough ahead of time?
Yes. The dough can be prepared and refrigerated overnight after the first rise. Bring it to room temperature before shaping.
Can these be made smaller for appetizers?
Absolutely. Divide the dough into smaller portions and reduce baking time slightly.
Final Thoughts
Cheeseburger stuffed buns are the perfect example of comfort food done right. They combine familiar flavors with the satisfaction of homemade bread, resulting in a dish that feels special without being complicated. Whether you are baking for your family, entertaining guests, or simply enjoying a weekend cooking project, these buns are sure to become a favorite.
With their soft texture, savory filling, and endless customization options, cheeseburger stuffed buns deserve a spot in your regular baking rotation. Once you try them, you may find yourself coming back to this recipe again and again.