
Classic Homemade Crepes: A Complete Guide to Perfect French Crepes at Home
Crepes are one of the most beloved and versatile dishes in the world of cooking. Originating from France, these thin, delicate pancakes can be served in countless ways—sweet or savory, simple or elaborate. Whether you’re preparing a cozy breakfast, an elegant brunch, or a light dessert, mastering classic homemade crepes is a skill that will elevate your cooking repertoire.
In this comprehensive guide, you’ll learn everything you need to know about making perfect crepes from scratch—from understanding the ingredients to mastering the cooking technique, troubleshooting common mistakes, and exploring delicious serving ideas.
What Are Crepes?
Crepes are very thin pancakes made from a simple batter of flour, eggs, milk, and sometimes butter. Unlike traditional pancakes, crepes do not use a leavening agent like baking powder, which is why they remain flat and flexible. This texture makes them ideal for folding or rolling around various fillings.
There are two main types of crepes:
- Sweet crepes (crêpes sucrées): Typically served with sugar, fruits, chocolate, or spreads.
- Savory crepes (crêpes salées): Often made with buckwheat flour and filled with cheese, meats, eggs, or vegetables.
This recipe focuses on classic sweet crepes made with all-purpose flour, perfect for a wide range of toppings.
Ingredients
To make classic homemade crepes, you only need a few basic ingredients:
- 2 large eggs
- 1 ½ cups milk
- 1 cup all-purpose flour
Optional additions (recommended for better flavor and texture):
- 1 tablespoon melted butter
- 1 tablespoon sugar (for sweet crepes)
- 1 teaspoon vanilla extract
- A pinch of salt
Each ingredient plays an important role in creating the perfect crepe:
- Eggs provide structure and richness.
- Milk creates a smooth, pourable batter and contributes to tenderness.
- Flour forms the base and gives the crepes their delicate structure.
- Butter adds flavor and helps prevent sticking.
- Sugar and vanilla enhance sweetness for dessert-style crepes.
- Salt balances the flavor.
Equipment You’ll Need
While crepes can be made with basic kitchen tools, having the right equipment makes the process much easier:
- A nonstick skillet or crepe pan (8–10 inches is ideal)
- A mixing bowl
- A whisk or blender
- A ladle or measuring cup
- A spatula (thin and flexible works best)
A dedicated crepe pan is helpful but not necessary. Any good nonstick pan will work well if properly heated and lightly greased.
Preparing the Batter
Step 1: Mix the Ingredients
In a large mixing bowl, whisk together the eggs and milk until well combined. Gradually add the flour while whisking continuously to avoid lumps.
If using optional ingredients, add melted butter, sugar, vanilla extract, and salt at this stage.
Step 2: Achieve the Right Consistency
The batter should be smooth and quite thin—similar to heavy cream. If it feels too thick, add a little more milk, one tablespoon at a time, until you reach the desired consistency.
A lump-free batter is essential for smooth crepes. If necessary, strain the batter through a sieve or blend it for a few seconds.
Step 3: Let the Batter Rest
Allow the batter to rest for at least 20–30 minutes at room temperature. This step is often overlooked but is crucial for:
- Relaxing the gluten in the flour
- Improving the texture of the crepes
- Ensuring even cooking
You can also refrigerate the batter for up to 24 hours if preparing in advance.
Cooking the Crepes
Step 1: Heat the Pan
Place your skillet over medium heat and allow it to warm up thoroughly. Lightly grease the surface with butter or oil, then wipe away any excess with a paper towel.
The pan should be hot but not smoking. If it’s too hot, the batter will cook too quickly and may burn.
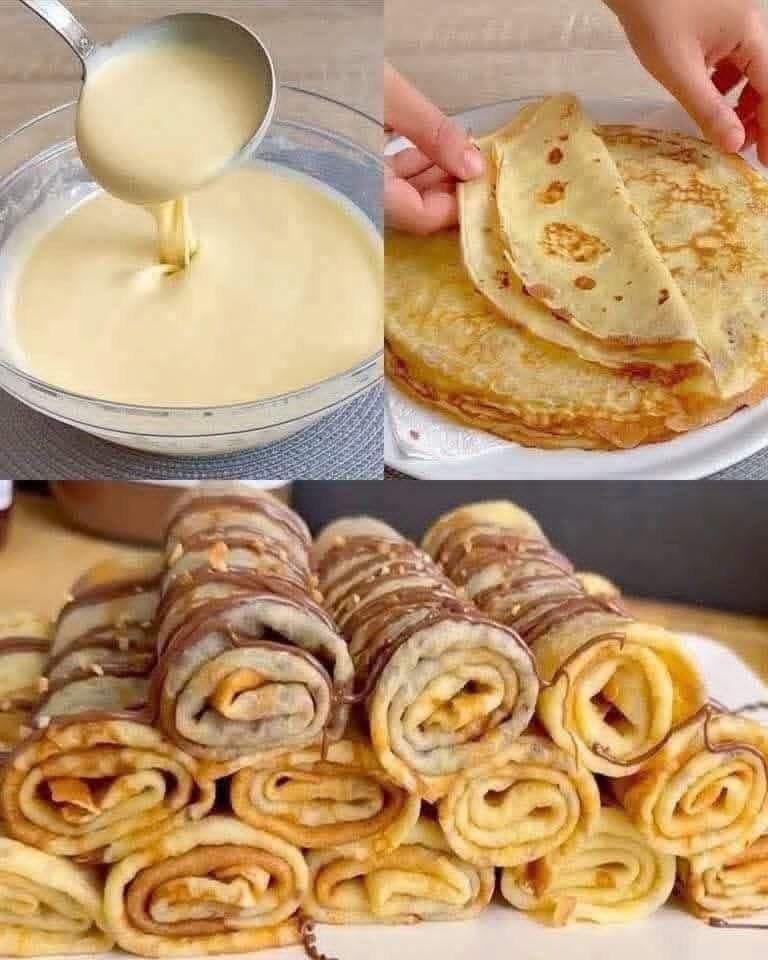
Step 2: Pour the Batter
Using a ladle or measuring cup, pour about ¼ cup of batter into the center of the pan.
Immediately tilt and rotate the pan in a circular motion to spread the batter evenly into a thin layer. This step requires a bit of practice but becomes easier with time.
Step 3: Cook the First Side
Cook the crepe for about 1–2 minutes, or until the edges begin to lift and the bottom turns lightly golden.
Step 4: Flip the Crepe
Carefully slide a spatula under the crepe and flip it. Cook the second side for another 30–60 seconds.
Step 5: Repeat
Transfer the cooked crepe to a plate and repeat the process with the remaining batter. Stack the crepes as you go; they won’t stick together.
Tips for Perfect Crepes
Making crepes is simple, but a few key tips can make a big difference:
Use the Right Heat
Medium heat works best. Too high, and the crepes burn; too low, and they won’t cook properly.
Don’t Overmix
Overmixing can develop too much gluten, making crepes slightly tough.
Adjust as You Go
If your crepes are too thick, thin the batter with a bit more milk. If they tear easily, the batter may be too thin.
Practice the Swirl
Spreading the batter evenly takes practice. Don’t worry if your first crepe isn’t perfect—it rarely is.
Grease Lightly
Too much butter or oil can make crepes greasy and uneven. A light coating is enough.
Common Mistakes and How to Fix Them
Lumpy Batter
Solution: Strain the batter or use a blender to smooth it out.
Crepes Stick to the Pan
Solution: Make sure your pan is properly heated and lightly greased.
Crepes Are Too Thick
Solution: Add more milk to thin the batter.
Crepes Tear Easily
Solution: Ensure the batter isn’t too thin and cook the crepe long enough before flipping.
Uneven Cooking
Solution: Adjust the heat and ensure the batter is spread evenly across the pan.
Serving Ideas
One of the best things about crepes is their versatility. Here are some popular ways to enjoy them:
Sweet Crepe Fillings
- Fresh fruits like strawberries, bananas, or blueberries
- Chocolate spread or melted chocolate
- Whipped cream
- Honey or maple syrup
- Powdered sugar
- Nut butters
- Yogurt and granola
You can fold crepes into triangles, roll them into cylinders, or stack them into layers for a crepe cake.
Savory Crepe Fillings
If you skip the sugar and vanilla, crepes can also be used for savory dishes:
- Cheese and ham
- Scrambled eggs and vegetables
- Chicken and mushrooms
- Spinach and cream sauce
Savory crepes make an excellent lunch or light dinner option.
Storing and Reheating Crepes
Storing in the Refrigerator
Place crepes in an airtight container or wrap them tightly in plastic wrap. They can be stored in the refrigerator for up to 3 days.
Freezing Crepes
Stack crepes with parchment paper between each layer, then store them in a freezer-safe bag for up to 2 months.
Reheating
Reheat crepes in a skillet over low heat or in the microwave for a few seconds. Avoid overheating, as this can make them dry.
Making Crepes Ahead of Time
Crepes are perfect for meal prep because they store well and reheat easily. You can:
- Make the batter the night before
- Cook all the crepes in advance
- Store them and assemble with fillings when ready to serve
This makes them ideal for hosting brunch or preparing a quick breakfast during busy mornings.
Variations to Try
Once you’ve mastered the basic recipe, you can experiment with variations:
Chocolate Crepes
Add 1–2 tablespoons of cocoa powder to the batter.
Whole Wheat Crepes
Replace part of the all-purpose flour with whole wheat flour for a nuttier flavor.
Gluten-Free Crepes
Use a gluten-free flour blend or buckwheat flour.
Flavored Crepes
Add citrus zest, cinnamon, or other spices to the batter for extra flavor.
Why Homemade Crepes Are Worth It
While store-bought options exist, homemade crepes offer unmatched freshness, flavor, and customization. You control the ingredients, adjust the sweetness, and create combinations that suit your taste perfectly.
Making crepes also becomes an enjoyable cooking ritual. With a bit of practice, the process becomes quick, relaxing, and even fun.
Final Thoughts
Classic homemade crepes are a timeless dish that combines simplicity with elegance. With just a handful of ingredients and a few basic techniques, you can create a dish that feels both comforting and sophisticated.
Whether you prefer them filled with sweet fruits and chocolate or savory ingredients like cheese and vegetables, crepes adapt beautifully to any occasion. Once you master the basics, the possibilities are endless.
Take your time, practice the technique, and enjoy the process. Before long, making perfect crepes will become second nature—and a favorite part of your cooking routine.