
Classic Southern Pecan Pralines
A Timeless Candy Recipe with Deep Roots and Foolproof Technique
Introduction
Pecan pralines are one of the most iconic confections of the American South. Rich, buttery, and generously studded with toasted pecans, these creamy candies strike the perfect balance between sweetness and nuttiness. With a texture that is soft yet slightly crumbly and a flavor that tastes like pure indulgence, pralines are as much a cultural tradition as they are a dessert.
This classic pecan praline recipe is rooted in simplicity. It uses a short list of pantry staples and relies on technique rather than complicated ingredients. While the process requires attention and patience, the result is a candy that tastes luxurious and homemade in the best possible way.
Whether you are making pralines for the holidays, as gifts, for a special event, or simply to satisfy a craving for old-fashioned candy, this recipe delivers consistent results and authentic flavor. In this guide, you will find not only step-by-step instructions but also detailed explanations, helpful tips, troubleshooting advice, and background information that will help you understand why this recipe works and how to master it.
What Are Pecan Pralines?
Pecan pralines are a type of sugar candy made by cooking sugar, butter, and milk to a specific temperature, then stirring in pecans and allowing the mixture to set into individual portions. Unlike hard candies, pralines have a creamy texture created by controlled crystallization of sugar.
The term “praline” has European origins, but the pecan praline as we know it today evolved in Louisiana, particularly in New Orleans. Early pralines were made with almonds and caramelized sugar, but as pecans became more widely available in the American South, they replaced almonds and became the defining ingredient.
Today, pecan pralines are associated with Southern hospitality, holiday celebrations, and traditional candy making. They are often sold in candy shops, gift boxes, and farmers markets, but nothing compares to the flavor and texture of pralines made fresh at home.
Why This Recipe Works
This recipe uses evaporated milk rather than cream, which provides richness without excess fat and helps achieve the proper texture. Butter contributes flavor and smoothness, while white sugar creates the classic sweetness and structure.
Cooking the mixture to the soft ball stage is essential. This temperature range allows the sugar to concentrate without turning hard or brittle. Cooling and stirring the mixture properly encourages fine sugar crystals to form, giving pralines their signature creamy consistency.
The ingredient ratios in this recipe are balanced to produce pralines that are rich but not overly sweet, firm but not hard, and packed with pecans in every bite.
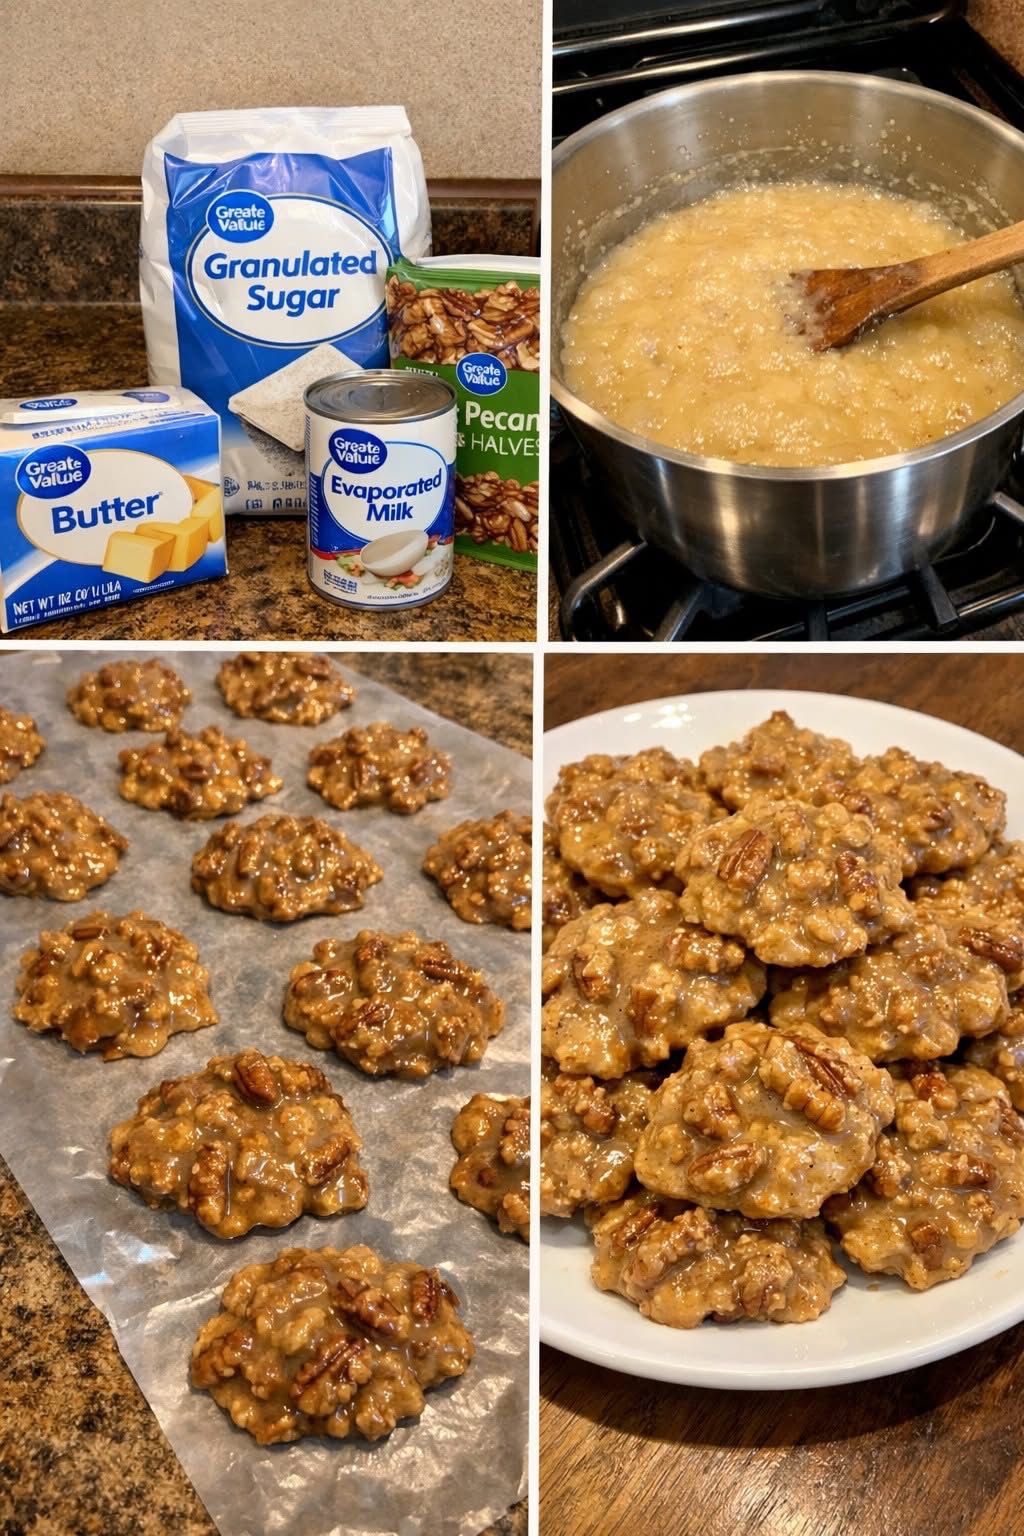
Ingredients
Butter – 4 ounces
Butter provides richness, flavor, and a smooth mouthfeel. Use real butter, not margarine, for best results. Unsalted butter is preferred so you can control the overall flavor.
White Sugar – 4 cups
Granulated white sugar is the foundation of pralines. It dissolves evenly and crystallizes predictably, which is crucial for candy making.
Evaporated Milk – 12 ounces (1 can)
Evaporated milk adds creaminess and body without the unpredictability of fresh milk or cream. It also improves shelf life slightly and contributes to the traditional praline texture.
Pecans – 2 cups
Pecans are the star of the recipe. Fresh, high-quality pecans provide the best flavor. Lightly toasting them beforehand enhances their natural nuttiness.
Equipment You Will Need
- Heavy 5-quart pot or saucepan
- Wooden spoon or heat-resistant silicone spatula
- Candy thermometer
- Measuring cups
- Baking sheets
- Foil or waxed paper
Using a heavy pot is important because it distributes heat evenly and prevents scorching. A candy thermometer is strongly recommended, especially if you are new to candy making.
Step-by-Step Directions
Step 1: Prepare Your Workspace
Before you begin cooking, line baking sheets with foil or waxed paper and set them aside. Measure all ingredients in advance. Candy making moves quickly once the sugar reaches temperature, so having everything ready is essential.
If you are toasting your pecans, do so now. Spread them on a baking sheet and bake at 325°F for 8–10 minutes, stirring once, until fragrant. Let them cool completely.
Step 2: Combine the Ingredients
Place the butter, sugar, and evaporated milk into a heavy 5-quart pot. Set the pot over medium heat. Stir gently to combine the ingredients as the butter melts and the sugar begins to dissolve.
Do not rush this step by increasing the heat. Medium heat allows the sugar to dissolve evenly and reduces the risk of scorching or crystallization.
Step 3: Bring the Mixture to a Boil
As the mixture heats, it will begin to bubble and foam slightly. Continue stirring occasionally to prevent sticking. Once the mixture reaches a full boil, attach a candy thermometer to the side of the pot.
At this stage, you should begin stirring continuously. This helps regulate temperature and ensures even cooking.
Step 4: Cook to the Soft Ball Stage
Continue cooking the mixture, stirring constantly, until it reaches the soft ball stage, which is between 234°F and 240°F.
If you do not have a thermometer, you can test the soft ball stage by dropping a small amount of the mixture into a bowl of cold water. If it forms a soft, pliable ball that flattens when removed, it is ready.
This step requires patience. Cooking too quickly or at too high a temperature can cause the sugar to burn or harden.
Step 5: Remove from Heat and Cool Slightly
Once the mixture reaches the correct temperature, remove the pot from heat. Allow it to cool slightly while continuing to stir. This cooling phase is critical for proper crystallization.
As you stir, you will notice the mixture gradually losing its glossy appearance and becoming thicker and more opaque. This indicates that sugar crystals are forming.
Step 6: Add the Pecans
When the mixture begins to thicken and lose its shine, add the pecans. Stir thoroughly to distribute them evenly throughout the candy mixture.
Continue stirring until the mixture thickens further and becomes difficult to stir. This is the point where it is ready to be portioned.
Step 7: Drop the Pralines
Using a spoon, drop portions of the mixture onto the prepared foil or waxed paper. Work quickly, as the mixture will continue to firm up as it cools.
Allow the pralines to cool completely at room temperature until they are set.
Tips for Success
- Always use medium heat. High heat can scorch the sugar and ruin the batch.
- Stir constantly once boiling begins to prevent burning.
- Use a heavy pot to maintain even temperature.
- Do not rush the cooling phase; this is essential for creamy texture.
- Work quickly when dropping the pralines, as they set fast.
Common Mistakes and Troubleshooting
Pralines Are Too Hard
This usually means the mixture was cooked past the soft ball stage. Use a thermometer and remove the pot from heat promptly.
Pralines Are Too Soft or Runny
This indicates undercooking. The sugar did not reach a high enough temperature to set properly.
Grainy Texture
Graininess can result from over-stirring too early or allowing sugar crystals to form on the sides of the pot. Wipe down the sides with a damp pastry brush if needed.
Burnt Flavor
This occurs when heat is too high or stirring is inconsistent. Always cook over medium heat and stir continuously after boiling begins.
Variations and Flavor Additions
While classic pecan pralines are perfect as they are, there are a few variations you can try:
- Add a teaspoon of vanilla extract after removing from heat
- Use brown sugar for a deeper, caramel-like flavor
- Add a pinch of salt to enhance sweetness
- Substitute part of the pecans with chopped walnuts
Any additions should be minimal to preserve the traditional texture.
Storage and Shelf Life
Store pralines in an airtight container at room temperature for up to one week. For longer storage, refrigerate for up to two weeks. Allow them to come to room temperature before serving.
Avoid storing pralines in humid environments, as moisture can cause them to become sticky or dissolve.
Serving Suggestions
Pecan pralines are perfect on their own, but they also pair well with:
- Coffee or tea
- Vanilla ice cream
- As a topping for cakes or pies
- Crumbled over desserts
They also make excellent gifts when wrapped individually or packed in decorative tins.
The Science Behind Pralines
The texture of pralines depends on controlled sugar crystallization. By cooking sugar to the soft ball stage and then stirring as it cools, you encourage the formation of many small crystals rather than a few large ones. This results in a creamy, smooth candy rather than a hard or grainy one.
Butter and evaporated milk interfere with crystal formation just enough to keep the texture soft while still allowing the candy to set.
Understanding this process makes pralines less intimidating and more predictable.
A Tradition Worth Preserving
Making pecan pralines is more than following a recipe. It is a connection to generations of Southern cooks who relied on simple ingredients and careful technique to create something special. The rhythm of stirring, the patience required, and the satisfaction of seeing the candy set are all part of the experience.
This recipe honors that tradition while providing clear guidance for modern kitchens. With practice, praline making becomes second nature, and each batch builds confidence and skill.
Final Thoughts
Pecan pralines are a true classic, beloved for their flavor, texture, and heritage. This recipe provides a reliable method for achieving perfect pralines every time, whether you are a beginner or an experienced candy maker.
By respecting the process, using quality ingredients, and paying attention to temperature and timing, you can create pralines that rival those from any Southern candy shop.
Once you master this recipe, it will likely become a favorite you return to year after year, sharing it with family, friends, and anyone lucky enough to receive a homemade praline.