
Family-Style Pavlova for Passover
A Light, Elegant, and Naturally Flourless Dessert for Your Holiday Table
Introduction
Passover is a time of reflection, tradition, and meaningful gatherings centered around the table. One of the unique challenges during this holiday is preparing desserts that respect dietary restrictions while still feeling indulgent and celebratory. Without leavened flour, many classic baked goods are off the menu—but this limitation opens the door to creativity. Among the most stunning and satisfying options is the pavlova.
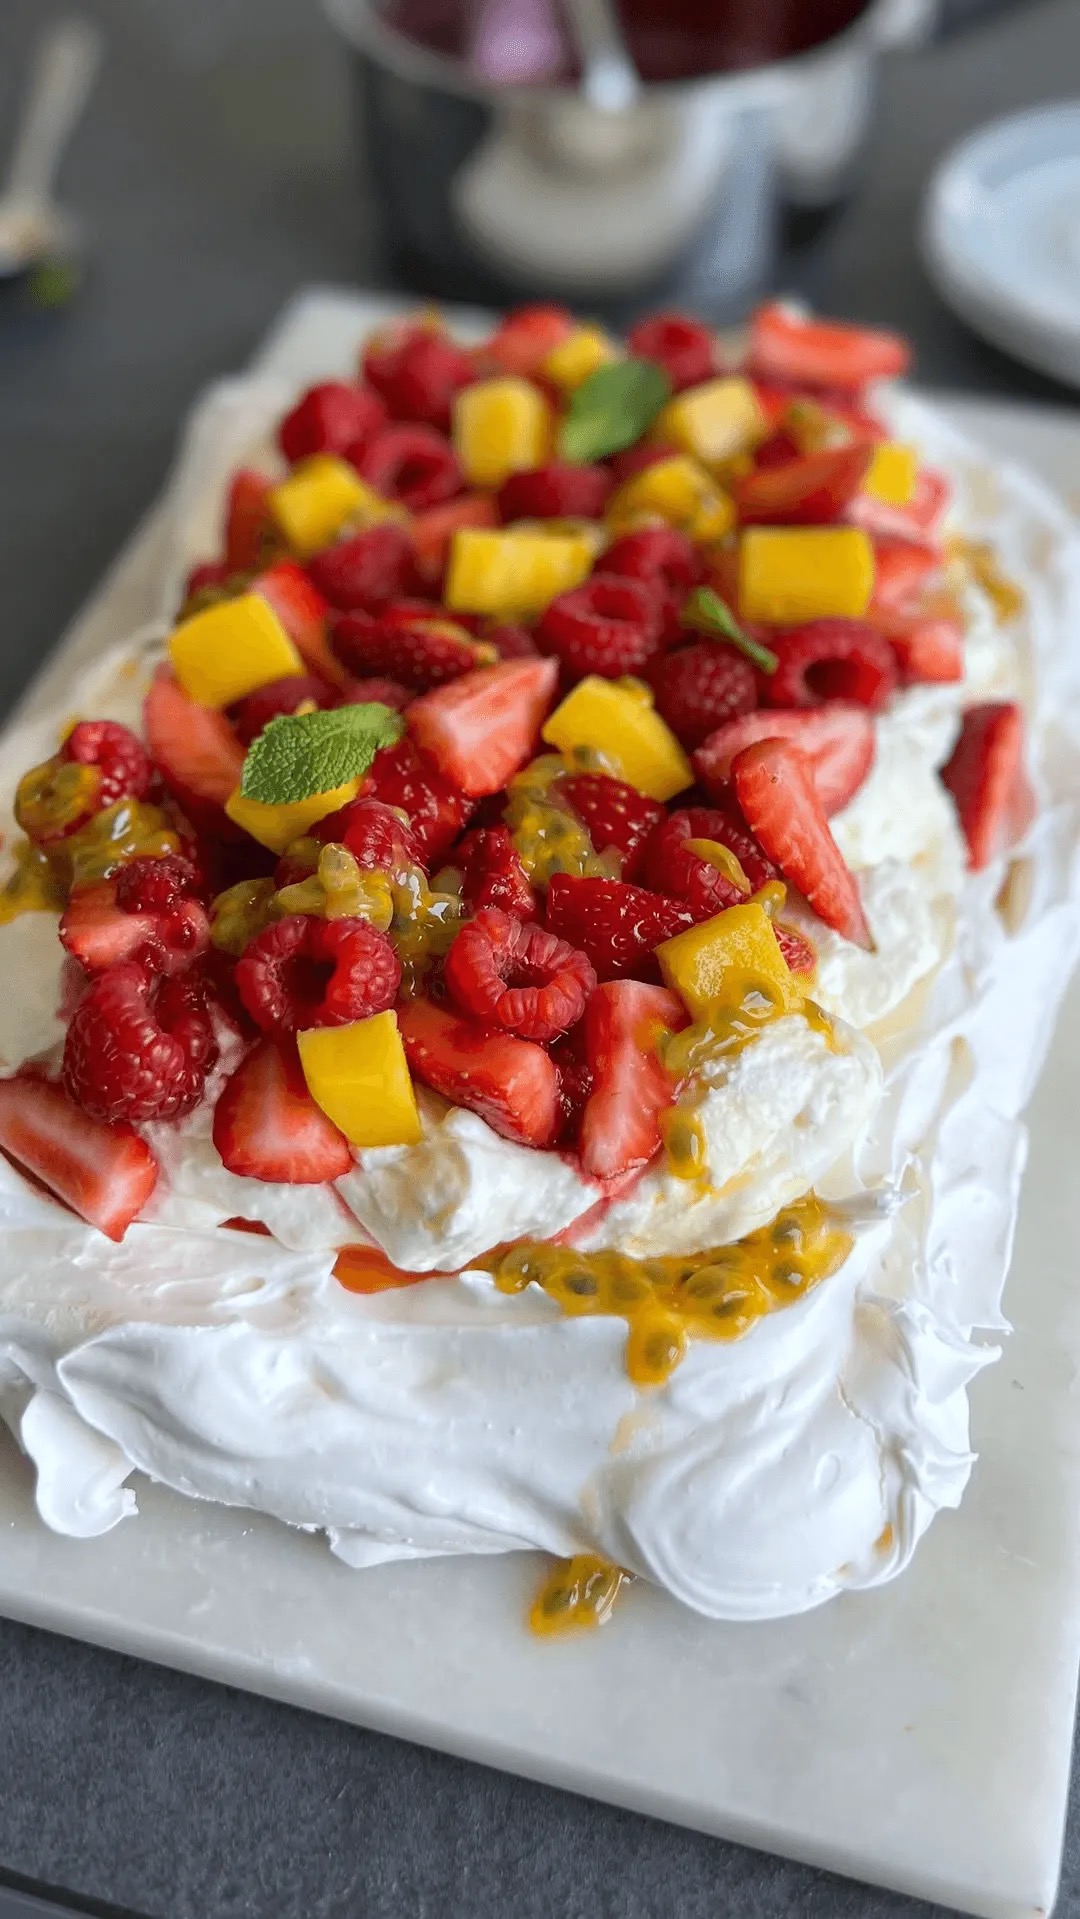
A family-style pavlova is a naturally gluten-free, flourless dessert made primarily from whipped egg whites and sugar. Its texture is what makes it unforgettable: crisp and airy on the outside, with a soft, marshmallow-like center. Topped with clouds of whipped cream and vibrant seasonal fruit, pavlova is both rustic and elegant—perfect for serving a crowd.
This version is specifically tailored for Passover, ensuring that all ingredients align with kosher-for-Passover guidelines while maintaining exceptional flavor and presentation. It is designed to be shared, placed at the center of the table, and enjoyed together.
In this guide, you will find a complete, detailed recipe along with expert tips, variations, and serving ideas to help you create a memorable dessert that will impress your guests and become a new holiday tradition.
Why Pavlova Is Perfect for Passover
Pavlova is an ideal dessert for Passover for several reasons:
First, it is naturally flourless. Traditional recipes rely on egg whites, sugar, and sometimes a small amount of cornstarch. For Passover, cornstarch can be substituted or omitted, depending on your dietary observance.
Second, it is light after a heavy meal. Passover meals often include rich dishes like brisket, roasted meats, and dense side dishes. Pavlova offers a refreshing contrast with its airy texture and bright toppings.
Third, it is visually stunning. The dramatic presentation makes it a centerpiece-worthy dessert without requiring complicated decorating skills.
Finally, it is highly customizable. You can adapt toppings based on seasonal fruits, personal preferences, or what is available locally.
Ingredients
For the Pavlova Base
- 6 large egg whites, at room temperature
- 1 ½ cups granulated sugar (ensure it is kosher for Passover)
- 1 teaspoon lemon juice or white vinegar
- 1 teaspoon vanilla extract
- 1 teaspoon potato starch (optional, for structure; omit or replace depending on your Passover tradition)
- A pinch of salt
For the Topping
- 2 cups heavy whipping cream, cold
- 2–3 tablespoons powdered sugar (Passover-certified)
- 1 teaspoon vanilla extract
For the Fruit Topping
Choose a variety of fresh fruits for color and flavor contrast:
- Strawberries, sliced
- Blueberries
- Raspberries
- Kiwi, peeled and sliced
- Mango, diced
- Pomegranate seeds (optional, for a festive touch)
Equipment Needed
- Stand mixer or hand mixer
- Large mixing bowl
- Baking sheet
- Parchment paper
- Rubber spatula
- Offset spatula or spoon for shaping
Step-by-Step Instructions
Step 1: Prepare Your Workspace
Preheat your oven to 250°F (120°C). Line a baking sheet with parchment paper. You may draw a circle (about 9–10 inches in diameter) on the parchment as a guide, then flip it over so the pencil does not touch the meringue.
Ensure your mixing bowl and whisk are completely clean and free of grease. Even a small amount of fat can prevent the egg whites from whipping properly.
Step 2: Whip the Egg Whites
Place the egg whites and a pinch of salt into your mixing bowl. Begin beating on medium speed until soft peaks form. At this stage, the mixture will be white and foamy, holding gentle peaks that fold over when lifted.
Gradually add the sugar, one tablespoon at a time, while continuing to beat. This slow addition is crucial for achieving a smooth, glossy meringue.
Once all the sugar has been added, increase the speed to high and beat until stiff peaks form. The mixture should be thick, shiny, and hold its shape firmly when the whisk is lifted.
Step 3: Add Flavor and Stabilizers
Gently fold in the lemon juice (or vinegar), vanilla extract, and potato starch if using. These ingredients help stabilize the meringue and enhance flavor.
Be careful not to deflate the mixture—use a light folding motion with a spatula.
Step 4: Shape the Pavlova
Spoon the meringue onto the prepared parchment paper within your drawn circle. Use a spatula to shape it into a round disk.
Create a slight indentation in the center to hold the toppings later, leaving the edges higher to form a natural “nest.” You can create decorative swirls or peaks for a rustic look.
Step 5: Bake Low and Slow
Place the pavlova in the preheated oven and immediately reduce the temperature to 225°F (110°C).
Bake for 1 hour and 30 minutes. Do not open the oven door during baking, as sudden temperature changes can cause cracking.
After baking, turn off the oven and allow the pavlova to cool completely inside with the door slightly ajar. This gradual cooling helps prevent collapse.
Step 6: Prepare the Whipped Cream
In a chilled bowl, whip the heavy cream with powdered sugar and vanilla extract until soft peaks form. The cream should be light and fluffy but not overwhipped.
Keep refrigerated until ready to use.
Step 7: Assemble the Pavlova
Once the pavlova base is completely cool, carefully transfer it to a serving platter.
Spread the whipped cream generously over the center, allowing it to gently spill toward the edges.
Arrange the fresh fruit on top in a decorative pattern or a casual, abundant style. The contrast of colors creates a beautiful presentation.
Serving Suggestions
Serve the pavlova immediately after assembling for the best texture. Use a large spoon or knife to scoop portions, ensuring each serving gets a mix of crisp shell, soft interior, cream, and fruit.
This dessert pairs wonderfully with:
- Fresh mint leaves for garnish
- A drizzle of fruit coulis
- A light dusting of powdered sugar
Tips for Success
Use room-temperature egg whites
They whip more easily and achieve greater volume.
Add sugar gradually
This ensures a stable meringue with a smooth texture.
Avoid humidity
Moisture in the air can affect the crispness of the pavlova. Choose a dry day if possible.
Do not rush cooling
Allowing the pavlova to cool slowly in the oven prevents cracks and collapse.
Assemble just before serving
This keeps the base crisp and prevents it from becoming soggy.
Variations
Chocolate Pavlova
Fold in 2 tablespoons of cocoa powder and a handful of finely chopped chocolate into the meringue before baking. Top with whipped cream and berries for a rich twist.
Citrus Pavlova
Add lemon or orange zest to the meringue and top with citrus segments for a refreshing flavor profile.
Nut-Topped Pavlova
Sprinkle chopped pistachios or almonds over the whipped cream for added crunch and a nutty contrast.
Dairy-Free Option
Replace whipped cream with coconut cream whipped with a bit of sugar and vanilla. Chill a can of coconut milk overnight and use only the solid portion.
Storage and Make-Ahead Tips
The pavlova base can be made one day in advance and stored in an airtight container at room temperature.
Avoid refrigeration, as moisture can soften the meringue.
Prepare the whipped cream and fruit just before serving for the freshest result.
Common Mistakes to Avoid
- Overbeating the egg whites: This can cause the mixture to become grainy and unstable.
- Adding sugar too quickly: Leads to a less stable structure.
- Opening the oven during baking: Causes temperature fluctuations that may crack the pavlova.
- Assembling too early: Results in a soggy base.
Cultural and Culinary Significance
While pavlova is traditionally associated with Australia and New Zealand, its simplicity and flourless nature make it a natural fit for Passover. It reflects the spirit of adapting recipes to honor tradition while embracing creativity.
Serving a large, shared dessert aligns beautifully with the communal aspect of the holiday. It invites conversation, connection, and the joy of sharing something homemade.
Final Thoughts
A family-style pavlova for Passover is more than just a dessert—it is a celebration of texture, flavor, and tradition. Its crisp exterior and soft interior create a delightful contrast, while the fresh toppings bring brightness and balance to the meal.
With its elegant appearance and simple ingredients, this pavlova is sure to become a centerpiece on your holiday table. Whether you follow the classic version or experiment with variations, the result is always impressive and deeply satisfying.
Take your time with each step, enjoy the process, and serve it with pride. This dessert captures the essence of Passover: thoughtful preparation, shared joy, and the beauty of gathering together.