
Perfect Rondelli for the End of the Year
A Complete Guide to a Creamy, Elegant, and Crowd-Pleasing Pasta Dish
Introduction
When it comes to festive meals, few dishes strike the perfect balance between elegance, comfort, and flavor quite like rondelli. With its delicate rolled pasta, rich and creamy filling, and a luscious sauce that ties everything together, this dish has the power to transform any dinner table into something truly special. It looks impressive, tastes indulgent, and yet remains surprisingly approachable for home cooks.
Rondelli is particularly ideal for end-of-year celebrations. Whether you are hosting a cozy family gathering, preparing a festive dinner with friends, or simply looking to close the year with something memorable, this dish delivers both visually and gastronomically. It carries a sense of warmth and abundance, making it a perfect centerpiece for holiday meals.
In this detailed guide, you will learn everything you need to know to prepare the perfect rondelli from scratch. From choosing the right ingredients to mastering the rolling technique and achieving a silky, flavorful sauce, every step is carefully explained to help you succeed. By the end, you will have a dish that not only tastes incredible but also looks like it came straight from a restaurant kitchen.
What Is Rondelli?
Rondelli is a baked pasta dish made by rolling sheets of pasta around a flavorful filling, slicing them into rounds, and baking them in a rich sauce. It is similar to cannelloni or lasagna in terms of ingredients, but its spiral presentation makes it visually distinctive and elegant.
The beauty of rondelli lies in its versatility. You can fill it with a variety of ingredients, from cheeses and vegetables to meats and seafood. The sauce can also vary, ranging from classic tomato-based sauces to creamy white sauces or a combination of both.
For this recipe, we focus on a creamy, comforting version with a rich filling and a sauce that complements every bite.
Ingredients
For the Pasta
- 500 g fresh lasagna sheets (or pre-cooked pasta sheets)
For the Filling
- 2 cups cooked shredded chicken (or ham, or a mix of both)
- 1 cup ricotta cheese
- 1 cup cream cheese, softened
- 1 cup grated mozzarella cheese
- 1/2 cup grated Parmesan cheese
- 2 cloves garlic, minced
- 1 small onion, finely chopped
- 2 tablespoons olive oil
- Salt and black pepper to taste
- 1 teaspoon dried oregano
- 1 tablespoon chopped fresh parsley
For the Sauce
- 2 tablespoons butter
- 2 tablespoons all-purpose flour
- 3 cups milk (warm)
- 1/2 cup heavy cream
- 1/2 cup grated Parmesan cheese
- Salt and black pepper to taste
- A pinch of nutmeg (optional)
For Assembly
- 1 cup shredded mozzarella cheese (for topping)
- Extra Parmesan cheese for finishing
Step-by-Step Instructions
Step 1: Prepare the Filling
Start by heating olive oil in a large skillet over medium heat. Add the chopped onion and sauté until soft and translucent. Stir in the garlic and cook for about 30 seconds until fragrant.
Add the shredded chicken or ham and mix well. Season with salt, black pepper, and oregano. Allow the mixture to cook for a few minutes so the flavors combine.
Remove the pan from heat and transfer the mixture to a large bowl. Add the ricotta, cream cheese, mozzarella, and Parmesan. Mix thoroughly until the filling is creamy and well combined. Finish with chopped parsley and adjust seasoning if needed.
Set aside and allow the filling to cool slightly before assembling.
Step 2: Prepare the Sauce
In a saucepan, melt the butter over medium heat. Add the flour and whisk continuously to form a smooth roux. Cook for about 1 to 2 minutes, being careful not to let it brown.
Gradually add the warm milk, whisking constantly to prevent lumps. Continue stirring until the sauce thickens and becomes smooth.
Add the heavy cream and Parmesan cheese. Stir until fully incorporated. Season with salt, black pepper, and a pinch of nutmeg for depth of flavor.
The sauce should be creamy and slightly thick, able to coat the back of a spoon. Remove from heat and set aside.
Step 3: Prepare the Pasta Sheets
If using fresh lasagna sheets, ensure they are soft and pliable. If using dry sheets, cook them in salted boiling water according to package instructions until just tender. Drain and lay them flat on a clean surface or kitchen towel.
Make sure the sheets are not overlapping to prevent sticking.
Step 4: Assemble the Rondelli
Lay a pasta sheet flat on your work surface. Spread a generous layer of the filling evenly across the sheet, leaving a small border around the edges.
Carefully roll the sheet tightly from one end to the other, forming a log. Repeat this process with all the pasta sheets.
Once rolled, use a sharp knife to slice each log into rounds approximately 3 to 4 cm thick.
Step 5: Arrange in the Baking Dish
Preheat your oven to 180°C (350°F).
Spread a thin layer of sauce on the bottom of a baking dish. This prevents sticking and adds moisture.
Place the rondelli slices upright in the dish, arranging them closely together so they hold their shape.
Pour the remaining sauce evenly over the rondelli, ensuring each piece is well coated.
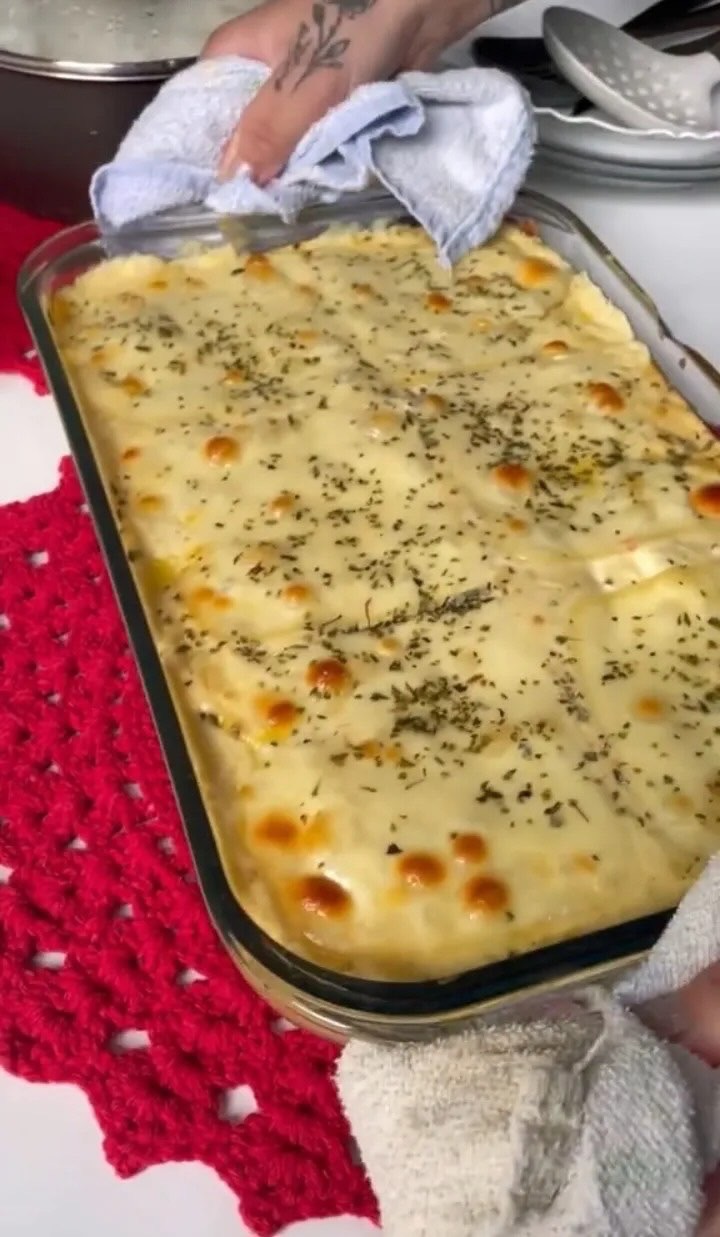
Step 6: Add the Topping
Sprinkle shredded mozzarella and extra Parmesan cheese over the top. This will create a golden, bubbly crust as it bakes.
Step 7: Bake
Cover the baking dish with foil and bake for 25 minutes. Then remove the foil and bake for an additional 15 to 20 minutes, or until the top is golden and the sauce is bubbling.
Allow the rondelli to rest for about 10 minutes before serving. This helps it set and makes it easier to serve.
Tips for Perfect Rondelli
Use Quality Ingredients
The flavor of this dish depends heavily on the quality of the cheese and the filling. Use fresh, good-quality cheeses for the best results.
Do Not Overfill
While it may be tempting to add a lot of filling, overfilling can make rolling difficult and cause the rondelli to fall apart.
Keep the Sauce Creamy
If the sauce becomes too thick, add a splash of milk to loosen it. The right consistency ensures the pasta stays moist during baking.
Let It Rest
Allowing the dish to rest before serving helps everything hold together and enhances the texture.
Variations
Vegetarian Rondelli
Replace the chicken with sautéed spinach, mushrooms, and ricotta for a delicious vegetarian version.
Beef Rondelli
Use seasoned ground beef with tomato sauce for a heartier option.
Four Cheese Rondelli
Skip the meat and use a blend of mozzarella, ricotta, Parmesan, and gorgonzola for a rich cheese-focused dish.
Serving Suggestions
Rondelli pairs beautifully with simple side dishes that balance its richness. A fresh green salad with a light vinaigrette works well, as does roasted vegetables or garlic bread.
For drinks, a light white wine or sparkling beverage complements the creamy texture of the dish.
Storage and Reheating
Refrigeration
Store leftovers in an airtight container in the refrigerator for up to 3 days.
Freezing
Rondelli freezes very well. Assemble the dish without baking, cover tightly, and freeze for up to 2 months. When ready to cook, bake directly from frozen, adding extra time.
Reheating
Reheat in the oven at 160°C (320°F) until warmed through. Add a little milk or sauce if needed to maintain moisture.
Why This Recipe Works
This rondelli recipe succeeds because it balances texture, flavor, and presentation. The soft pasta contrasts with the creamy filling, while the sauce ties everything together without overpowering the dish. The baked cheese topping adds a satisfying finish, making each bite rich and comforting.
It is also highly adaptable, allowing you to tailor it to your preferences or the ingredients you have on hand. Despite its elegant appearance, the preparation is straightforward, making it accessible even for less experienced cooks.
Conclusion
Rondelli is more than just a pasta dish. It is a celebration of flavor, texture, and the joy of sharing a meal with others. Perfect for the end of the year, it brings warmth and sophistication to the table without requiring complicated techniques.
With its creamy filling, soft pasta, and irresistible sauce, this dish is guaranteed to impress your guests and leave a lasting impression. Whether you are cooking for a festive gathering or simply treating yourself to something special, this recipe delivers on every level.
Once you try it, it may very well become a new tradition in your kitchen.