
Red Velvet Cheesecake Brownies
A Complete Guide to Rich, Fudgy Red Velvet Brownies Swirled with Creamy Cheesecake
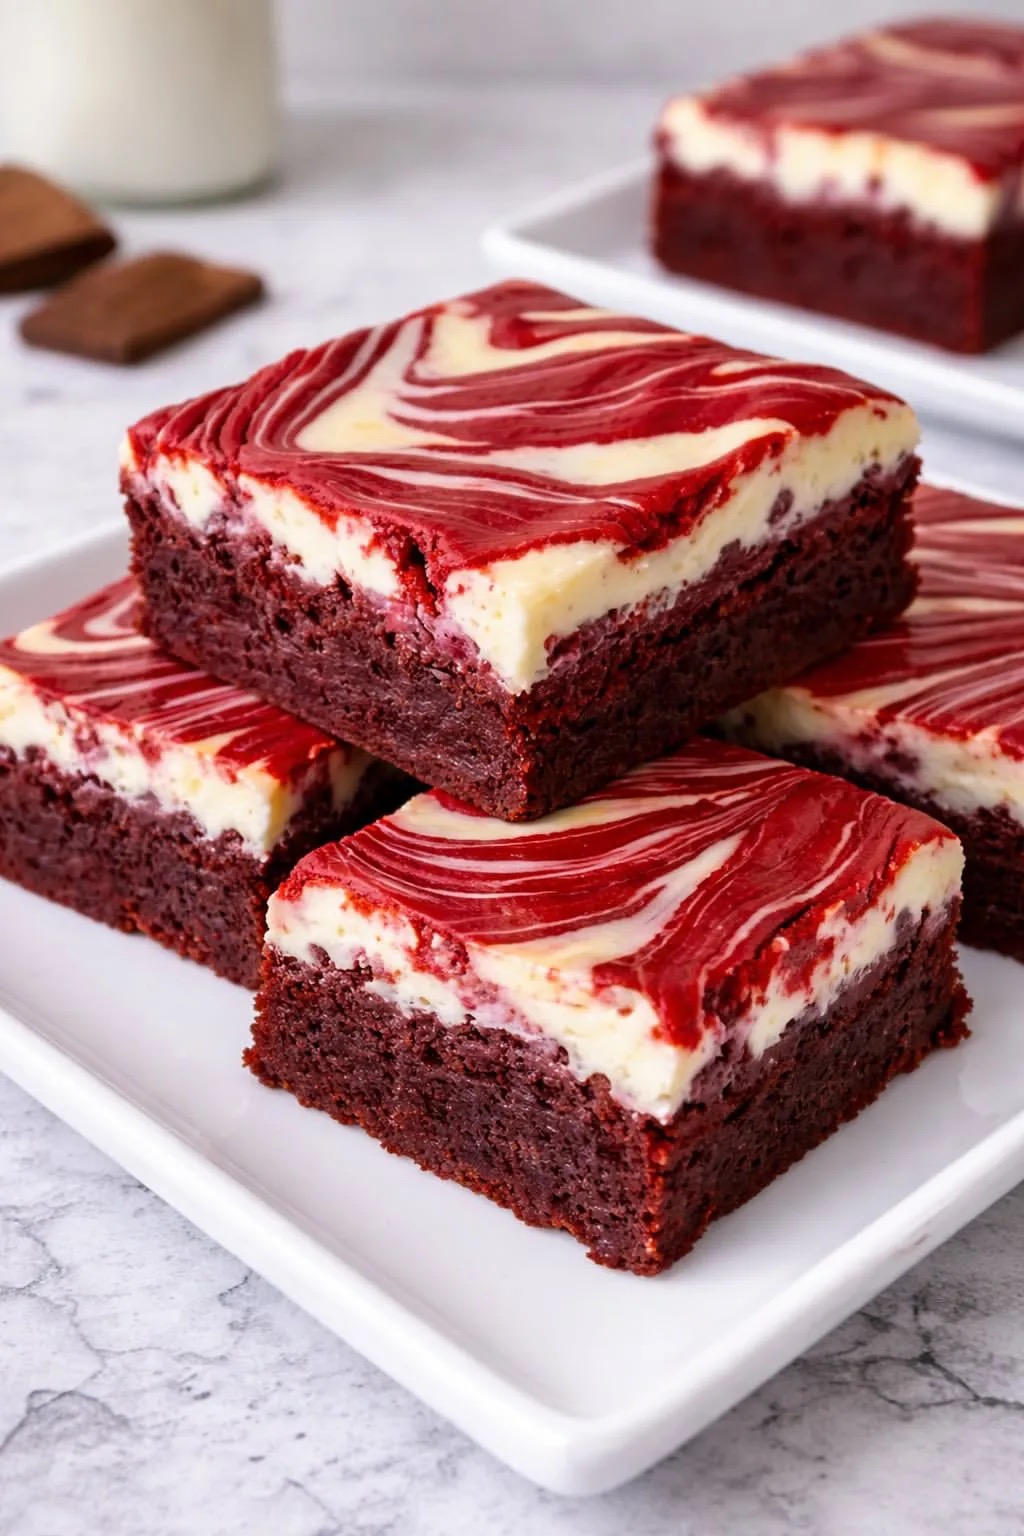
Red velvet cheesecake brownies are the perfect fusion of two beloved desserts. They combine the deep, cocoa-kissed flavor and signature color of red velvet with the smooth, tangy richness of cheesecake. The result is a visually stunning and indulgent treat that offers both flavor contrast and texture in every bite.
These brownies are soft, fudgy, and slightly dense, with a delicate chocolate undertone balanced by a creamy cheesecake swirl that melts into the batter as it bakes. Whether you are baking for a special occasion, a gathering, or simply to satisfy a craving, this recipe delivers a dessert that feels elegant yet comforting.
This comprehensive guide will walk you through each step of the process, ensuring your brownies turn out perfectly every time.
What Makes Red Velvet Cheesecake Brownies Special
Red velvet is known for its subtle chocolate flavor, vibrant red color, and soft texture. When paired with cheesecake, it creates a dessert that is both rich and balanced.
The brownie base provides a dense and fudgy foundation, while the cheesecake layer adds a creamy, slightly tangy contrast. The swirl pattern not only enhances the flavor distribution but also creates a beautiful marbled effect that makes these brownies stand out.
Ingredients
For the Red Velvet Brownie Layer
- 1/2 cup (113 g) unsalted butter, melted
- 1 cup (200 g) granulated sugar
- 2 large eggs
- 1 teaspoon vanilla extract
- 1 tablespoon red food coloring
- 1/4 cup (25 g) unsweetened cocoa powder
- 3/4 cup (95 g) all-purpose flour
- 1/4 teaspoon salt
For the Cheesecake Layer
- 200 g cream cheese, softened
- 1/4 cup (50 g) granulated sugar
- 1 egg yolk
- 1/2 teaspoon vanilla extract
Equipment Needed
- 20 cm (8-inch) square baking pan
- Parchment paper
- Mixing bowls
- Whisk and spatula
- Hand or stand mixer
Step 1: Preparing the Pan and Oven
Preheat your oven to 175°C.
Line your baking pan with parchment paper, leaving some overhang on the sides. This makes it easier to remove the brownies after baking.
Lightly grease the pan if needed to keep the parchment in place.
Step 2: Making the Red Velvet Batter
In a large bowl, combine the melted butter and granulated sugar.
Whisk until the mixture becomes smooth and slightly glossy.
Add the eggs one at a time, mixing gently after each addition. Stir in the vanilla extract and red food coloring.
The batter should develop a vibrant red color.
Step 3: Adding Dry Ingredients
Sift together the cocoa powder, flour, and salt.
Gradually fold the dry ingredients into the wet mixture.
Mix gently until just combined. Avoid overmixing, as this can affect the texture and make the brownies less tender.
The batter should be thick and smooth.
Step 4: Preparing the Cheesecake Layer
In a separate bowl, beat the softened cream cheese until smooth and creamy.
Add the sugar, egg yolk, and vanilla extract.
Mix until fully combined and free of lumps.
This mixture should be smooth, slightly thick, and easy to spread.
Step 5: Assembling the Layers
Pour most of the red velvet batter into the prepared pan, reserving a small amount for swirling.
Spread the batter evenly.
Next, pour the cheesecake mixture over the brownie layer and spread it gently.
Drop small spoonfuls of the reserved red velvet batter over the cheesecake layer.
Step 6: Creating the Swirl Effect
Using a knife or skewer, gently swirl the two layers together.
Do not overmix. The goal is to create a marbled pattern while keeping distinct layers.
Step 7: Baking the Brownies
Place the pan in the preheated oven.
Bake for 25 to 30 minutes.
The edges should be set, and the center should still have a slight softness.
A toothpick inserted should come out with a few moist crumbs.
Step 8: Cooling the Brownies
Remove the brownies from the oven and allow them to cool completely in the pan.
Cooling is essential for the cheesecake layer to set properly.
Step 9: Cutting and Serving
Lift the brownies out of the pan using the parchment paper.
Use a sharp knife to cut into squares.
Wipe the knife between cuts for clean edges.
Tips for Perfect Brownies
Use room temperature cream cheese for a smooth cheesecake layer
Do not overmix the batter
Bake until just set to maintain a fudgy texture
Allow the brownies to cool completely before cutting
Use high-quality cocoa powder for better flavor
Flavor Variations
This recipe can be adapted in several ways.
Chocolate Chip Version
Add chocolate chips to the brownie batter for extra richness.
Nutty Version
Incorporate chopped nuts for added texture.
Extra Cheesecake Layer
Increase the cheesecake mixture for a thicker layer.
White Chocolate Swirl
Add melted white chocolate to the cheesecake layer.
Common Mistakes to Avoid
Overbaking the brownies
Using cold cream cheese
Overmixing the swirl
Skipping the cooling step
Using too much flour
Avoiding these mistakes will ensure the best results.
Storage and Shelf Life
Store brownies in an airtight container in the refrigerator for up to 5 days.
Because of the cheesecake layer, refrigeration is necessary.
You can also freeze them for longer storage.
Serving Suggestions
Serve these brownies chilled or at room temperature.
They pair well with:
A glass of milk
Coffee or tea
A scoop of vanilla ice cream
Why This Recipe Works
This recipe balances richness and texture.
The red velvet base provides a soft, slightly chocolatey foundation, while the cheesecake layer adds creaminess and tang.
The swirling technique ensures that each bite contains both elements, creating a harmonious dessert.
Making It Ahead
These brownies are ideal for making ahead of time.
In fact, they often taste even better the next day after the flavors have settled.
Final Thoughts
Red velvet cheesecake brownies are a dessert that combines elegance with comfort. Their vibrant color, rich flavor, and creamy texture make them a standout treat for any occasion.
By following this detailed guide, you can create brownies that are both visually stunning and delicious.
Whether you are baking for a celebration or simply treating yourself, this recipe is sure to impress.
Take your time, enjoy the process, and savor every bite of these rich and indulgent brownies.