
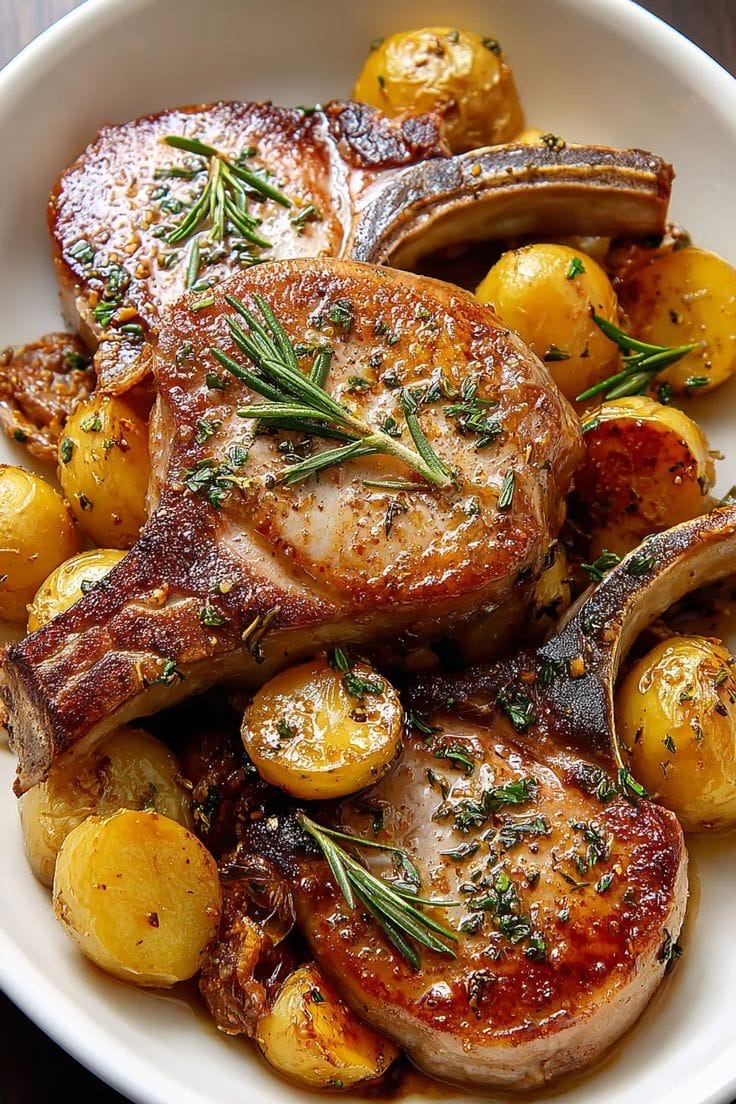
Rosemary Garlic Pork Chops with Roasted Potatoes
Few meals strike the perfect balance between rustic comfort and elegant simplicity quite like Rosemary Garlic Pork Chops with Roasted Potatoes. This dish celebrates timeless flavors—fragrant rosemary, rich garlic, golden potatoes, and juicy bone-in pork chops—coming together in a way that feels both hearty and refined. It’s the kind of meal that works just as beautifully for a cozy family dinner as it does for entertaining guests on a quiet weekend evening.
What makes this recipe especially appealing is its versatility. It relies on simple, readily available ingredients, yet delivers restaurant-quality results when prepared with care. Thick-cut pork chops remain tender and flavorful thanks to a thoughtful seasoning process and careful cooking technique, while the roasted potatoes develop irresistibly crispy edges and soft, fluffy centers infused with rosemary and garlic.
In this guide, you’ll find everything you need to prepare this dish with confidence: detailed ingredient explanations, step-by-step instructions, cooking science insights, tips for success, variations, storage advice, and serving suggestions. Whether you’re an experienced home cook or someone looking to elevate a weeknight meal, this recipe offers both reliability and depth.
Why This Recipe Works
At its core, this recipe succeeds because it respects the ingredients. Pork chops are often overcooked, resulting in dry, tough meat. By using thick-cut, bone-in pork chops, seasoning them generously, and cooking them at the right temperature, you preserve moisture and enhance flavor. The bone acts as an insulator, slowing down the cooking process and helping the meat cook evenly.
The potatoes are roasted at a high temperature, allowing their natural sugars to caramelize. Olive oil, garlic, and rosemary work together to create a savory, aromatic crust that complements the pork without overpowering it.
Another advantage of this recipe is its efficient workflow. While the potatoes roast, the pork chops can be seasoned and rested, allowing flavors to penetrate the meat. Everything comes together smoothly, making the process enjoyable rather than stressful.
Main Ingredients
Pork Chops
Thick-cut, bone-in pork chops are strongly recommended for this recipe. Look for chops that are at least 1 to 1½ inches thick. Thinner cuts cook too quickly and are more prone to drying out.
What to look for when buying pork chops:
- A light pink color with some marbling
- A clean, fresh smell
- A firm texture
- Bone-in for better flavor and moisture retention
Potatoes
Baby potatoes or fingerling potatoes work best. Their thin skins crisp beautifully in the oven, and their creamy interiors provide the perfect contrast.
Recommended varieties:
- Baby Yukon Gold
- Fingerling potatoes
- Baby red potatoes
Avoid starchy potatoes like russets for this recipe, as they tend to fall apart and won’t hold their shape as well.
Supporting Ingredients
- Fresh rosemary: Provides a woodsy, aromatic flavor that pairs perfectly with pork.
- Garlic: Adds depth and savory richness.
- Olive oil: Helps with browning and flavor.
- Salt and freshly ground black pepper: Essential for seasoning.
- Optional additions: Butter, lemon zest, paprika, or thyme.
Equipment Needed
- Large rimmed baking sheet
- Cast iron skillet or heavy oven-safe pan
- Sharp knife
- Cutting board
- Tongs
- Meat thermometer (highly recommended)
Preparation Overview
Before diving into the detailed steps, here’s a quick overview of the process:
- Preheat the oven.
- Prepare and season the potatoes.
- Roast the potatoes until partially cooked.
- Season the pork chops and allow them to rest.
- Sear the pork chops to develop a golden crust.
- Finish cooking the pork chops in the oven.
- Rest the pork chops before serving.
- Serve with roasted potatoes and optional pan juices.
Step-by-Step Instructions
Step 1: Preheat the Oven
Preheat your oven to 425°F (220°C). A hot oven is essential for achieving crispy potatoes and finishing the pork chops evenly.
Step 2: Prepare the Potatoes
Wash the baby or fingerling potatoes thoroughly and pat them dry. Halve them lengthwise to create flat surfaces that will brown nicely.
Place the potatoes in a large bowl and drizzle with olive oil. Add minced garlic, chopped fresh rosemary, salt, and freshly ground black pepper. Toss until every piece is evenly coated.
Transfer the potatoes to a rimmed baking sheet and spread them out in a single layer, cut side down if possible. Overcrowding the pan will cause steaming instead of roasting, so use two baking sheets if necessary.
Step 3: Roast the Potatoes
Place the baking sheet in the preheated oven and roast for 20–25 minutes, flipping halfway through. The potatoes should be golden brown on the outside and just tender when pierced with a fork.
Once done, reduce the oven temperature to 375°F (190°C) and keep the potatoes warm while you prepare the pork chops.
Step 4: Season the Pork Chops
Remove the pork chops from the refrigerator at least 30 minutes before cooking. Allowing them to come to room temperature ensures even cooking.
Pat the pork chops dry with paper towels. Moisture on the surface prevents proper browning.
Season generously on both sides with salt and black pepper. Sprinkle with finely chopped rosemary and minced garlic, pressing the seasoning gently into the meat.
Step 5: Sear the Pork Chops
Heat a cast iron skillet over medium-high heat. Add a tablespoon of olive oil and allow it to shimmer.
Place the pork chops in the skillet, being careful not to overcrowd. Sear for 2–3 minutes per side until a deep golden-brown crust forms.
Avoid moving the pork chops too much during this stage. Letting them sit undisturbed helps develop a proper sear.
Step 6: Finish in the Oven
Transfer the skillet to the oven set at 375°F (190°C). Cook for 8–12 minutes, depending on the thickness of the chops.
Use a meat thermometer to check doneness. The internal temperature should reach 145°F (63°C) at the thickest part.
Step 7: Rest the Pork Chops
Remove the pork chops from the oven and transfer them to a plate. Tent loosely with foil and allow them to rest for 5–10 minutes.
Resting is crucial. It allows the juices to redistribute throughout the meat, ensuring a moist and tender result.
Step 8: Serve
Serve the pork chops alongside the roasted potatoes. Spoon any pan juices over the meat for added flavor.
Cooking Tips for Perfect Pork Chops
- Do not overcook. Pork is best when slightly blushing in the center.
- Use a thermometer. Guesswork leads to dry meat.
- Season generously. Thick cuts need sufficient seasoning.
- Let the meat rest. This step is non-negotiable.
Flavor Variations
Lemon Rosemary Pork Chops
Add lemon zest to the seasoning and finish the dish with a squeeze of fresh lemon juice.
Garlic Butter Pork Chops
Add a knob of butter to the skillet after searing and baste the chops before transferring to the oven.
Herb-Crusted Pork Chops
Mix rosemary with thyme, parsley, and sage for a more complex herb profile.
Side Dish Ideas
While roasted potatoes make this dish complete, you can also serve it with:
- Steamed green beans
- Roasted carrots
- A simple arugula salad
- Sautéed spinach
- Creamy polenta
Storage and Reheating
Storage:
Store leftovers in an airtight container in the refrigerator for up to 3 days.
Reheating:
Reheat gently in a 300°F (150°C) oven until warmed through. Avoid microwaving, as it can dry out the pork.
Make-Ahead Tips
- Potatoes can be halved and stored in cold water up to 24 hours ahead.
- Pork chops can be seasoned and refrigerated up to 12 hours in advance.
- Bring everything to room temperature before cooking.
Nutritional Overview
This dish is naturally gluten-free and rich in protein. Pork provides essential B vitamins, iron, and zinc, while potatoes contribute potassium and fiber. Using olive oil keeps the fat profile balanced.
Final Thoughts
Rosemary Garlic Pork Chops with Roasted Potatoes is a dish that proves great cooking doesn’t need to be complicated. With quality ingredients, proper technique, and attention to detail, you can create a meal that feels both comforting and special.
Whether you’re cooking for family, hosting friends, or simply treating yourself to a well-made dinner, this recipe delivers consistently delicious results. It’s a timeless combination that deserves a permanent place in your recipe collection.
If you’re building a website or food blog, this recipe offers not only excellent flavor but also strong visual appeal, clear structure, and broad audience appeal—making it a reliable cornerstone dish worth sharing again and again.