The Essence of the Recipe: The Magical Contrast Between Crunch and Cream The secret of this dessert lies in the principle of “Textural Contrast.” It is where the ultra-thin, golden-brown layers of phyllo dough meet a rich, velvety heart of semolina custard. This combination isn’t just about flavor; it is a sensory experience that begins with the audible shatter of the pastry and ends with the smooth melt of warm cream.
Essential Ingredients (The Pillars of Quality) To achieve professional results, every component must be selected with care: A. Semolina Custard Filling:
Milk: 1.5 Liters of full-fat milk (fat is essential for that signature mouthfeel).
Semolina: 1 Cup of fine semolina (ensure it is “fine” to avoid a grainy texture).
Sugar: 1.5 Cups to balance the sweetness of the syrup later.
Egg Yolks: 6 large yolks (provides the rich golden hue and acts as a natural emulsifier).
Butter: 50g unsalted butter to add a glossy finish.
Flavorings: 2 tsp pure vanilla extract or orange blossom water. B. The Pastry Shell:
Phyllo Dough: One pack (450-500g) of high-quality phyllo sheets.
Clarified Butter or Ghee: 250g. Using clarified butter ensures a long-lasting crunch compared to regular butter, which contains water that can soften the dough. C. The Finishing Syrup:
2 Cups Sugar, 1 Cup Water, 1 tbsp Honey, half a lemon (juiced), and a cinnamon stick.
Preparing the Syrup: The Golden Rule of Soaking The syrup must be completely cold when poured over the hot pastry to maintain the crunch.
Combine sugar, water, and the cinnamon stick in a saucepan over medium heat.
Bring to a boil, then add the lemon juice and simmer for 10 minutes.
Stir in the honey (for shine and texture) and let it cool completely at room temperature.
Crafting the Professional Custard (Step-by-Step) Unlike standard cornstarch puddings, this custard uses semolina for a stable, firm-yet-creamy structure.
Initial Mix: Combine the milk with half the sugar in a pot and bring to a gentle simmer.
Tempering: In a separate bowl, whisk egg yolks with the remaining sugar and semolina. Slowly pour one ladle of hot milk into the egg mixture while whisking vigorously (this prevents the eggs from scrambling).
Thickening: Pour the mixture back into the main pot and cook over medium-low heat. Stir constantly with a wooden spoon until it reaches a thick, pudding-like consistency.
The Final Touch: Remove from heat and stir in the butter and vanilla. Cover the surface directly with plastic wrap to prevent a skin from forming.
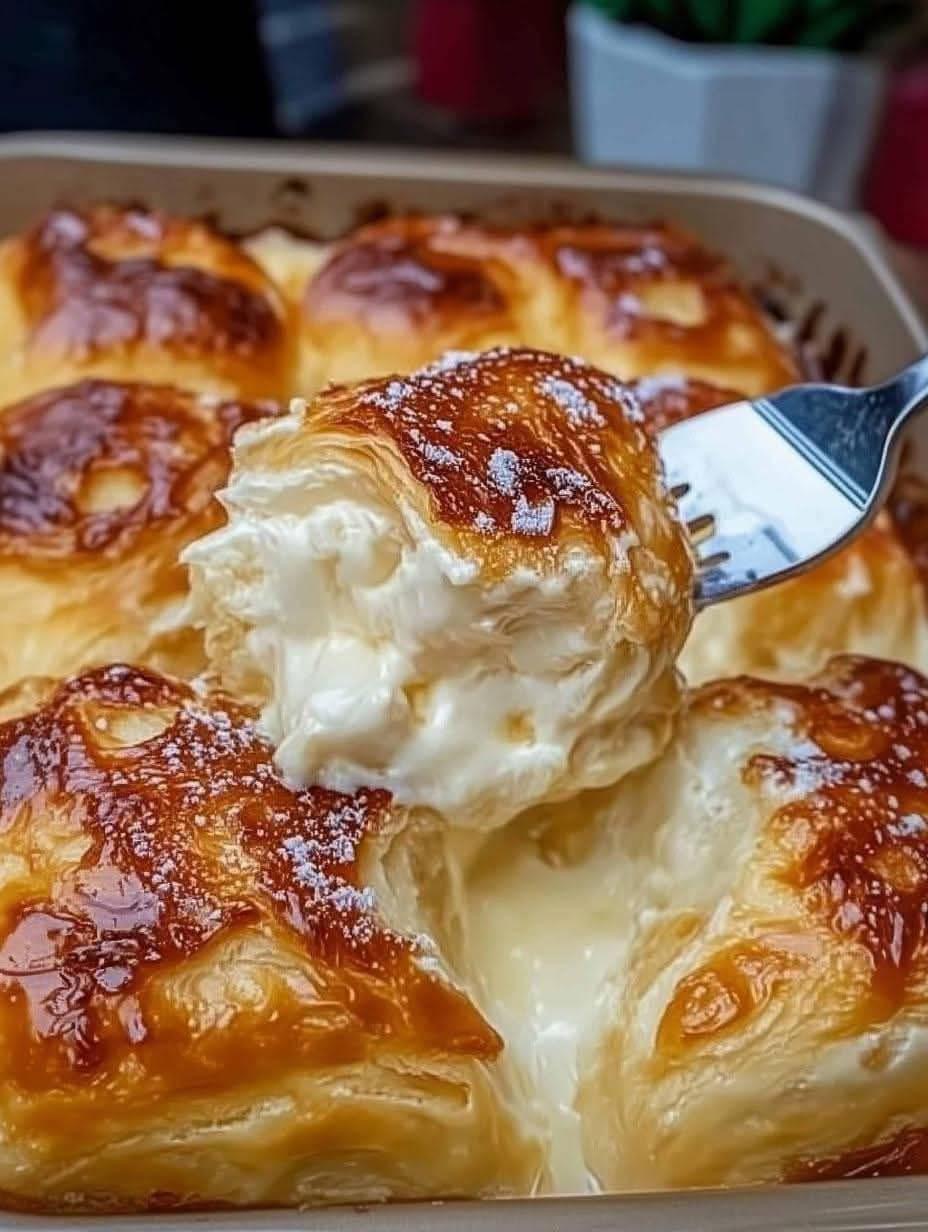
Assembly Technique: The Secret of the “Bun” Shape To achieve the look seen in the photo, we use a specific folding and crowding technique:
Brush a sheet of phyllo generously with melted clarified butter.
Fold the sheet lengthwise into a wide strip.
Place a generous dollop of the cooled custard at one end of the strip.
Roll the dough around the custard or “scrunch” it from the sides to create a circular, slightly irregular ball.
Place these parcels tightly against each other in the baking dish. The “crowding” forces the pastry to rise upward and prevents the filling from leaking.
The Art of Baking and Browning (The Critical Phase)
Preheat your oven to 180°C (350°F).
Brush the tops of the parcels generously with the remaining melted butter.
Bake for 45 to 55 minutes. The secret to perfect crunch is a deep mahogany gold color. A pale color means the inner layers are still undercooked and will turn soggy.
The Science of Success: Why Cold Syrup? When the pastry leaves the oven, it is at its highest temperature and the pores are open. Pouring cold syrup over it creates a thermal shock (the “sizzle”). This allows the syrup to penetrate the layers quickly without the moisture turning the delicate dough into a mushy texture.
Serving and Storage Tips
Serving: It is best served warm, about 20 minutes after adding the syrup. This allows the custard to set while the pastry remains at peak crispness.
Garnish: A light dusting of powdered sugar or crushed pistachios enhances the visual appeal.
Storage: Never cover the dish while it is still hot, as the trapped steam will soften the crust. To reheat, use an oven or air fryer—avoid the microwave at all costs.