
Soft and Fluffy Homemade Cinnamon Rolls with Gooey Filling and Creamy Icing
There are few things more comforting than the smell of freshly baked cinnamon rolls filling your kitchen. Soft, pillowy dough wrapped around a rich cinnamon-sugar filling and topped with a smooth, creamy icing creates a treat that feels indulgent yet familiar. Making cinnamon rolls from scratch may seem like a project reserved for experienced bakers, but with a little patience and attention to detail, it becomes an enjoyable and rewarding process.
This recipe is designed to guide you step by step, from activating the yeast to pulling perfectly golden rolls out of the oven. The result is a batch of tender, fluffy cinnamon rolls with a beautifully gooey center and a balanced sweetness that is not overwhelming.
Why You’ll Love This Recipe
These cinnamon rolls stand out for their texture and flavor. The dough is soft and elastic, thanks to the right balance of flour, fat, and liquid. The filling melts into the layers as it bakes, creating that signature sticky swirl. The icing adds a final touch of sweetness and moisture without overpowering the cinnamon flavor.
They are perfect for breakfast, brunch, or dessert, and they can be prepared ahead of time, making them convenient for special occasions or weekend baking.
Ingredients Overview
Dough
- 3 ½ cups all-purpose flour
- ¼ cup granulated sugar
- 1 packet (2 ¼ teaspoons) active dry yeast
- ½ teaspoon salt
- ¾ cup warm milk
- ¼ cup melted butter
- 1 egg
Filling
- ½ cup brown sugar
- 2 tablespoons ground cinnamon
- ¼ cup softened butter
Icing
- 1 cup powdered sugar
- 2 to 3 tablespoons milk
- ½ teaspoon vanilla extract
Understanding the Ingredients
Before diving into the process, it helps to understand the role each ingredient plays.
Flour provides the structure of the dough. All-purpose flour works well here, offering a balance between softness and strength.
Sugar not only sweetens the dough but also helps feed the yeast, contributing to proper fermentation and a tender crumb.
Yeast is the leavening agent that makes the dough rise. Active dry yeast needs to be dissolved in warm liquid before use.
Milk adds richness and softness, while also helping develop a golden crust.
Butter contributes flavor and tenderness, making the rolls soft and slightly rich.
The egg adds structure, moisture, and a slight richness to the dough.
Brown sugar in the filling provides a deeper, caramel-like sweetness that pairs perfectly with cinnamon.
Cinnamon is the key flavor, giving the rolls their warm and aromatic profile.
The icing ties everything together, adding sweetness and a creamy finish.
Step 1: Preparing the Dough
Start by warming the milk. It should be warm to the touch but not hot, ideally around body temperature. If the milk is too hot, it can kill the yeast.
In a large mixing bowl, combine the warm milk and yeast. Let it sit for about 5 to 10 minutes until it becomes frothy. This indicates that the yeast is active.
Add the sugar, melted butter, egg, and salt to the mixture. Stir until well combined.
Gradually add the flour, one cup at a time, mixing until a soft dough forms. Once the dough starts pulling away from the sides of the bowl, transfer it to a lightly floured surface.
Step 2: Kneading the Dough
Kneading is essential for developing gluten, which gives the dough its structure and elasticity.
Knead the dough by pressing it down, folding it over, and repeating the motion for about 8 to 10 minutes. The dough should become smooth, soft, and slightly elastic.
If the dough feels too sticky, add a small amount of flour, but avoid adding too much, as this can make the rolls dense.
Step 3: First Rise
Place the kneaded dough into a lightly greased bowl. Cover it with a clean kitchen towel or plastic wrap.
Let it rise in a warm, draft-free place for about 1 to 1.5 hours, or until it has doubled in size.
This step is crucial, as it allows the yeast to ferment and develop flavor while creating a light, airy texture.
Step 4: Preparing the Filling
While the dough is rising, prepare the filling.
In a small bowl, mix together the brown sugar and cinnamon until evenly combined.
Ensure that the butter is soft enough to spread easily but not melted. This will help create distinct layers inside the rolls.
Step 5: Rolling Out the Dough
Once the dough has doubled in size, gently punch it down to release excess air.
Transfer it to a floured surface and roll it into a rectangle, approximately 12 by 18 inches. Try to keep the thickness even throughout.
Spread the softened butter evenly over the surface of the dough, leaving a small border around the edges.
Sprinkle the cinnamon-sugar mixture evenly over the butter, pressing it lightly into the surface.
Step 6: Shaping the Rolls
Starting from the longer side of the rectangle, tightly roll the dough into a log.
Use a sharp knife or dental floss to cut the log into equal pieces, about 1 to 1.5 inches thick.
Place the rolls into a greased baking dish, leaving a little space between each one to allow for expansion.
Step 7: Second Rise
Cover the rolls and let them rise again for about 30 to 45 minutes.
During this time, they will become puffy and fill the gaps in the pan. This second rise ensures a soft and fluffy texture.
Step 8: Baking the Rolls
Preheat your oven to 180°C (350°F).
Bake the rolls for 20 to 25 minutes, or until they are lightly golden on top.
Be careful not to overbake, as this can make the rolls dry. The centers should be soft and slightly gooey.
Step 9: Preparing the Icing
While the rolls are baking, prepare the icing.
In a bowl, whisk together the powdered sugar, milk, and vanilla extract until smooth. Adjust the consistency by adding more milk for a thinner glaze or more sugar for a thicker icing.
Step 10: Finishing Touch
Once the rolls are out of the oven, let them cool for about 5 to 10 minutes.
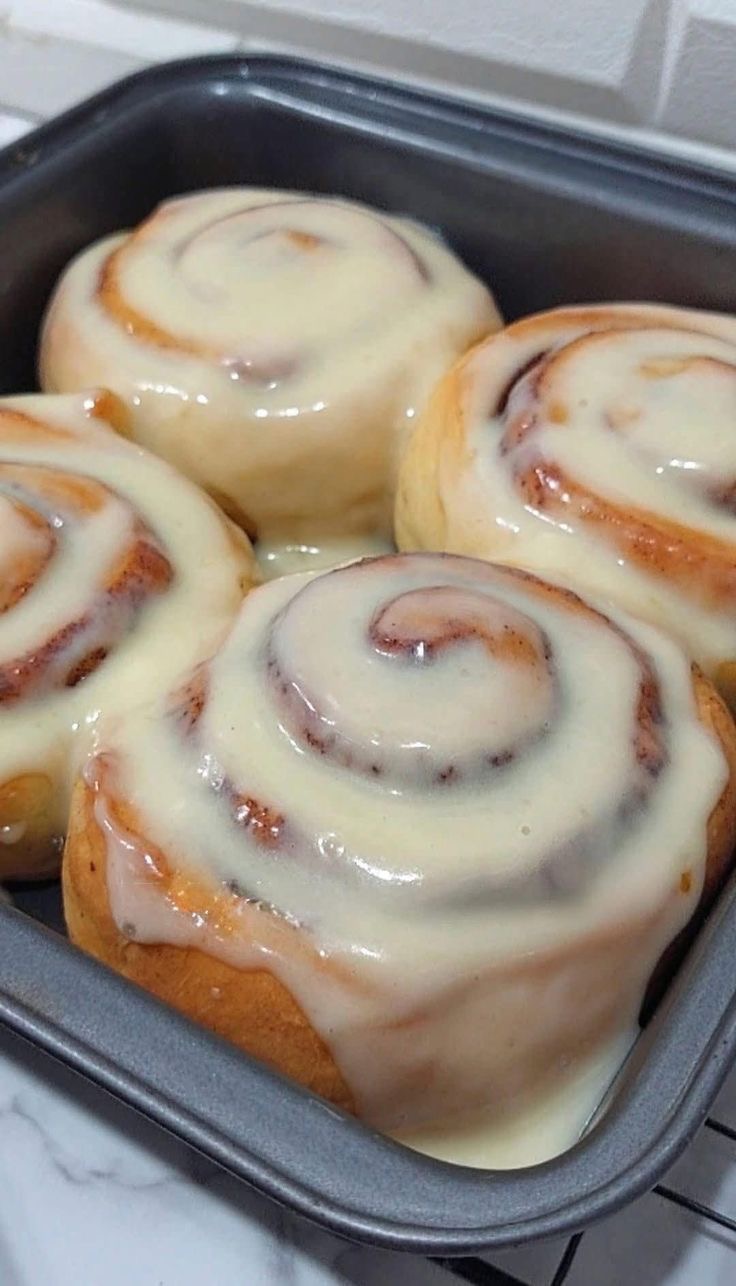
Spread the icing over the warm rolls, allowing it to melt slightly and seep into the layers.
Serve while warm for the best texture and flavor.
Tips for Perfect Cinnamon Rolls
Use fresh yeast. If your yeast does not foam during activation, it may be expired.
Do not overheat the milk. Warm, not hot, is key for proper yeast activation.
Knead properly. Under-kneaded dough will not develop enough structure, while over-kneading can make it tough.
Allow enough rising time. Rushing this step will result in dense rolls.
Roll the dough evenly to ensure consistent baking.
Avoid overbaking. Slightly underbaked centers are better than dry rolls.
Variations
You can customize this recipe in many ways.
Add chopped nuts such as walnuts or pecans to the filling for extra texture.
Include raisins for a classic twist.
Replace the icing with cream cheese frosting for a richer topping.
Add a pinch of nutmeg or cardamom to the filling for a more complex flavor.
Storage and Reheating
Store leftover cinnamon rolls in an airtight container at room temperature for up to 2 days, or in the refrigerator for up to 5 days.
To reheat, warm them in the microwave for about 15 to 20 seconds, or in the oven at a low temperature until heated through.
You can also freeze baked rolls without icing. When ready to serve, thaw and warm them, then add fresh icing.
Make-Ahead Option
To prepare in advance, assemble the rolls and place them in the baking dish. Cover and refrigerate overnight.
The next day, let them come to room temperature and rise slightly before baking.
This method is perfect for saving time in the morning while still enjoying freshly baked cinnamon rolls.
Final Thoughts
Making cinnamon rolls from scratch is a process that rewards patience and attention to detail. Each step, from kneading the dough to spreading the filling, contributes to the final result. The combination of soft dough, rich filling, and creamy icing creates a dessert that is both comforting and satisfying.
Once you master this recipe, you will find yourself returning to it again and again, whether for a quiet morning treat or a special gathering.