
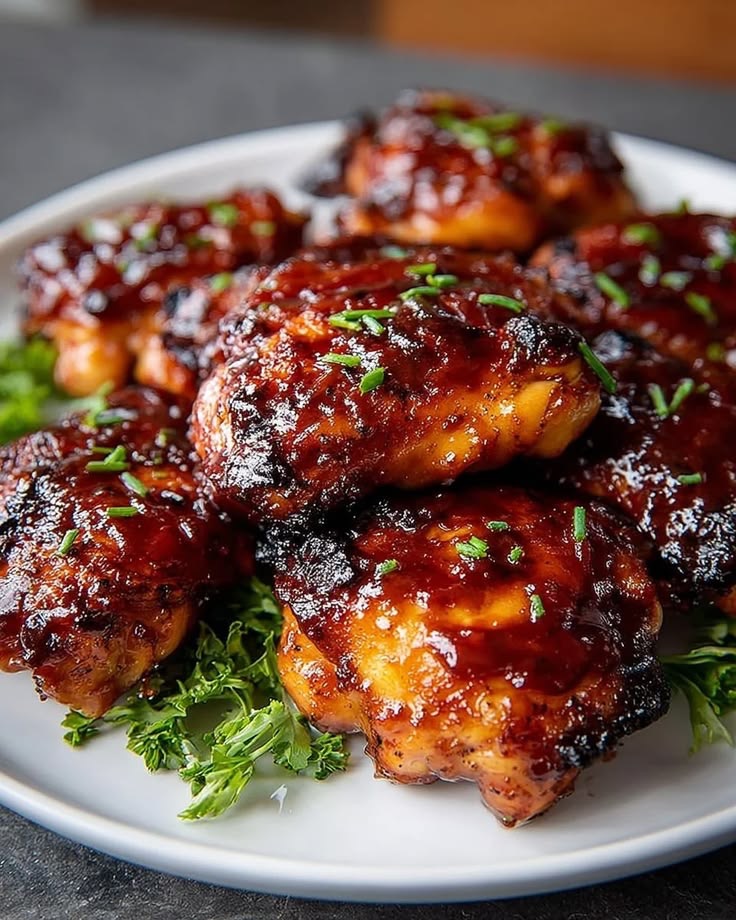
BBQ Glazed Chicken Thighs
Also called Sticky BBQ Chicken Thighs or Oven Baked Barbecue Chicken, this recipe gives you the deep flavor and caramelized finish of grilled barbecue without a grill. You start with bone in, skin on chicken thighs for maximum juiciness, season them well, and roast until the skin is crisp. Then you brush them with a homemade honey soy BBQ glaze that reduces in the oven into a thick, glossy, lacquered coating. The result is tender meat, crispy edges, and a sweet, smoky, tangy glaze that clings to every bite.
This is weeknight friendly but good enough for company. Total time is about 50 minutes, with only 10 minutes of prep. The thighs are forgiving and stay juicy even if you leave them in a few minutes too long, which makes them more reliable than chicken breasts. Serve them with coleslaw, cornbread, roasted potatoes, or mac and cheese for a full barbecue plate.
Why This Recipe Works
The secret is two temperature cooking. First, you roast the thighs at high heat to render the fat under the skin and get it crisp. Chicken skin has a lot of moisture and fat that needs time to render before it can brown. Starting with dry skin and a hot oven solves that. Second, you add the glaze late in the cooking process. If you brush BBQ sauce on raw chicken, the sugars will burn before the meat cooks through. By adding it in the last 15 minutes, the sauce thickens and caramelizes without scorching.
Bone in, skin on thighs are key. The bone insulates the meat so it cooks gently and stays moist. The skin protects the meat and turns into a crackly layer that holds the glaze. Boneless skinless thighs work, but they will not have the same texture. Breasts will dry out with this method.
The glaze balances sweet, salty, smoky, and acidic. Store bought BBQ sauce gives you a consistent base, then honey adds shine and stickiness, soy sauce adds umami and salt, apple cider vinegar cuts through the richness, and smoked paprika reinforces the barbecue flavor even if you are using an oven.
Ingredients
Serves 4 to 6
For the Chicken
Chicken Thighs: 8 bone in, skin on thighs, about 3 to 3.5 pounds total. Look for thighs that are similar in size so they cook evenly. Trim excess skin and fat if needed, but leave most of the skin intact. Pat them very dry with paper towels. Dry skin equals crispy skin.
Salt: 1 teaspoon kosher salt. If using table salt, use ¾ teaspoon. Salt draws out moisture at first, then helps the skin crisp.
Black Pepper: 1 teaspoon freshly ground. Fresh pepper has more bite than pre ground.
Garlic Powder: 1 teaspoon. This gives all over flavor without burning like fresh garlic would at high heat.
Paprika: 1 teaspoon, sweet or regular. This adds color and a mild pepper flavor. You can use smoked paprika here if you want extra smokiness before the glaze.
For the BBQ Glaze
BBQ Sauce: 1 cup. Use your favorite brand. A thick, tomato based sauce works best. Sweet Baby Ray’s, Stubb’s, or a local brand are all fine. Avoid very thin sauces because they will not cling. If your sauce is very sweet, reduce the honey to 1 tablespoon.
Honey: 2 tablespoons. Honey helps the glaze become sticky and gives you that shiny lacquer. Maple syrup or brown sugar can substitute.
Soy Sauce: 1 tablespoon. This adds salt and deep savory flavor. Use low sodium if your BBQ sauce is very salty. Tamari works for gluten free.
Apple Cider Vinegar: 1 tablespoon. Acid balances the sweet sauce and cuts the fat in the chicken. You can use rice vinegar or lemon juice in a pinch.
Smoked Paprika: 1 teaspoon. This brings a campfire flavor to oven baked chicken. If you only have regular paprika, add ¼ teaspoon liquid smoke or skip it.
Optional Heat: ½ teaspoon cayenne pepper or 1 teaspoon hot sauce. Add if you like a spicy finish.
For Garnish
Fresh Chives: 2 tablespoons, finely chopped. Chives add a mild onion flavor and color.
Fresh Parsley: 2 tablespoons, chopped. Parsley adds freshness and looks bright against the dark glaze. You can use curly or flat leaf.
Equipment You Need
Rimmed baking sheet or 9×13 inch baking dish
Wire rack, optional but recommended
Aluminum foil or parchment paper for easy cleanup
Small saucepan
Pastry brush or spoon for glazing
Instant read thermometer
Paper towels
Step by Step Instructions
Prep the Chicken
Preheat your oven to 425°F. Place a wire rack on a foil lined rimmed baking sheet. The rack lets air circulate under the thighs so the bottom does not steam. If you do not have a rack, you can bake directly on foil, but the skin on the bottom will be softer.
Pat the chicken thighs very dry with paper towels. Moisture is the enemy of crisp skin. Place them skin side up on the rack or pan.
In a small bowl, mix 1 teaspoon salt, 1 teaspoon black pepper, 1 teaspoon garlic powder, and 1 teaspoon paprika. Sprinkle the seasoning evenly over the thighs. Use your hands to rub it into the skin and a little under the skin if you can, without tearing it. Seasoning under the skin flavors the meat directly.
Let the thighs sit at room temperature for 15 minutes while the oven heats. This takes the chill off and helps them cook evenly.
Make the BBQ Glaze
While the oven preheats, combine 1 cup BBQ sauce, 2 tablespoons honey, 1 tablespoon soy sauce, 1 tablespoon apple cider vinegar, and 1 teaspoon smoked paprika in a small saucepan. Add cayenne or hot sauce if using.
Bring to a simmer over medium heat, stirring often. Reduce heat to low and let it bubble gently for 3 to 4 minutes until slightly thickened. It should coat the back of a spoon. Remove from heat. You will use about half for glazing and reserve the rest for serving.
If your BBQ sauce is already very thick, you can skip the stovetop and just whisk everything in a bowl. Heating helps meld the flavors and reduces it slightly so it clings better.
Roast the Chicken
Place the pan in the preheated oven. Roast for 25 to 30 minutes. Do not touch them. You want the skin to render and start to brown. After 25 minutes, the skin should be golden and the fat should be mostly rendered. The internal temperature will be around 150°F to 160°F.
Remove the pan from the oven. Use a pastry brush or spoon to coat each thigh generously with the warm glaze. Flip the thighs and glaze the bottom side too, then flip back to skin side up and add another layer of glaze on top. Be generous. The glaze will reduce as it bakes.
Caramelize the Glaze
Return the pan to the oven for 10 to 15 more minutes. Brush with more glaze once halfway through if you want a thicker coating. The sugars will bubble and darken. Watch closely in the last 5 minutes. You want deep caramelization, not burnt. If the edges start to blacken, pull them out.
The chicken is done when the internal temperature in the thickest part, not touching bone, reads 175°F to 190°F. Thighs are safe at 165°F, but they are more tender and juicy at 175°F to 190°F because the connective tissue breaks down. The skin should look glossy and set.
Rest and Garnish
Let the thighs rest on the pan for 5 minutes. The juices redistribute and the glaze sets so it does not slide off when you cut.
Transfer to a platter. Warm the reserved glaze and drizzle a little over the top or serve on the side for dipping. Scatter chopped chives and parsley over the chicken for color and fresh flavor.
Expert Tips for the Best BBQ Chicken Thighs
Dry Skin is Critical: If you have time, place the seasoned thighs uncovered in the fridge for 1 to 8 hours. The cold air dries the skin and gives you the crispiest result. Pat them dry again before roasting.
Do Not Crowd the Pan: Leave space between thighs so hot air can circulate. If they are touching, they will steam and the skin will not crisp. Use two pans if needed.
Use a Thermometer: Chicken thighs are very forgiving, but a thermometer takes out the guesswork. Pull them at 185°F for the best texture. Undercooked thighs are rubbery near the bone.
Glaze in Layers: Two to three thin layers of glaze are better than one thick coat. Each layer caramelizes and builds flavor. The first layer seals, the second adds body, the third gives shine.
Broil for Finish: If your glaze is not as dark as you want after roasting, turn the broiler on for 1 to 2 minutes. Watch constantly. Sugar burns fast under the broiler.
Save the Drippings: The pan drippings under the rack are liquid gold. Spoon off the fat and whisk the drippings into your reserved glaze for extra flavor.
Grill Version
You can make this on a grill for more smoke flavor. Preheat grill to medium high, about 400°F. Grill thighs skin side down for 5 minutes to render fat and get grill marks. Move to indirect heat, close the lid, and cook 20 to 25 minutes until 160°F. Brush with glaze, move back to direct heat, and cook 2 to 3 minutes per side, brushing again, until glazed and 175°F. Keep the lid open while glazing to prevent flare ups.
Air Fryer Version
For small batches, the air fryer works well. Preheat to 400°F. Place thighs skin side up in the basket, not touching. Cook 18 minutes. Brush with glaze, cook 4 minutes. Brush again, cook 2 to 4 more minutes until 175°F and caramelized. You will need to work in batches for 8 thighs.
Recipe Variations
Spicy Peach BBQ: Add ¼ cup peach preserves to the glaze and 1 minced chipotle in adobo. The fruit adds sweetness and the chipotle adds heat and smoke.
Bourbon BBQ: Add 2 tablespoons bourbon to the glaze when simmering. Cook 1 extra minute to burn off the alcohol. The bourbon adds depth and a slight bite.
Asian Style: Replace half the BBQ sauce with hoisin sauce. Add 1 teaspoon grated ginger and 1 clove minced garlic to the glaze. Garnish with sliced scallions and sesame seeds instead of chives and parsley.
Mustard BBQ: Use a Carolina gold style mustard BBQ sauce as the base. Reduce honey to 1 tablespoon. This version is tangier and less sweet.
Boneless Option: Use 2.5 pounds boneless skinless thighs. Reduce initial roast time to 18 minutes. Glaze and roast 8 to 10 minutes more. You will lose the crispy skin, but the meat stays juicy and it cooks faster.
What to Serve with BBQ Chicken Thighs
This chicken is rich, so balance it with fresh and acidic sides. Classic pairings include creamy coleslaw, vinegar based cucumber salad, or a tomato salad. For starches, try cornbread, mac and cheese, baked beans, potato salad, or garlic mashed potatoes. Grilled corn on the cob or roasted broccoli adds a vegetable without more work.
For a lighter meal, serve over rice or a big green salad. The glaze doubles as a dressing. Leftovers make great sandwiches. Shred the meat, toss with extra glaze, and pile on a bun with pickles and slaw.
Make Ahead and Storage
Make Ahead: You can season the thighs and refrigerate them uncovered up to 8 hours ahead. This dries the skin for better crisping. The glaze can be made 3 days ahead and stored in the fridge. Rewarm it gently before using.
Store: Let leftovers cool completely. Store in an airtight container in the refrigerator for up to 4 days. The skin will soften in the fridge but the flavor holds.
Reheat: For best texture, reheat in a 375°F oven for 10 to 12 minutes, or in the air fryer at 350°F for 5 to 6 minutes. This re-crisps the skin. Microwave works for speed, 1 to 2 minutes, but the skin will be soft.
Freeze: Freeze cooked, cooled thighs in a single layer, then transfer to a freezer bag for up to 3 months. Thaw overnight in the fridge and reheat in the oven. The glaze may lose some shine but the taste is still good.
Troubleshooting
Skin Is Not Crispy: The thighs were not dry enough, the oven was not hot enough, or they were crowded. Next time, pat very dry, use a rack, and make sure the oven is fully preheated. You can finish under the broiler for 1 to 2 minutes.
Glaze Burned: The heat was too high or the glaze was added too early. Keep the oven at 425°F max and only glaze in the last 15 minutes. If it darkens too fast, tent with foil.
Chicken Is Dry: You used breasts instead of thighs, or you cooked them past 200°F. Thighs are best between 175°F and 190°F. Use a thermometer and pull them on time.
Glaze Is Too Thin: Your BBQ sauce was watery or you did not simmer the glaze. Reduce it on the stove for a few minutes until it coats a spoon. You can also brush, bake 5 minutes, then brush again.
Underseasoned: Salt the chicken well before roasting. The glaze has flavor but most of it stays on the surface. Seasoning the meat itself makes every bite taste good.
Frequently Asked Questions
Can I use boneless skinless chicken breasts?
You can, but you need to adjust. Breasts dry out fast. Bake at 400°F for 18 minutes, then glaze and bake 5 to 8 minutes more until 165°F. Cover with foil if the glaze starts to burn. Thighs are still better for this method.
Do I have to use a wire rack?
No, but it helps. Without a rack, the bottom skin will be softer because it sits in rendered fat. If you skip the rack, drain off the fat before glazing so the thighs do not boil in grease.
Can I make this with drumsticks or wings?
Yes. Drumsticks take about the same time as thighs. Wings cook faster. Roast wings for 20 minutes, then glaze and roast 8 to 10 minutes more. Use a thermometer to check.
Is it safe if the meat is pink near the bone?
Thigh meat can stay slightly pink near the bone even when fully cooked due to myoglobin. If the thermometer reads 175°F and the juices run clear, it is safe.
Can I double the recipe?
Yes. Use two pans and rotate them halfway through cooking. Do not crowd one pan. You may need to add 5 minutes to the initial roast time if the oven is full.
What BBQ sauce is best?
Use one you like eating plain. A thick, balanced sauce works best. If you only have a thin sauce, simmer the glaze longer to reduce it. Homemade sauce works too.
Why 175°F to 190°F instead of 165°F?
165°F is the safety minimum. Thighs have more connective tissue. Cooking to 175°F to 190°F melts that tissue and makes the meat tender instead of chewy. It also renders more fat, which keeps them juicy.
Final Thoughts
BBQ Glazed Chicken Thighs are the answer when you want barbecue flavor without a grill or smoker. The method is simple. Dry the skin, roast hot, glaze late, and let it caramelize. The homemade glaze takes 5 minutes and makes a huge difference compared to just dumping bottled sauce on. Once you try this technique, you will use it for drumsticks, wings, and even pork chops.
The recipe scales up easily for a crowd and the leftovers are arguably better the next day. It is the kind of meal that looks impressive but asks very little of you. Make it once and it will go into your regular rotation.